All Escape Academy 2 Back 2 School guides
Chapter 6 moves to the Lower Science Campus and the beach. You take weather readings around campus, rebuild Quanty in the Computer Lab, sail through Von Boyage and open The Second Chamber in the sand.
Chapter 6: Weather Tower, Von Boyage and The Second Chamber
Lower Science Campus
Go to the Science Campus Store Room, but instead of going in, talk to Professor Von Bellini outside (Quanty 8/11). The way down to the Lower Science Campus and the Weather Tower is next to the Store Room door, with 1 Escape Buck on the way.
Walk around the Weather Tower for 1 Escape Buck near the ground. Head toward the 45-puzzle-piece fence, slip into the small clearing on the right and follow it to a student by some leaking pipes for Piping Mad.
Extra Credit: Piping Mad
Turn each of the eight pipes exactly once, left to right, and the leaks stop. That’s 5 Escape Bucks.
The potted plant to the north has 1 Escape Buck. Crouch into the small grate at the dead end for a Red Herring (34/50).
Weather Tower
Inside, take 1 Escape Buck from the bottom shelf of the machine on the right and a Red Herring (35/50) from the shelf behind Von Bellini. He gives you three instruments. Equip each one in the right place to take a reading:
- Smell-O-Meter: Headmaster’s Tower restroom (from the Courtyard or Lobby), or the Upper Arts Campus rooftop
- Air Quality Sampler: Headmaster’s Tower rooftop, or the chicken in the Biology Lab
- Water Purity Analyzer: Campus Gardens or Humanities Campus
Back at the Weather Tower blackboard, enter:
- Air Quality: 90
- Water Purity: 170
- Stink Level: 10
- Days Until Brainstorm: 26
Behind the 45-Piece Fence
Open the fence and set up the zipline (8/10). Jump into the lava behind the nearby fence to finish Snap, Crackle, Pop! if you’ve already done the fall and the electric pole.
 | Snap, Crackle, Pop! Fall from a great height, jump into lava, and get electrocuted. |
Extra Credit: Feel the Burn
Come back and talk to the man for Feel the Burn. Slide the colored balls onto their matching outlines. Rows and columns are numbered 1–3 from the top and left, and you push a row left or right or a column up or down: row 1 right, column 1 down, row 2 right, row 3 left. He pays 10 Escape Bucks.
Collectibles around here:
- 1 Escape Buck on the sign on the fence behind him.
- Red Herring (36/50) on the ground in the corner across from the entrance.
- Red Herring (37/50) behind the Biology Lab chicken coop, on your left as you leave the area.
- 1 Escape Buck on the grate near Stinky Steve, the student with the green stink cloud by the lava area.
- Red Herring (38/50) behind the pillar under the stairs northwest of Steve, near Professor Quanty. Don’t talk to him yet.
- 1 Escape Buck on one of the satellite dishes on the Computer Lab roof. Climb up using the grate by Steve.
- Red Herring (39/50) on the ground at the end of the zipline from the roof that heads left, past the 45-piece sign.
- 1 Escape Buck on the rock by the wall where you land.
- 1 Escape Buck on the right as you face the 45-piece door, straight ahead from there.
- Red Herring (40/50) along the wall as you head back the other way.
Computer Lab
Talk to Professor Quanty by the Computer Lab: you need the garage door open. Climb the Computer Lab from Steve’s grate again, but stop before the satellites. Press the play button and watch the order the 3×5 grid lights up:
| 7 | 5 | 3 | ||
| 6 | 4 | |||
| 1 | 2 |
Follow the purple cable down and enter the same sequence. The picture it draws is a CROWN: enter that on the padlock. Follow the cable to a blue screen and move the lines until they form CROWN letter by letter, noting the number each time. Follow the cable once more and enter 86143. Pull the lever.
Turn around for a mailbox and a note explaining binary. The edges of the mailbox show binary numbers. Convert them and press the arrow that matches each rule:
| Rule | Up | Left | Right | Down | Press |
|---|---|---|---|---|---|
| Largest | 3 | 5 | 1 | 7 | Down |
| Smallest | 2 | 1 | 4 | 3 | Left |
| Prime | 3 | 4 | 6 | 6 | Up |
| Equals 5 | 7 | 6 | 1 | 5 | Down |
Take the Green, Orange, Red and Blue chips and follow the green cable to the next panel:
- Top left: Green
- Top right: Blue
- Bottom left: Orange
- Bottom right: Red
The chips reveal numbers. Follow the green cable to another blue display and turn them into letters: 2 = M, 9 = A, 7 = I, 3 = N. Enter MAIN. Pick up Quanty to get Quanty’s Head and put it in the Personality Driver (Quanty 9/11). There’s 1 Escape Buck by the servers below the screens.
Go to the Chemistry Lab by the Puzzle Factory’s back entrance and talk to Von Bellini for his belongings. Pay the two students running the crane.
Beach
The last Cliff Notes spot is the dock crane mural. Ride the crane over from the Science Campus and climb the crates. There’s 1 Escape Buck on the way up.
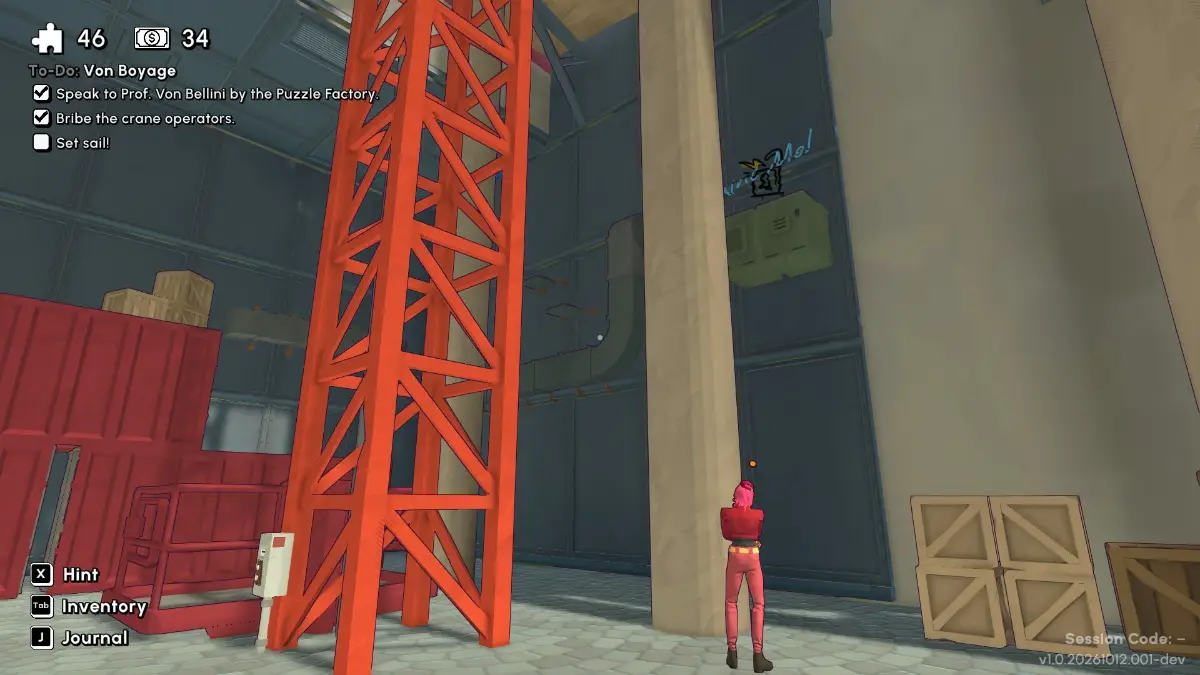
Extra Credit: Cliff Notes (5/5)
Hand Cliff Notes in to the student inside the tunnel between the Headmaster’s Tower and the Humanities and Arts campuses (the end closer to the Arts Campus). The reward is 15 Escape Bucks and No Paint, No Gain.
 | No Paint, No Gain Complete all painting challenges around campus. |
After you drop down from the mural, a Red Herring (41/50) is behind the red crates. Set up the zipline (9/10).
On the sand, keep an eye on the wall: by the stretch with white chalk drawings, a rock has 1 Escape Buck. Further on, Quanty (10/11) is working as a lifeguard, with a Red Herring (42/50) next to the tower.
Extra Credit: Throwing Shade
The student by the beach chairs has four objects around him: ball, parasol, shovel and sand castle. The lifeguard tower’s pillar shows those objects, and the dot on each digit of the box tells you where on the pillar to look. Converted to numbers, ball is 2, parasol 5, shovel 8 and sand castle 7. The box takes:
| 7 | 2 |
| 8 | 5 |
Give him the Sunglasses for 5 Escape Bucks.
Head toward the sea. On the left, a rock with two stars sits half underwater. Keep going past it for a Red Herring (43/50) by the rocks on the left. On the pier, there’s a Red Herring (44/50) behind the pink-haired student and 1 Escape Buck on the crates on the other side. Talk to Von Bellini.
Von Boyage
Take the Nautical Flags Diagram from the barrel and pin it. The flags strung on the rope to the padlock spell ISTOPSCURVY, or “I stop scurvy”. The crate with that phrase is the LEMON crate, and that’s the code. Take the Message from a Bottle.
The message has four empty boxes, and there are four barrels next to the lemon crate. Put the barrels where the boxes are and read the arrows coming from them. Look up at the lock on your right and enter down, left, down, up. Go upstairs.
Grab the Lighter from the barrel by the board of letters and numbers. The wall says “Fire the BLASTED cannon”. Pull the rope from the top left corner of the board and run it over the letters of BLASTED, from B to D. The chest behind you has a shape on top: match it against the rope’s path on the board.
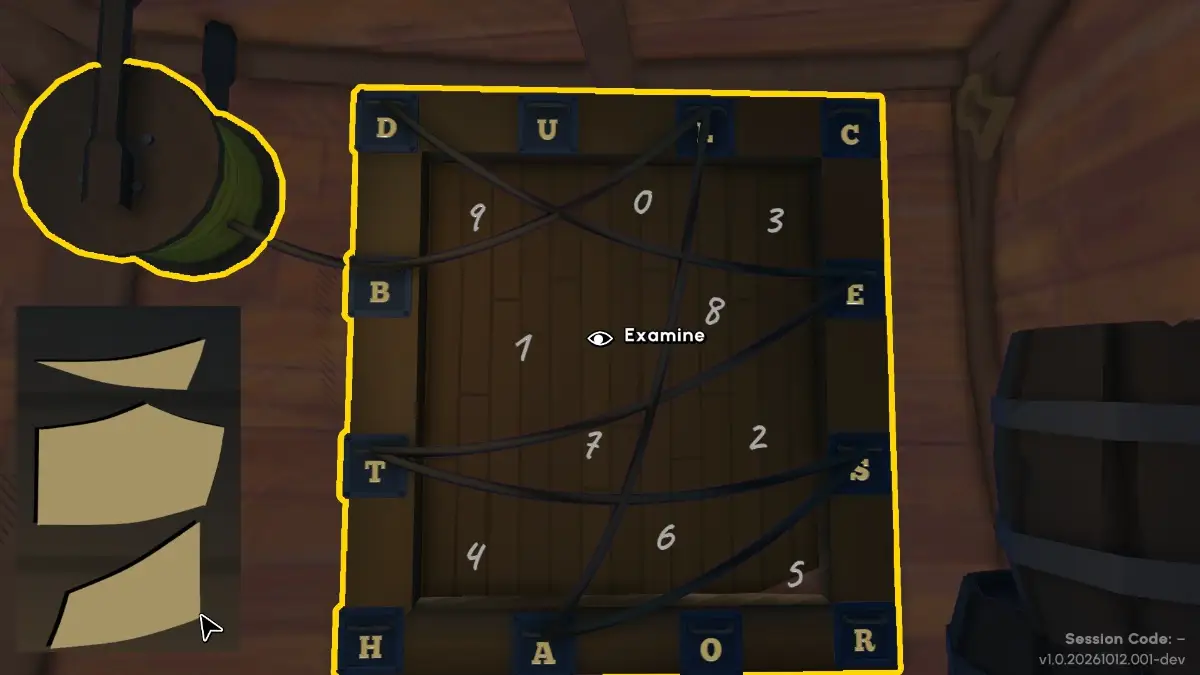
The chest takes 712. Load the Cannonball and Lighter into the cannon and go upstairs.
The note by the fish plaque lists the Captain’s Code: Support the Ship, Be last on the Raft, Report all troubles, Put the crew before yourself. Note the bold letters, then turn around to the ship symbols by the diving suit and translate those letters into symbols. The pink chest on your left takes: upside-down triangle, mountain shape, upside-down triangle, three dots. Take the Currents Chart and the Wind Chart.
Go to the locked door to the north and turn right for instructions on reading the charts. At the table in the middle, steer the ship: B5, A4, B3, C2, D3, E2, F1. Mark the animals you passed on the door:
| ✅ | ❌ | ✅ | ❌ | ❌ |
| ❌ | ❌ | ✅ | ✅ | ❌ |
Head north to the Life Vests box and note its arrows: ↖, ↙, ↗, →. Turn the ship’s helm so its up arrow points each way in turn and read the letter at the top: S, A, V, E. Open the box with SAVE and take the Life Vest, Flares and Rations.
Put all three in the boat behind the helm. Lines lead from it to numbers, and the boat’s padlock is color-coded:
- Yellow: 2
- Blue: 6
- Green: 5
- Red: 9
Enter 2659 and use the boat to finish Von Boyage.
 | Von Boyage Complete “Von Boyage” |
The Second Chamber
Talk to your friends by the lifeguard tower and equip The Founder’s Eyes. Six purple glows run from the left end of the beach to the right: each is an Alchemical Tile. Each tile looks like a number paired with its mirror image. Place them on the marking at the right end of the beach, 1 at the top down to 6 at the bottom.
Three constellations glow in the sky, and a nearby plaque names them: Leo, Cancer, Taurus. Press their animals on the door that opened, at the spots marked X (leave the dots alone):
| . | X | . |
| X | X | . |
| . | . | . |
| . | . | . |
Inside the Chamber
Left of the entrance, take the Sword and Pumpkin by the decorated chest and the Apple from the bottom shelf. To the right, the Scepter is on the floor, and further right the Crown sits on another chest. On the far side of the room, the Tiara is under the “Escape Academy: Established 1803” sign.
The portrait on the wall shows a crown, a scepter and two apples. Weigh the items:
- Sword: 3200
- Crown: 2000
- Scepter: 1000
- Pumpkin: 0950
- Tiara: 0250
- Apple: 0220
Crown + scepter + two apples = 3440. Enter it on the Weight of Responsibility chest and take the Calendar and Newspaper.
The floor in the middle of the room shows a club pattern. The tablet on the left holds five clubs in six slots:
| 1 | |
| 2 | 3 |
| 4 | 5 |
| 6 |
The goal: normal black club in 1, white club in 2, circled club in 3, fat black clubs in 4 and 6, and 5 empty. Make these moves in order:
- 6 to 4, 5 to 6, 3 to 5
- 2 to 3, 4 to 2, 5 to 4
- 3 to 5, 1 to 3, 2 to 1
- 4 to 2, 6 to 4, 5 to 6, 3 to 5
- 2 to 3, 4 to 2, 5 to 4
Take the Mysterious Coin and the Strongly Worded Letter. Put the coin in the tablet on your left and order the pictures by life stage:
| Acorn | Caterpillar | Baby |
| Plant | Cocoon | Adult |
| Tree | Butterfly | Elderly |
Take the Meeting Invitation and fill in the big statue:
“We’d run this academy for 35 years (the Newspaper’s year minus the 1803 founding), but we were Growing Old (Newspaper). We feared that without us, the school would Fall Apart (Strongly Worded Letter). Alistair, being a man of Science (Meeting Invitation), was determined to find a solution. One night, he invited us to meet him during The Brain Storm (Meeting Invitation and Calendar). He said he had An Invention (Meeting Invitation) that would change everything.”
Pull the lever for Dark Tidings. Go back across the beach and turn left at the beach chairs to continue.
 | Dark Tidings Complete “The Second Chamber” |
Previous: Chapter 5 walkthrough. Next: Chapter 7 walkthrough. Every chapter is listed in the Escape Academy 2 Back 2 School walkthrough.
Based on the original walkthrough by aquatorrent.