All Escape Academy 2 Back 2 School guides
Chapter 4 is short and story-heavy: you guide Gillian through the pipes, crack the library safe in Eyes on the Prize, break out of Pay Close Detention and then follow the founders’ portraits down into the sewers.
Chapter 4: Eyes on the Prize, Pay Close Detention and the Sewers
Before the story, stop by the Bookstore: Quanty (5/11) is working the register. Ride the zipline up from the rooftop and climb the roof for a Red Herring (26/50). Jump from that tower down to the Headmaster’s Tower entrance for the first part of Snap, Crackle, Pop! (1/3), then go back to your dorm.
Guiding Gillian
Talk to Gillian, open the bathroom door and talk to your roommates. You need to work out which schematic matches what Gillian sees. Ask her each time:
- She sees a toolbox to the north and a hard hat to the south, so Schematic B is out. Send her south, toward the hard hat.
- Now there’s a valve to the west and a toolbox to the north, leaving A or E. Send her west, toward the valve.
- She reports a hard hat to the east and a path north. Send her north. She ends up next to a spider, which confirms Schematic A.
- Send her north, west, north, grab the money, then east.
Go to the Headmaster’s Office and talk to your roommates.
Eyes on the Prize
Take the Mysterious Paper from the table, read it and pin it. Its picture matches the bookshelves on the right. Map out where each object sits:
| 1 | 2 | 3 | 4 | |
|---|---|---|---|---|
| A | Butterfly | |||
| B | Crystal ball | Shield | ||
| C | Valve | |||
| D | Pyramid | Trophy | ||
| E | Snake | Key | ||
| F | Chemical compound | Bust | ||
| G |
Read the bold parts of the letter out loud and they turn into coordinates:
- “Before” = B4
- “foray” = 4A
- “To Be” = 2B
- “see one” = C1
On the safe in the left bookshelf, press shield, butterfly, crystal ball, valve. Take the Reshelving Rules and the Fancy Key.
The shelves on the left have puzzle pieces at each end. One piece is bolted in place: rotate the others so they fit it.
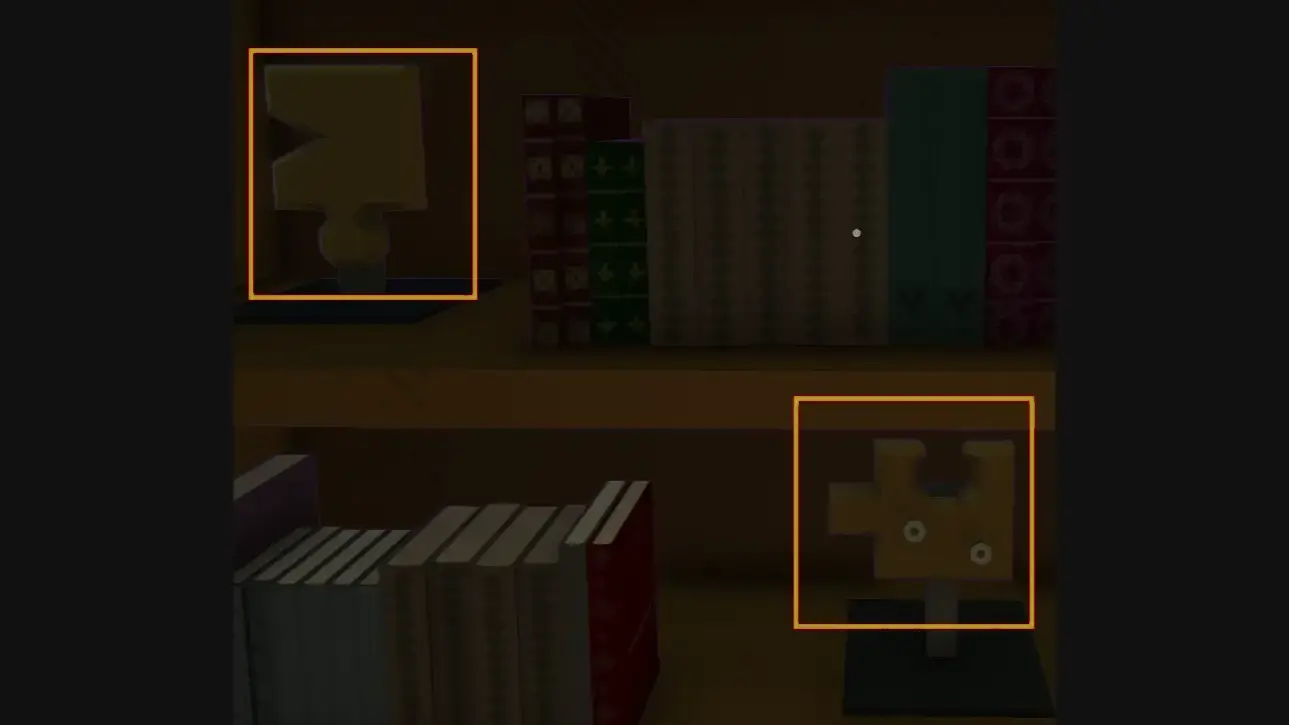
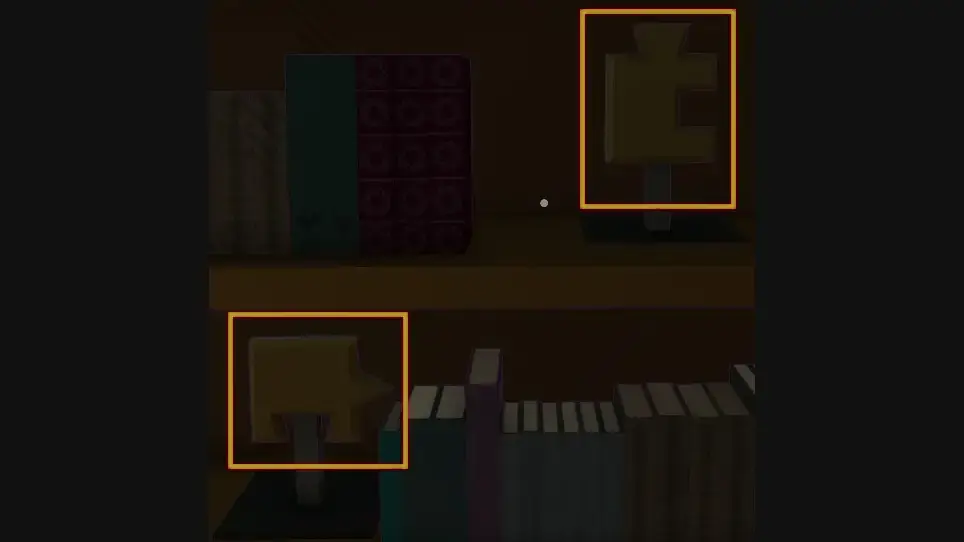
The Reshelving Rules say to pull three kinds of books: books about riddles, titles that rhyme with “rocks”, and titles that read the same backward. From the left shelf to the right, pull these:
- Evil Olive: Palindrome
- Identifying Blocks: Rhymes with rocks
- Riddle Me That: Riddles
- Race Car: Palindrome
- Meet in the Riddle: Riddles
- Never Odd or Even: Palindrome
- Riddle Me This: Riddles
- Locks: Rhymes with rocks
- Riddles and You…: Riddles
- Bird Flocks: Rhymes with rocks
- Go Dog!: Palindrome
- Yo, Banana Boy: Palindrome
- Riddles for Fools: Riddles
- Cooking for Clues: Riddles
- Fixing Clocks: Rhymes with rocks
Open the drawer at the bottom of the bookshelf with the Fancy Key and flip the switch on the left. The light shows the padlock code: 5863. Take the Spectacles to finish Eyes on the Prize.
 | Eyes on the Prize Complete “Eyes on the Prize” |
Pay Close Detention
Follow the trail of notes:
- The cupboard says to check the mirror.
- The mirror says to check the bottom left of the gate.
- That one says “I mean bottom right…”.
- Bottom right says to check under the bed.
- Crawl under your bed (C) and take the brick-shaped object on the wall. It’s a Lockpick.
The Lockpick opens a sound lock on your cell gate. Press the items from lowest note to highest. Left to right, the order is 3, 5, 1, 2, 4.
Visit the other cells. Reed, across from you, gives you a Ball of Yarn. Kira, next door, has a Rusty Hook. Gillian, on the far side, has Chewed Gum. Back at your desk, combine the yarn, then the hook, then the gum to make a Fishing Rod. Fish the Warden’s Key out of the grate in the middle of the room and let everyone out.
The blackboard to the left of your cell lists crimes and their sentences. Slide the puzzle in the Giving Spoilers row to make the longest sentence possible, keeping the brown tiles on top and the blue tiles at the bottom like the rest of the board: 9542. Walk straight ahead to the lockers and use the same code to take the UV Light.
Shine the UV Light on the blackboards in each cell:
- Triangle: left
- Circle: right
- Square: right
- Hexagon: left
The exit gate has four shape lamps. Turn them based on those clues, keeping in mind where each blackboard sits:
- Top left (circle): facing you
- Bottom left (square): facing the cell
- Top right (triangle): facing left
- Bottom right (hexagon): facing right
Walk out to finish Pay Close Detention.
 | Pay Close Detention Complete “Pay Close Detention” |
Sewers
Equip The Founder’s Eyes and look at the three founder portraits in the Lobby:
- First floor, spade: R and S
- Second floor, heart: I and A
- Third floor, club: L
Go to the big tree on the Courtyard’s lower floor. The five-letter padlock takes LIARS. Drop down, take the Sewer Keyring at the bottom and open the door.
Sewer Doors
Each room has four doors with claims on them. Only one door is correct.
| Room | Diamond | Spade | Club | Heart | Go through |
|---|---|---|---|---|---|
| 1 | There is 1 liar here | I am the correct path | Hearts is the correct path | I am the wrong path | Spade (Club is lying) |
| 2 | There are 2 liars here | Hearts is the correct path | Spades is a liar | I am the wrong path | Heart (Club and Heart are lying) |
| 3 | Everyone is a liar here | Hearts is the correct path | Spades is the correct path | Clubs is telling the truth | Club |
The Hidden Chamber
Open the chest, check the statues, go upstairs to look at the cell, then come back to the plaque under the chest. Fill in the blanks from what the statues show:
“This chamber was built for Alistair Bell, the Founder of Diamonds. He was Imprisoned here for his Betrayal against The Academy.”
Pull the lever for Liars!. Check the map inside the chest, then head back to the Detention Dungeon.
 | Liars! Uncover a dark secret. |
Previous: Chapter 3 walkthrough. Next: Chapter 5 walkthrough. Every chapter is listed in the Escape Academy 2 Back 2 School walkthrough.
Based on the original walkthrough by aquatorrent.