All Escape Academy 2 Back 2 School guides
Chapter 2 opens up the Quad and the Science Campus. Before you head into Lightbulb Moment, there are five Extra Credits to clear, two labs full of puzzles and the memory gas synthesis that trips a lot of people up.
Chapter 2: The Quad, Science Campus and Lightbulb Moment
Take the stairwell all the way down to unlock a new area and meet Quanty (1/11). The Quanty locations guide tracks all eleven.
Dorm Extra Credits
Extra Credit: Don’t Be a Chore
Go back past your dorm to the Courtyard door and unlock the next door there. Talk to the two roommates for Don’t Be a Chore. Ask each what they like:
- Wyatt is allergic to dust, can do either the laundry or the bathroom, and will wash the dishes if Michael cleans the bathroom.
- Michael can wash the dishes or vacuum, will clean the bathroom if Wyatt takes out the trash, and can either dust or do the laundry.
Mark the chores on the notes above the display:
- Michael: dusting, vacuum, bathroom
- Wyatt: dishes, laundry, trash
That’s 5 Escape Bucks. Downstairs, there’s 1 Escape Buck on the sofa. The next locked door leads to the Infirmary: Quanty (2/11) is here, and a Red Herring (8/50) is on the shelf by the bed near the window. Leave through the Lobby.
The Quad
On the way down the main stairs, check behind the statue where the stairs split for 1 Escape Buck. At the bottom, go left: a Red Herring (9/50) is behind the trash can.
Extra Credit: Hook, Line, and Thinker
The Fishing Club stall in the middle gives Hook, Line, and Thinker. You can finish its first step straight away for 5 Escape Bucks.
Extra Credit: Send in the Clues
A bit further on is the Clown Club and Send in the Clues. The balloon animal on the table has five colored parts that matter:
- Tail: red
- Right ear: blue
- Left front leg: red
- Body: blue
- Right front leg: yellow
The papers map letters to colored parts, left to right on the balloon:
| Letter | Color | Part |
|---|---|---|
| C | Yellow | Nose |
| J | Red | Left ear |
| M | Blue | Right ear |
| O | Green | Neck |
| E | Yellow | Right front leg |
| I | Red | Left front leg |
| L | Blue | Body |
| W | Green | Left back leg |
| N | Yellow | Right back leg |
| S | Red | Tail |
Reading the five parts in order spells SMILE. Open the box for 5 Escape Bucks.
Past the Clown Club, a group of students wants a zipline set up (1/10). Near the Headmaster’s Tower, the student next to the zipline asks for another (2/10). Every zipline is covered in the zipline locations guide.
The benches between the Science and Arts campuses have 1 Escape Buck. Walking from the Science Campus toward the entrance gate, stop before the map sign and signpost by the stairs: a Red Herring (10/50) sits near the bushes shaped like a door.
Extra Credit: A Riddle Bit Closer (1/3)
Under the stairs by the Entrance Gate is A Riddle Bit Closer. The first riddle talks about being lowered in mourning, red as a warning, one for every country and checkered for a race. The answer is FLAG, worth 5 Escape Bucks. Then unlock the Science Campus for Scientific Breakthrough.
 | Scientific Breakthrough Unlock the Science Campus. |
Upper Science Campus
There’s a Red Herring (11/50) next to the door that needs 12 puzzle pieces. Talk to Professor Von Bellini, then go upstairs. Grab 1 Escape Buck by the window on the left and set up the zipline for the student nearby (3/10).
Extra Credit: Chipping In
The student by the Chemistry Lab gives Chipping In. Buy Dokeytos from the vending machine at the far left downstairs. It’s the same letter-number sudoku as before:
| B4 | D2 | C1 | A3 |
| C3 | A1 | B2 | D4 |
| A2 | C4 | D3 | B1 |
| D1 | B3 | A4 | C2 |
The code is C3. Before you hand the chips over for 10 Escape Bucks, take the buck on top of the closed trash can by the machine and the Red Herring (12/50) in the pot with the white tree.
Biology Lab
Jump on the chicken coop to reach 1 Escape Buck on the upper shelf, then talk to Professor Bonilla.
The animal tiles are spread around the room: Tortoise on the blackboard, Cheetah and Octopus on the table, Blue Whale on the back window, Howler Monkey on the counter. Place them in the Cabinet of Records:
- Fastest: Cheetah
- Smartest: Octopus
- Loudest: Howler Monkey
- Oldest: Tortoise
- Largest: Blue Whale
Put the Record on the record player. Play each bird and work out which one sings first. Enter its colors on the machine at the back: the Blue Jay’s orange, white, blue, white (left to right). Feed the Worm to the chicken.
The food chain screen is the hardest part. Drag the animals from the edges into the middle in the right order, then enter their numbers on the socket behind you:
- Water: Dolphin (9), seal (6), fish (3), plankton (1)
- Desert: Snake (9), hyena (6), lizard (4), plant (2)
- Savanna: Lion (9), zebra (7), cricket (5), grass (3)
Report back to Bonilla and head upstairs to the Chemistry Lab.
Chemistry Lab
There’s 1 Escape Buck above the blackboard. Another one sits by the window, but you can’t reach it yet. Talk to Bonilla again.
The incident report on the bench says the brain chemicals caught fire at room temperature, exploded from the shock and set off the radiation alarm, but were safe to breathe. The thermometer next to the hazard poster shows 20 degrees. Grab the Red Herring (13/50) by the spill while you’re here. That gives you the hazard diamond:
- Blue (health): 0, normal material
- Red (fire): 4, burns below 23°C
- Yellow (reactivity): 3, shock and heat may detonate
- White (special): radioactive
Top to bottom, the padlock by the door takes 4, 0, 3, ☢. Take the Brain Chemicals.
The second note reads “Drain Chemicals Are nOt saFe!”. The capitals point to Ar, O and Fe. Their atomic numbers on the periodic table at the back are 18, 8 and 26, so the lock takes 18826. Take the Drain Chemicals.
Load both on the computer and build CH₅NO₃: line up the letters until you have one C, five H, one N and three O, then press OK.
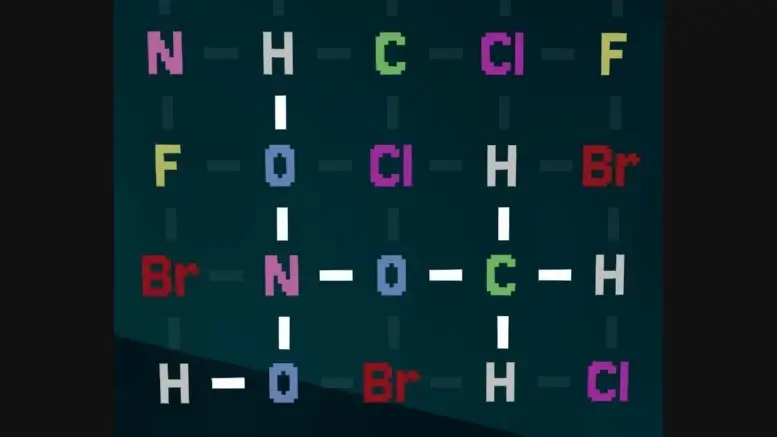
That unlocks Science, Dude!. Report to Bonilla.
 | Science, Dude! Synthesize your own batch of memory gas. |
Lower Science Campus Extra Credits
Go downstairs and open the door that needs 12 puzzle pieces. A few steps in, face east: a buck pokes out by a window. Follow the wall left to three pipes, climb them and jump onto the green tarp for the buck you saw from the Chemistry Lab. Turn around, slip under the nearly closed shutter across the way and accept Scoping Things Out.
Extra Credit: Scoping Things Out
Each colored telescope shows a letter:
- Blue, S: leave the room, go far left and take the stairs up.
- Red, P: on the way to the Chemistry Lab.
- Yellow, O: on the platform above the quest giver’s room.
- Green, T: opposite the blue telescope.
Enter SPOT and follow the path to a bigger pipe. The chest on the left has 10 Escape Bucks.
More bucks around here:
- Jump off the railing by the blue telescope.
- Turn around at the green telescope and look past the Puzzle Factory door.
- Under the door at the foot of the lighthouse.
- On top of the tallest of the three “Paint Me!” pipes on the roof. Climb the cluster of pipes along the path to get there. The sign itself can’t be used yet.
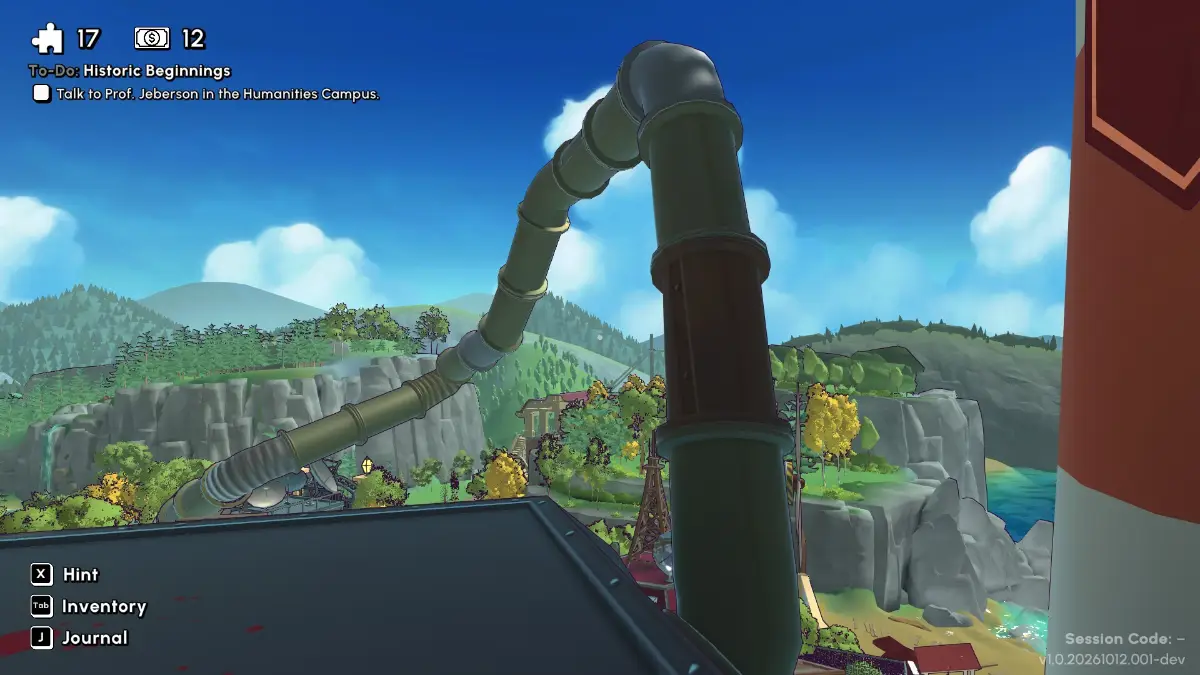
The pipe behind you on the roof leads toward areas you can’t enter yet, with 1 Escape Buck along the way. Getting caught sneaking into a locked area five times gives B- B- B- B- Busted!.
 | B- B- B- B- Busted! Get caught trespassing 5 times. |
Store Room and the Puzzle Factory
Talk to Von Bellini at the Puzzle Factory door, then open the Store Room downstairs on the right. There’s 1 Escape Buck in the bag by the Model Plane. Buy:
- Model Boat
- Model Train
- Plastic Tubing (7m)
- Plastic Tubing (2m)
- Plastic Tubing (1m)
- Plastic Gears
Give them to Von Bellini, then find him again by the red door on the other side of the building. Before you take the wooden stairs up, check the support pillars below for a Red Herring (14/50).
Lightbulb Moment
Take the Cheese Wheel and Swiss Cheese from the fridge downstairs. Upstairs, lay the Swiss Cheese over Turmeric’s Cheese Feeding Chart to read the letters as numbers: A=5, B=4, C=2, D=3. Use them on Turmeric’s cage.
Downstairs, rotate the maze on the right so the ball drops. If it won’t turn yet, wait for Turmeric. A box opens with four airplanes: yellow, red, green and blue. Launch each from the slingshot and see how far it flies. The banners in front of the field show shapes, and the locker behind you wants them from nearest to farthest: triangle, diamond, circle, square. Take the Toy Rocket.
Launch the Toy Rocket to bring the water, and a new section opens in the northwest corner. The blackboard on the right shows which way to set the Cheese Wheel. Place it, rotate it and pull the lever. When it rolls down, solve each highlighted sum:
- Down: 9 − 7 = 2
- Right: 8 ÷ 2 = 4
- Left: 3 × 2 = 6
- Up: 2 + 6 = 8
The padlock takes 2468.
In the new room, take the Basketball and read the menu on the table: salami, pepperoni, brie, olives, pecorino, manchego, pickles, parmesan, cheddar. Each made-up cheese name around the room blends three items from the list, and their positions on the menu give the code:
- Chemesego: cheddar, parmesan, manchego, 986
- Parmeddino: parmesan, cheddar, pecorino, 895
- Mancorsan: manchego, pecorino, parmesan, 658
Each lock gives a Trampoline. Set them on the floor circles, climb up and drop the Basketball into the cone at the top.
A light beam now crosses the room. Turn the mirrors until it reaches the picture with the triangle. The fridge behind you says POTENTIAL, and the poster next to the picture shows potential energy as U = MGH. Read the colors off the picture: yellow, orange, red, cyan, purple.
Take the Train Tracks, climb up and lay them on the unfinished track at the end of the hall. Go back to Von Bellini and turn the wheel to finish Lightbulb Moment.
 | Lightbulb Moment Complete “Lightbulb Moment” |
Previous: Chapter 1 walkthrough. Next: Chapter 3 walkthrough. Every chapter is listed in the Escape Academy 2 Back 2 School walkthrough.
Based on the original walkthrough by aquatorrent.