All Escape Academy 2 Back 2 School guides
Chapter 3 sends you through the Campus Gardens and the Humanities Campus before the museum escape room, Think Inside the Box. It’s a long one: the library has three book puzzles, and there are six Extra Credits along the way, including the hedge maze and the second and third riddles.
Chapter 3: Campus Gardens, Humanities Campus and Think Inside the Box
Extra Credit: Cliff Notes (1/5)
Leave the Headmaster’s Tower and head east to a locked door. The students behind it give Cliff Notes, a painting quest, and a Paint Bucket. Only one of its five spots is open right now: the factory smokestacks on the Science Campus. Climb the pipes by the lighthouse to the roof and paint the pipe marked “Paint Me!”. The rest of the spots open up in later chapters.
From the Headmaster’s Tower, go down to the door in the northwest to unlock the Humanities Campus (Oh, The Humanity). Talk to Professor Jeberson, who is also Quanty (3/11), then jump down on the right.
 | Oh, The Humanity Unlock the Humanities Campus. |
Campus Gardens
Entering the gardens unlocks The Gate Outdoors. Follow the building wall to a huge pipe with 1 Escape Buck on top. Turn around and follow the river to the left until you reach two students, one holding a bow. The Red Herring (15/50) is in the river next to them.
 | The Gate Outdoors Unlock the Campus Gardens |
Extra Credit: Cluepid’s Arrow
The archer’s quest. Go left to the targets. The locked box of Suction Cup Arrows by the wall has symbols on its padlock that match the tips of the arrows stuck in the targets. Count the rings each arrow hit:
- Heart: 1
- V: 3
- Triangle: 2
- Shield: 5 (that arrow is on the table across from it)
- Spade: 4 (also on the table across from it)
The code is 41352. Hand over an arrow for 5 Escape Bucks.
Waterfall, Stage and Ziplines
The second Cliff Notes spot is now open: make a rainbow at the waterfall ahead of the archers. Climb it from the right side to reach the top.
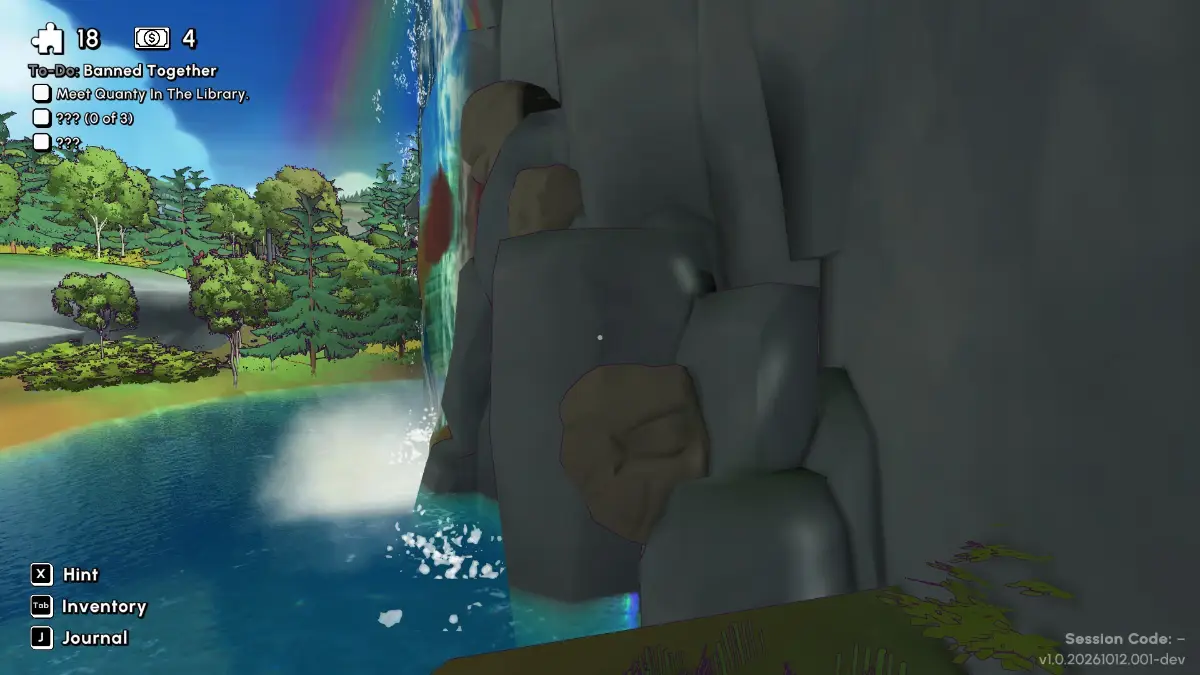
On the piers by the waterfall, the student fishing for compliments has 1 Escape Buck at the edge of the pier. Behind the concert stage across from it is a Red Herring (16/50). From the stage, walk away from the 17-puzzle-piece door past a small rock until you reach a bigger one for another Red Herring (17/50).
Talk to the student by the stage to set up a zipline (4/10). Unlock the door next to him: the map board near the 45-puzzle-piece door has 1 Escape Buck.
Go back to the waterfall and keep going until the path forks. Take the northeast branch up the hill. When you see two students relaxing by a log, cross the bridge and look left at the end for a Red Herring (18/50) on a rock.
Extra Credit: A Riddle Bit Closer (2/3)
The path continues to the second riddle: it turns and climbs, reaches every home, crosses everything and never moves. The answer is ROAD, worth 5 Escape Bucks.
Extra Credit: A-maze-ing Beasts
Back at the fork, Quanty (4/11) is on the right. The student next to it sends you into the hedge maze.
- From the start, go left. Only the right turn leads anywhere from there.
- Go left, take the second left, then left again.
- Go straight all the way. Check every dead end on the way: the one at the very far end has a Red Herring (19/50).
- Head back until you reach the circular area.
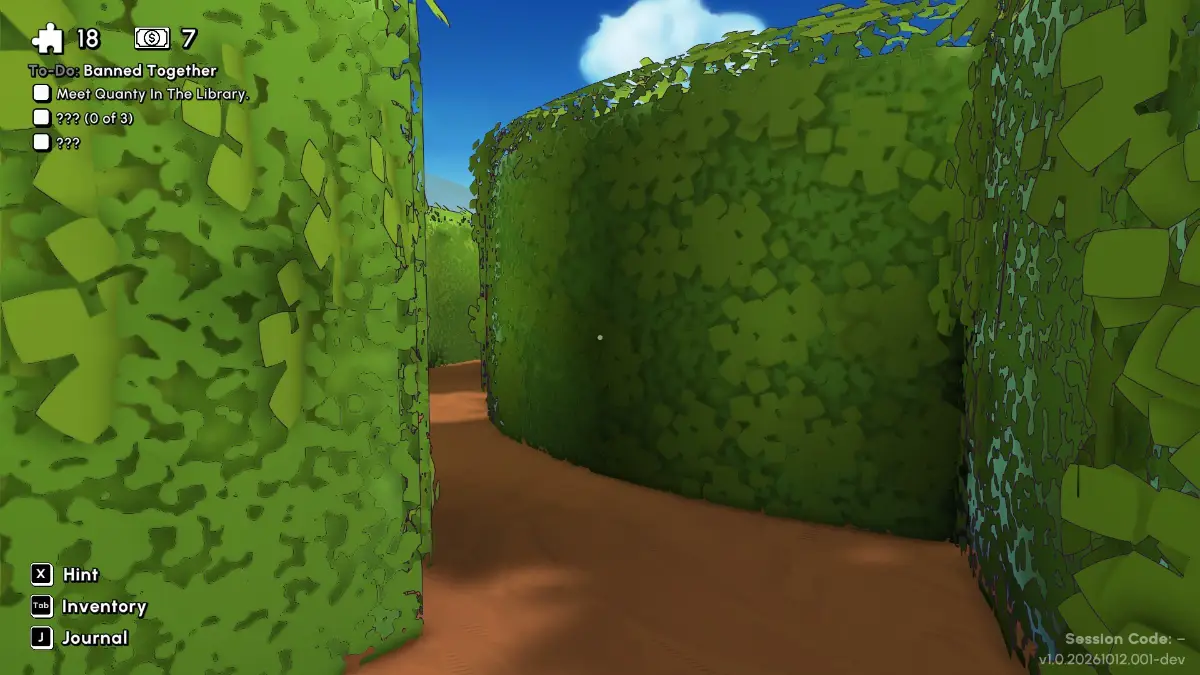
- Take the first left from the circle, then left again, and turn around for 1 Escape Buck.
- Go back to the circle and follow it forward to the entrance.
- Turn around, go straight the way you came and take the first left to find the monster.
The quest giver pays 5 Escape Bucks.
Humanities Campus
Library
Go back to the Humanities Campus and talk to Quanty. Take 1 Escape Buck from the shelf behind it.
The book on the table by Quanty’s counter, Prof. Grumble’s Resignation, only makes sense on its even pages: Grumble now looks toward etiquette, Pleasant likes fashion, Maxwell focuses on dance, and Saunders copies Grumble.
On the way to the stained-glass window on the left, check the ladder shelf: the Red Herring (20/50) is on the far left, third row from the bottom. Then go back past the table and into the middle of the building to the four statues. Turn each one to face the shelf for its interest:
- Eustice Grumble: right, toward etiquette
- Philomend Saunders: right, toward etiquette (he copies Grumble)
- John Pleasant: north, toward fashion
- Max Maxwell: top right, toward dance, near the 19-puzzle-piece door
Take How To Open Doors With A Crowbar.
Upstairs, a door asks for quiet. Walk over every tile on the second floor and note which ones creak. Flip the faces of the people standing on creaky tiles on the door: the bald man, the bald man with the eye guard, the short-haired girl with round eyes, and the man with round hair and glasses next to her. Take Escape Rooms Are Overrated: A Manifesto.
Go back down and explore the right side of the building. Climb the stairs for a Red Herring (21/50). The poster under the stairs explains the Cluey Decimal System:
- 001–099: Generalities
- 100–199: Philosophy
- 200–299: Religion
- 300–399: Social Science
- 400–499: Languages
- 500–599: Natural Science
- 600–699: Applied Science
- 700–799: Arts & Recreation
- 800–899: Literature
- 900–999: Geography & History
- 92 + 920: Biography & Collective Biography
The book tray behind you holds four books. Match each to its section’s first digit:
- Toth: God of Puzzles: religion, 2
- Eel Barnes: The Greatest Escapist There Ever Was: history, 9
- Id, Ego, and Escape: generalities, 1
- The Language of Riddles: languages, 4
The code is 2914. Take A Primer on Brute-Forcing Puzzles and report to Quanty.
Lecture Hall Grounds
Leave through the north door that was locked before and follow the path to the Lecture Hall. Don’t go in yet. Walk around the building for 1 Escape Buck, then talk to the group next to it for When Life Gives You Limes….
Extra Credit: When Life Gives You Limes…
All four glasses need the same amount. Counting from the left (1 to 4):
- Pour glass 2 into glass 4.
- Pour glass 3 into glass 1.
- Pour glass 4 into glass 3.
- Pour glass 2 into glass 4.
That’s 5 Escape Bucks and your tenth Extra Credit, which unlocks This Should Help My Grades. There’s 1 Escape Buck inside the payphone.
 | This Should Help my Grades Complete 10 Extra Credit quests. |
Lecture Hall
Take the Red Herring (22/50) from the teacher’s seat and 1 Escape Buck from the bag on the middle table. Talk to Professor Solange and sit down. The answers are all in the notes on your laptop, and you mark them on the card next to it: B, A, B, B, D.
Museum Grounds
Leave the Lecture Hall and go far left to the locked door to the Museum. Agree to build the zipline (5/10).
Extra Credit: A Riddle Bit Closer (3/3)
The mailbox behind you has the last riddle: often made at the start of the year, scary when too big, and something you can set, keep, defend or score. The answer is GOAL, for 5 Escape Bucks.
Extra Credit: A Cryptic Picnic
The student in the gazebo on the left gives A Cryptic Picnic. Neighboring cells always share at least one letter. Fill in the board:
| FS | RS | SU | SI | TS |
| FN | NR | UN | NI | TN |
| FA | RA | AU | AI | TA |
| FC | CR | UC | CI | TC |
| FK | RK | KU | KI | TK |
Read the shared letters in the direction of each padlock:
- Top to bottom: SNACK
- Left to right: FRUIT
That’s 5 more Escape Bucks.
A Red Herring (23/50) is at the Library windows on the left. Jump across the pillars onto the gazebo roof for 1 Escape Buck. Keep following the pillars to the next building, hop onto the window and use the small ledge to work your way left along the upper pillars to another buck. The zipline gets you onto the roof if the jumps give you trouble. Further on, a line of bricks crosses the river, and the last brick has 1 Escape Buck. The guide’s author found that this buck can glitch if you grab it this early. If it isn’t there, come back for it near the end of the game.
Falling into the river sends you to the infirmary for Tis But a Scratch.
 | Tis But a Scratch Get sent to the infirmary. |
In the garden behind the gazebo, a Red Herring (24/50) sits near the end of a log.
Museum
Inside, go right for 1 Escape Buck by the window. Crouch and look under the counter from behind for a Red Herring (25/50) tucked in a corner. Professor Jeberson gives you a Crowbar Permit.
Take the zipline to the docks, go all the way west and down to the Science Campus Store Room, and buy a Crowbar. Back in the Museum, the crate area has a sign: a crate is dangerous if it shows three or more warning signs (muddy, moving, misspelled label, leaking, no barcode).
| Crate | Warning signs | Safe? |
|---|---|---|
| OPEN CAREFULLY | Muddy | Yes |
| OVERNIGHT SHIPING | Leaking (water under it), muddy, misspelled | No |
| Three stickers | Muddy, no barcode, no label | No |
| ARTIFACTS INSIDE (left) | Leaking (green liquid), moving, no barcode | No |
| FRAGIL | Misspelled | Yes |
| ARTIFACTS INSIDE (right) | No barcode | Yes |
Pry open the three safe crates. You get Sameer’s Shovel, Hat and Mustache Wax, Reina’s Bell and Pen, and Fernando’s Checkbook, Ring and Sword. Place them in the middle of the room:
| Exhibit | Plaque | Artifact |
|---|---|---|
| 1 | Key to many groundbreaking discoveries | Sameer’s Shovel |
| 2 | A 10-gallon thinking cap | Sameer’s Hat |
| 3 | It’s most powerful when it’s blank | Fernando’s Checkbook |
| 4 | Far mightier than Exhibit 5 | Reina’s Pen |
| 5 | It cuts straight to the point | Fernando’s Sword |
| 6 | It has a rich ring | Reina’s Bell |
| 7 | It is a rich ring | Fernando’s Ring |
| 8 | The mark of a true gentleman | Sameer’s Mustache Wax |
Talk to Jeberson again to start the escape room.
Think Inside the Box
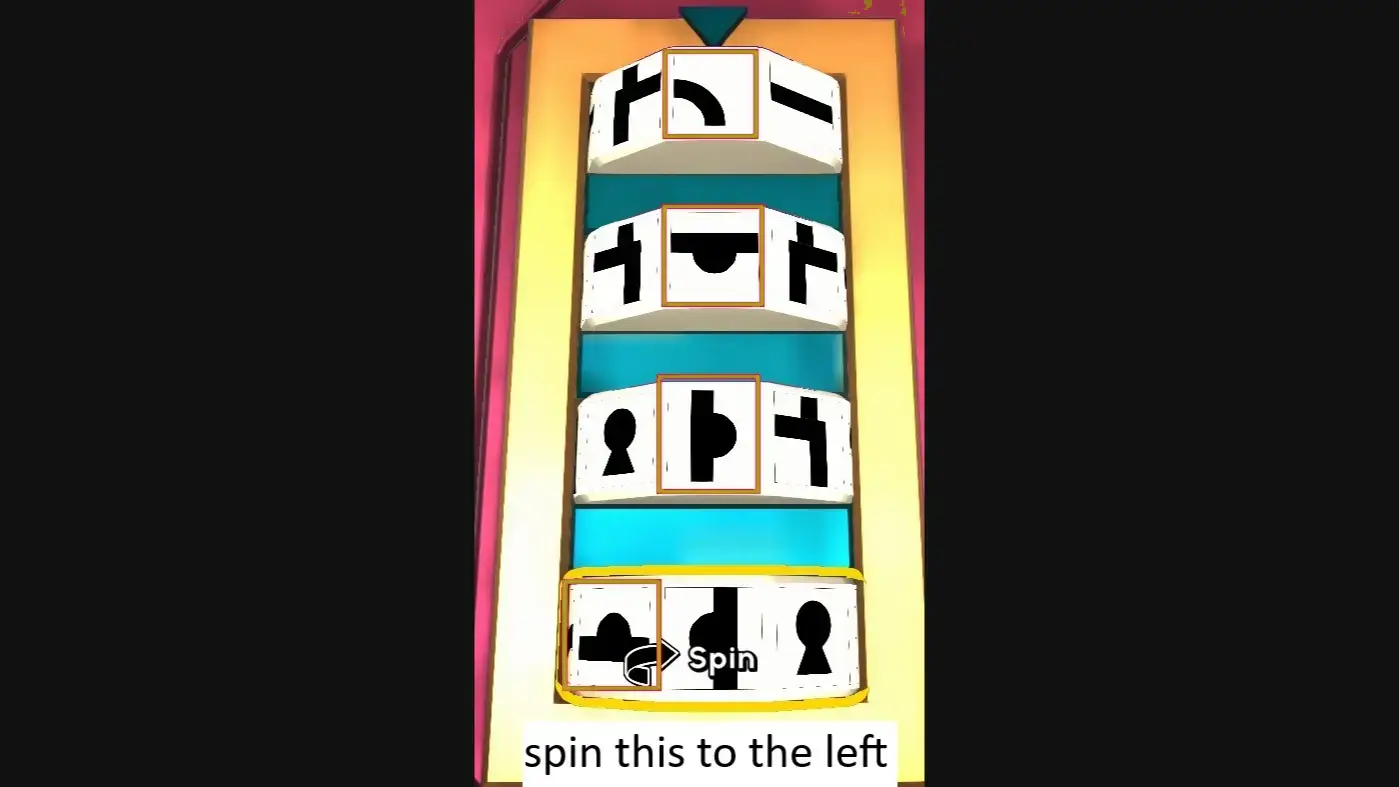
The box next to the Figure 1 poster has a grid, and the poster titled “This lock is the key to opening the chest!” shows the same grid. The highlighted tiles on the box form the pattern for the padlock:
Take the Aztec Death Whistle and use it on the pyramid behind Jeberson. One side has green and black marbles: turn the wheel until all the green ones are inside. If you get stuck, push all the black marbles to the far left and all the green ones to the far right and it falls into place. Take the first Ancient Key.
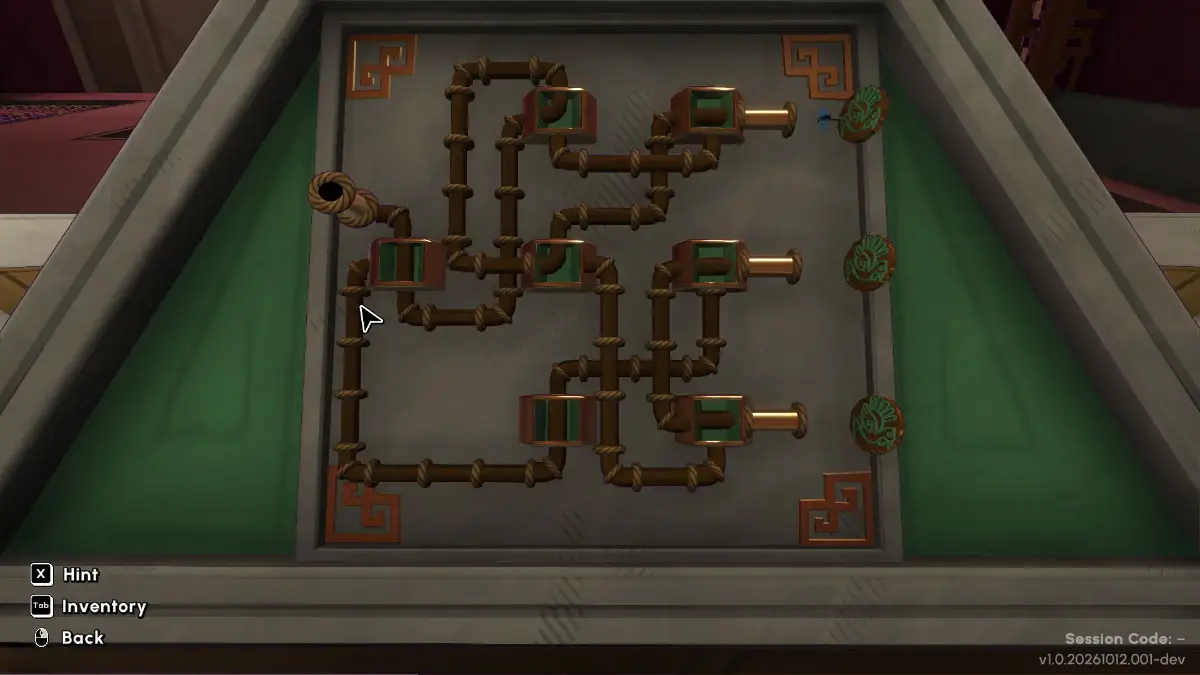
The other side of the pyramid has a pipe puzzle. Route the pipe to each of the three ends in turn:
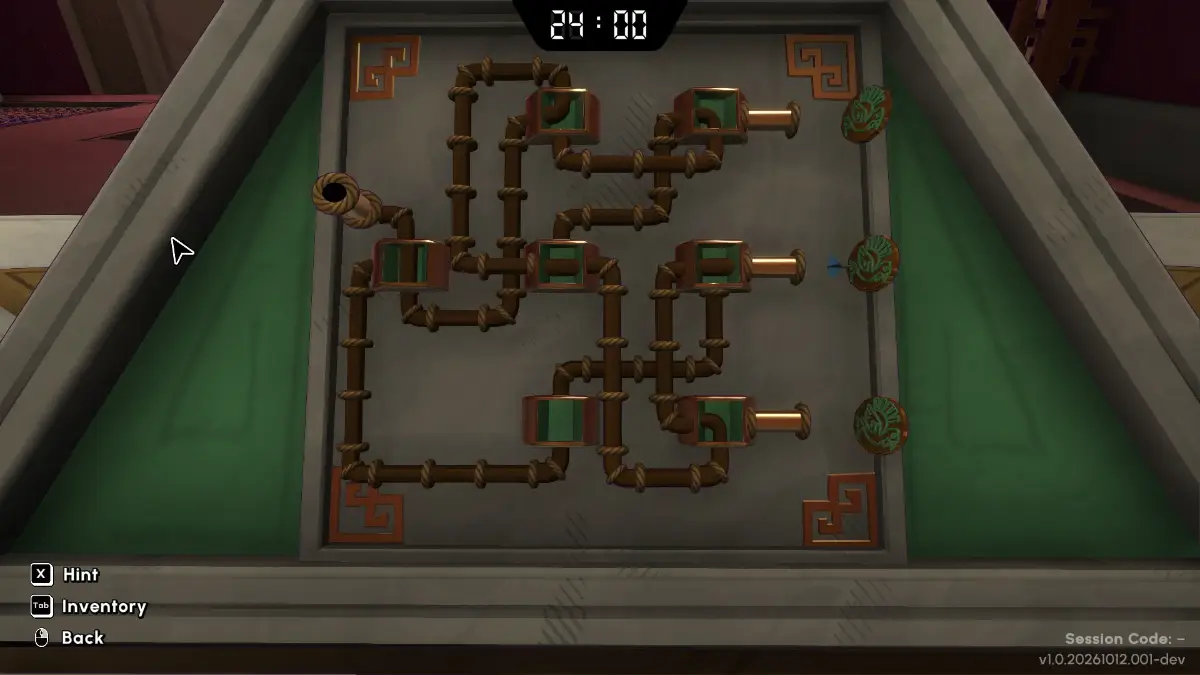
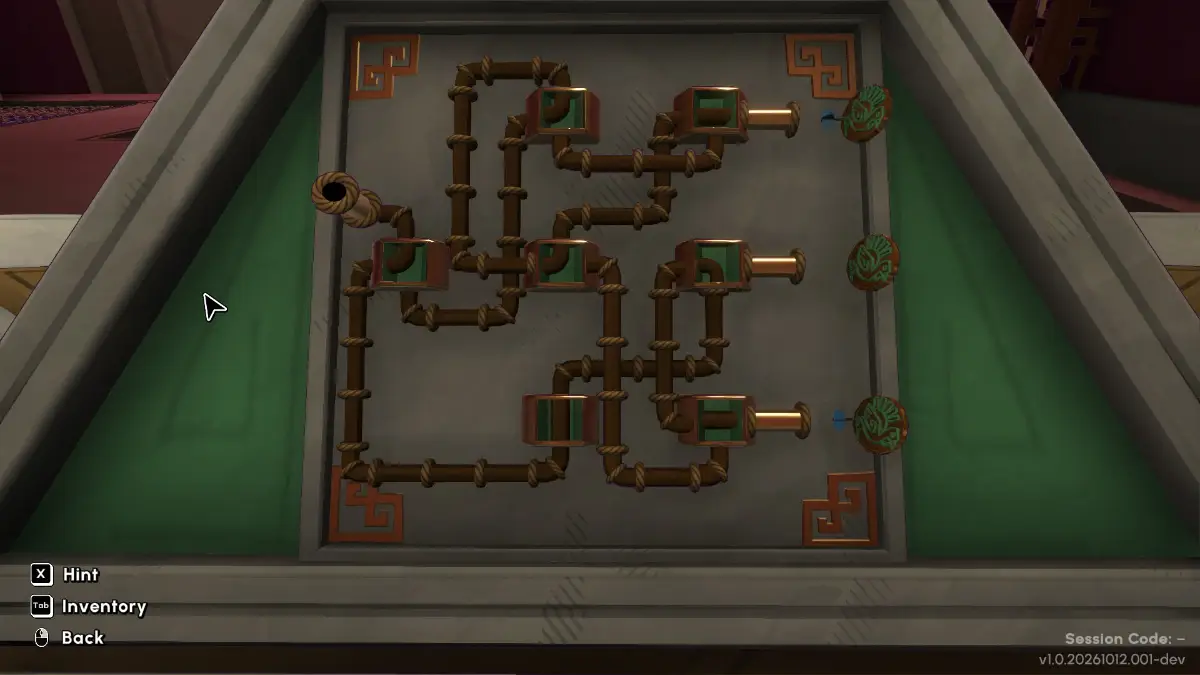
Take the second Ancient Key. Put both keys in the pyramid side with two eyes and take the Jade Snake.
Figure 1: Sameer’s Box of Wonder
Put the Jade Snake in the southeast puzzle of the box. It shows the same five patterns as the poster’s padlock. Press the grid tiles marked X:
| X | X | – |
| – | X | – |
| – | – | X |
| X | – | – |
Take the Folded Fan and the Torch Sculpture.
Figure 3: Lockrates’ Box
Put the Torch Sculpture on the mosque-like building. The poster on the left reads “Narcissus + EKHO”. On the water side of the box, set the symbols so their reflections spell EKHO: C, |/, U, half circle. Take the three wedges: Hex, Rounded and Triangle.
At the back of the box, put Rounded in the first pit, Triangle in the second and Hex in the third. Move the statue to the third pit, then move the Rounded wedge from the first pit to the last. A key is projected on the ceiling.
Figure 4: The Coffer of Keyfucius
Place the Folded Fan in the coffer and take the six coins. Match two coins to each painting on the fan:
- Bird: Circle and Hexagon
- Mountain: Shovel and Crescent
- Tree: Dagger and Pronged
Take the Ancient Compass. It points south, so north is the opposite way. Stand behind the coffer facing the poster. In the spot where the compass was, frogs hold balls: once you’ve found south, drop the balls on the east, north and southwest frogs.
Take the Unusual Star Chart, pin it and look up. The constellation from Lockrates’ Box matches three shapes on the chart. Note where each one is and enter them on Sameer’s Box of Wonder:
| 1 | – | – |
| – | – | – |
| – | – | 2 |
| 3 | – | – |
That finishes Think Inside the Box.
 | Think Inside the Box Complete “Think Inside the Box” |
Previous: Chapter 2 walkthrough. Next: Chapter 4 walkthrough. Every chapter is listed in the Escape Academy 2 Back 2 School walkthrough.
Based on the original walkthrough by aquatorrent.