All Death at Fleming Manor guides
Episode 6, The Unidentified, opens on a man found dead in a locked shed with a snake bite and a stab wound. Submit his death certificate and two more bodies turn up, one in a grave and one in the lake, and you have to name all three and work out who killed whom.
Episode 6: The Unidentified Walkthrough
The case starts small, with one body and a handful of words. It grows a lot once the first death certificate is in.
Words
Scene 1: Shed
Note the hair on the window ledge and the blood on the dagger for the pathologist.
- Corpse’s Leg, Tourniquet: Linen Strip
- Dagger: Dagger
Scene 2: Medical Book
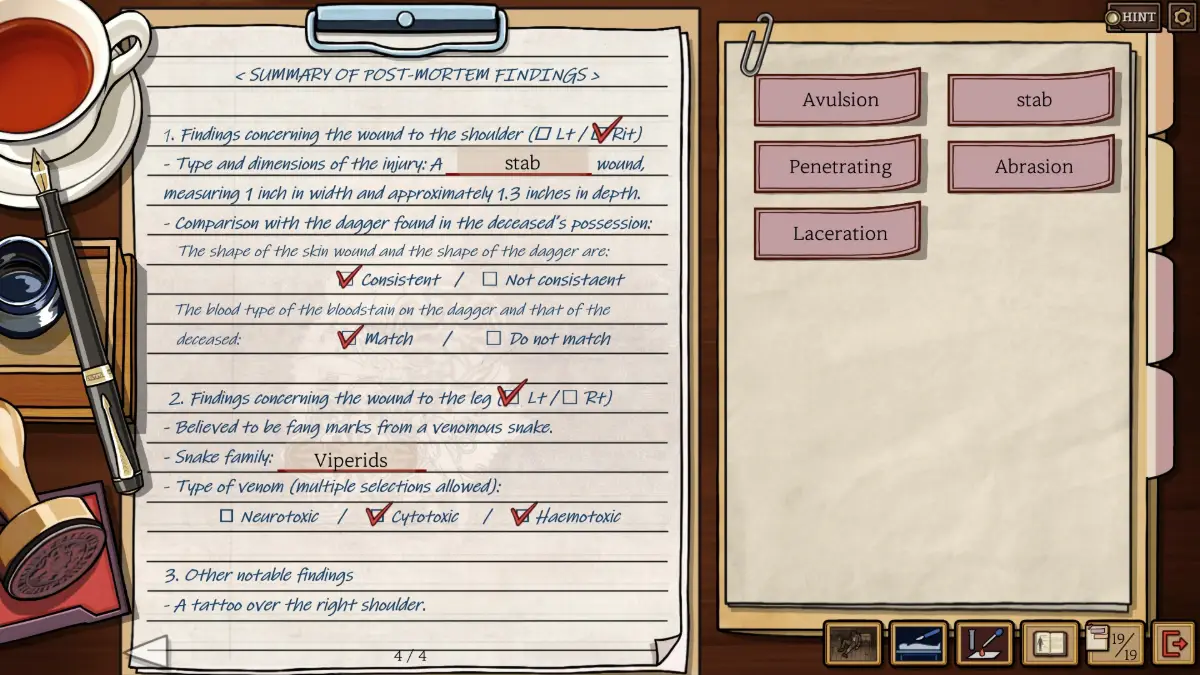
Hypovolemic, Cardiogenic, Distributive, Obstructive, Elapid, Viperid, Colubrid, Non-Venomous, Algor Mortis, Rigor Mortis, Entomology, Amputation, Avulsion, Stab, Penetrating, Abrasion, Laceration
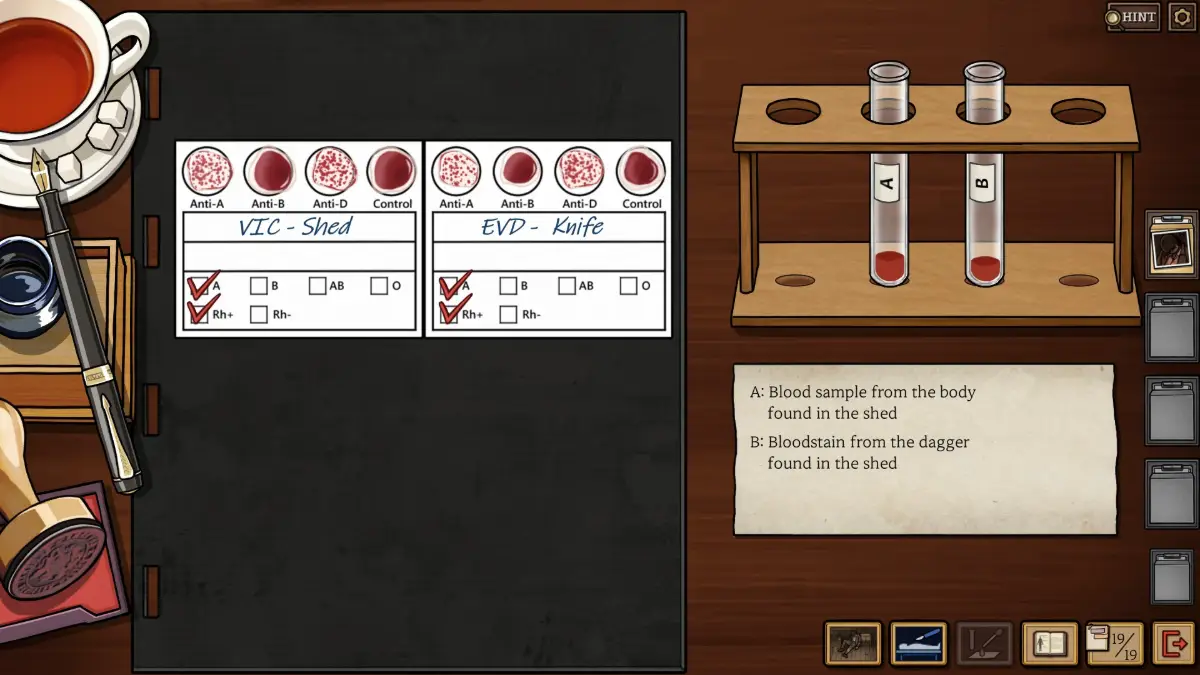
Form 1: Blood Test
- There are two samples: the bloody dagger and the one the pathologist draws from the chest.
- Read them with the same chart as in Episode 1.
Form 2: Death Certificate
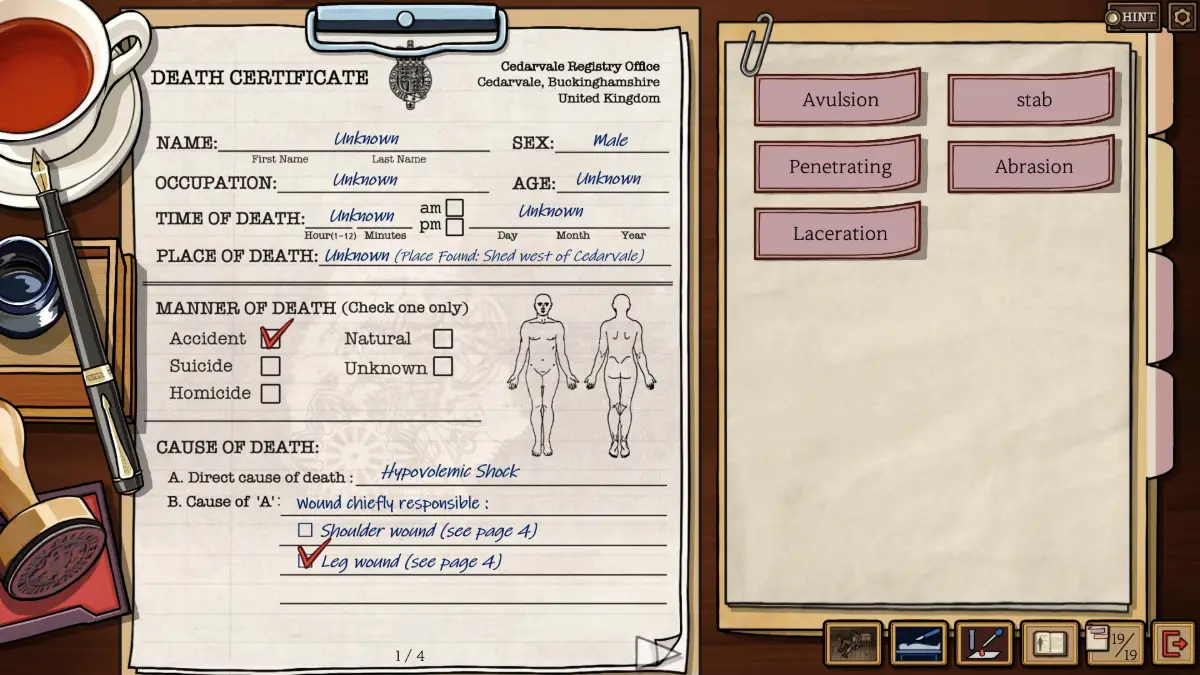
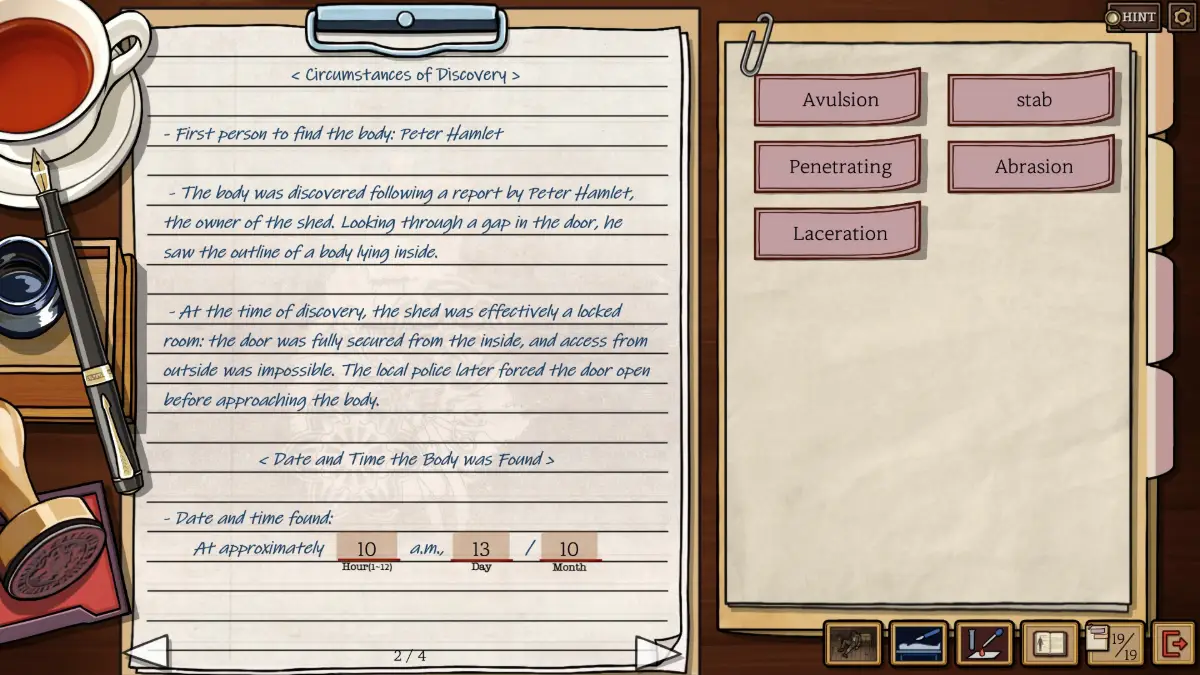
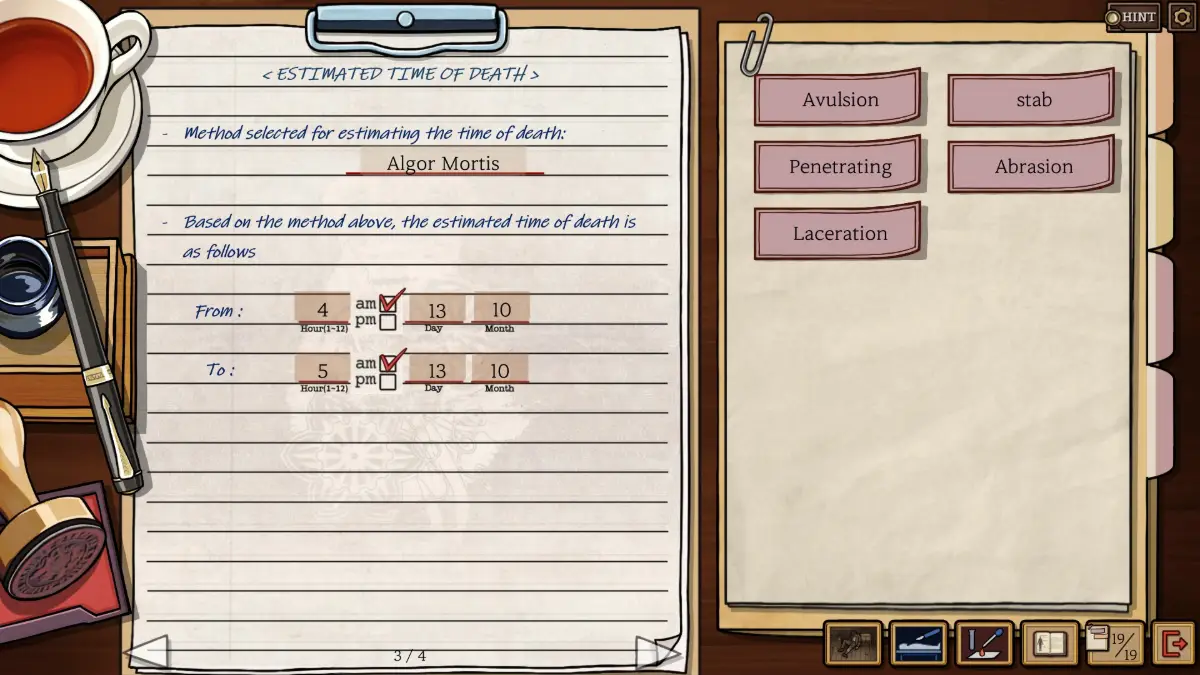
- Leave the victim’s identity for later. For now you need what killed him, when he was found and the best estimate for the time of death.
- Nearly everything you need is at the pathologist’s this time, so start there if you get stuck.
- The police had to break the shed door down. Either the killer got out some other way, or the victim died in there alone.
- Hypovolemic shock does not need blood on the floor. Blood belongs inside the vessels, so bleeding into the body cavities counts too. Internal bleeding is still hypovolemic shock.
- Left and right on the form are the victim’s, not yours.
- The manner of death is the odd one. A snake bit him, he tied a tourniquet from torn linen, and somehow he was also stabbed without losing much blood. Questions remain, but go with what the evidence shows so far.
- For the time of death, pick the narrowest window you can. Entomology only says he died within the last 24 hours, which adds almost nothing. Listen closely to the pathologist: some of his estimates count back from now, others from the moment the body was found.
- Venom can harm the body in more than one way, and you tick every type that applies. Neurotoxic effects are hard to spot, but the other two leave visible signs.
- Only one item has a date and time on it: the bag of hair at the pathologist’s. It was collected when you arrived, and the inspector got there within an hour of the report.
Two More Bodies
After the first death certificate is approved, two more bodies are found. That opens new scenes and adds new words.
Scene 3: Cemetery
Note the footprints.
- Footprints on the Left: Footprints
- Tombstone: Elenor, Ainsworth
- Worker on the Right, Work Schedule: Frank, Harper, Hans, Muller, Albert, Colins, Samuel, Dawkins
Scene 4: Lake
Note the blood on the sack and the bloodstain on the oar.
- Sack Pulled From the Lake: Shovel, Hammer, Nails, Rake, Crowbar, Pliers
- Sandbag: Sandbag
- Boat: Oar, Rope
Scene 5: Medical Book (New Pages)
Drowning, TBI, SCI
Form 3: Blood Testing Redux
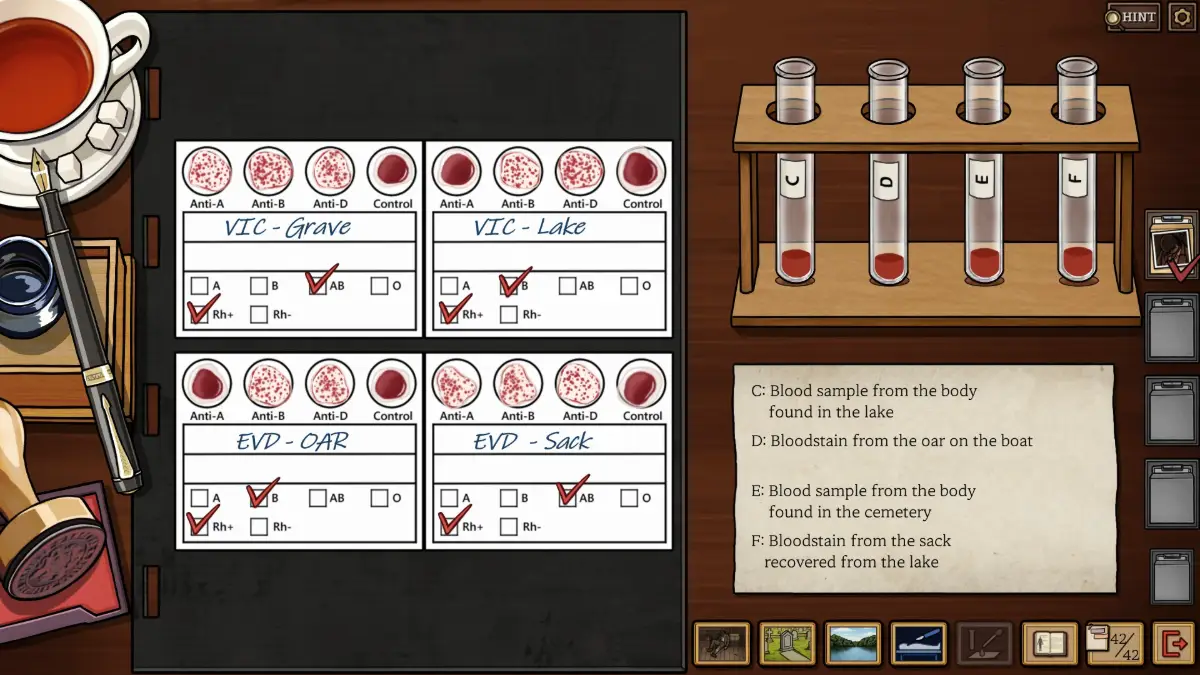
The pathologist gives you one sample from each new body, and you get one more each from the oar and the sack.
Fingerprints and the Inspector’s Question
Take fingerprints from all three bodies. Once the tattoos, prints and blood types are logged, the inspector asks which records would help.
The answer is Criminal Organization. All three men share the same tattoo, and the note in the grave reads like a robbery that went wrong.
For the Contrarian achievement, pick the five wrong options first (Missing People, Naval Records, Forensic Entomology, Blood Type and International Fugitive Fingerprints), then choose Criminal Organization.
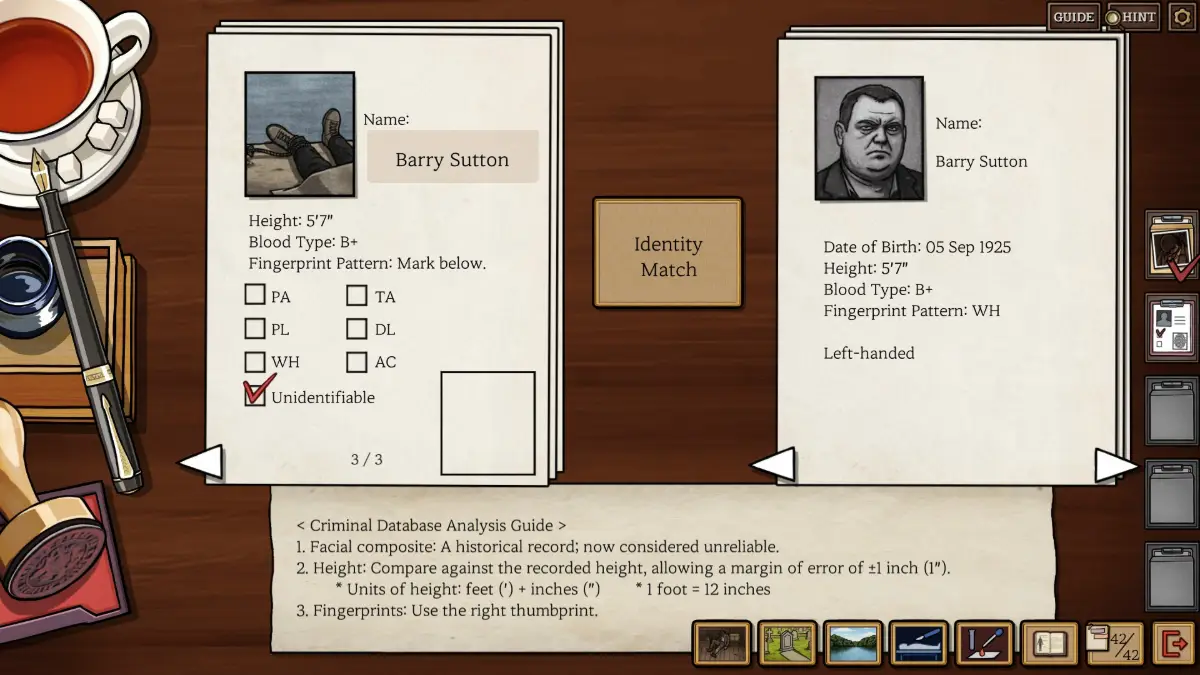
Form 4: Victim Identification
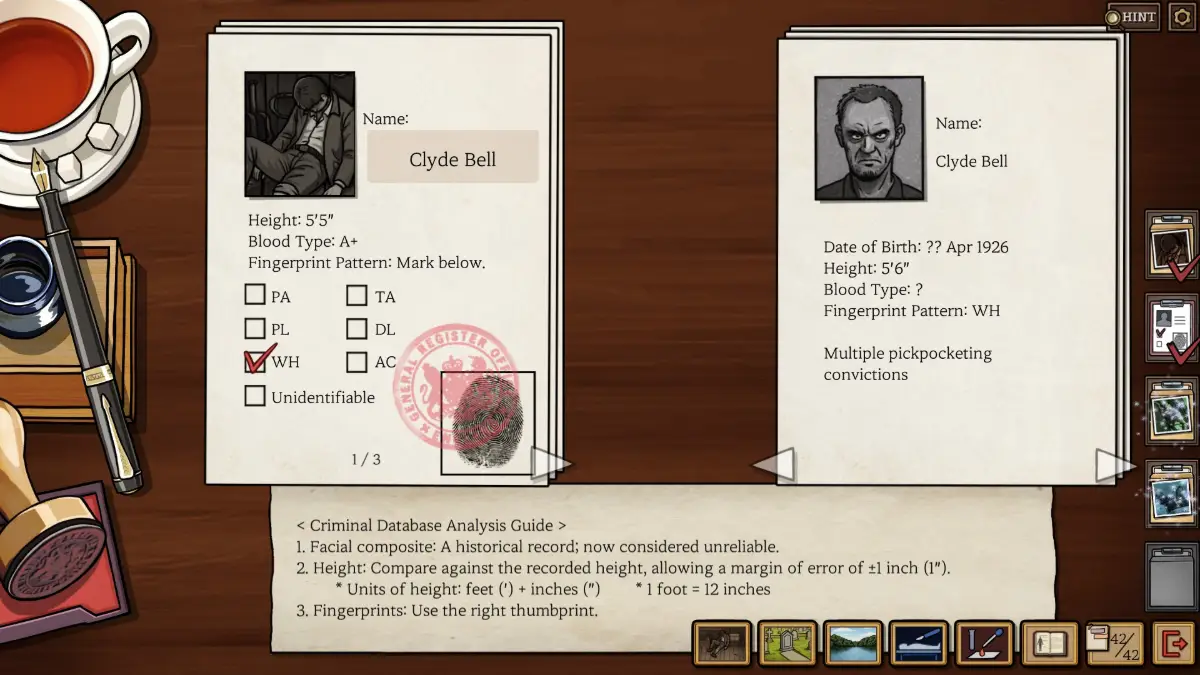
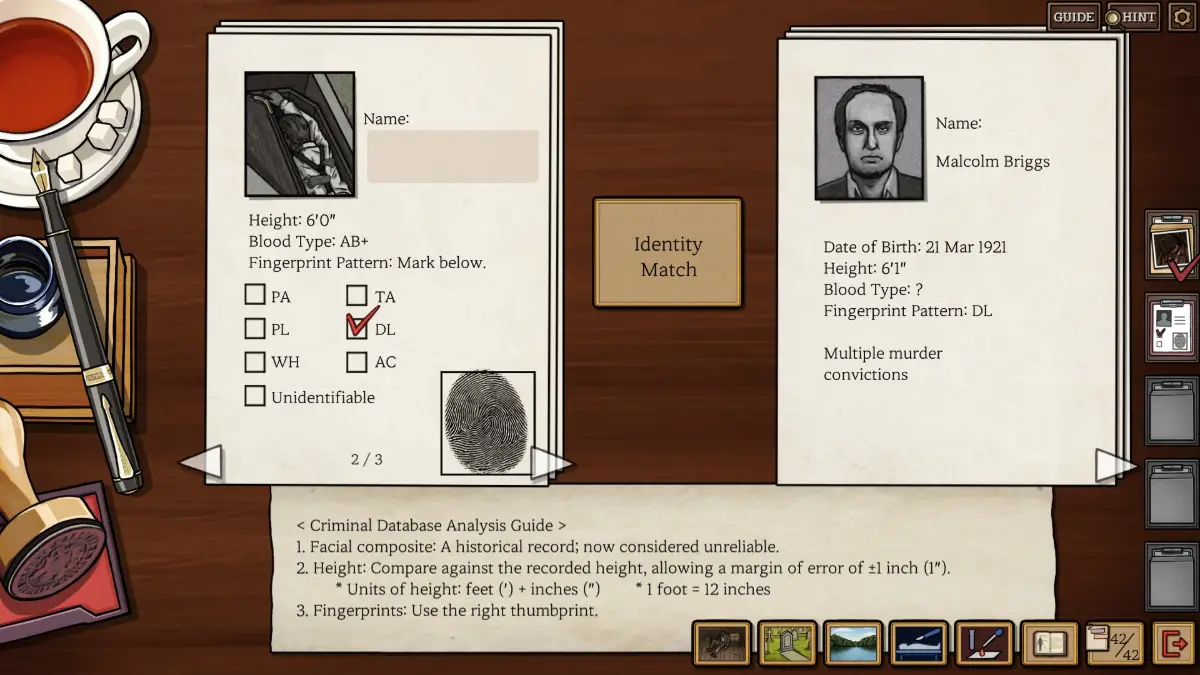
- For each body you have the height (give or take an inch), blood type, fingerprint pattern and a rough face sketch. Each profile also lists something extra, such as a criminal record or a distinguishing mark.
- You need all of it together. The shed victim is 5’5″, and five profiles fall within an inch of that.
- The shed body and the lake body both end in ties on the basic details, so the extra information decides them.
- The note on the cemetery body mentions a Colin, and there is a Colin among the profiles. He is the wrong height for all three bodies, so ignore him.
- One of the faces in the profiles is someone you have already met.
- The lake body is the hard one, because no clean print could be taken. What you do know is that he wore his watch on his right wrist and was heavily built. There are no other clear marks.
Shed Body
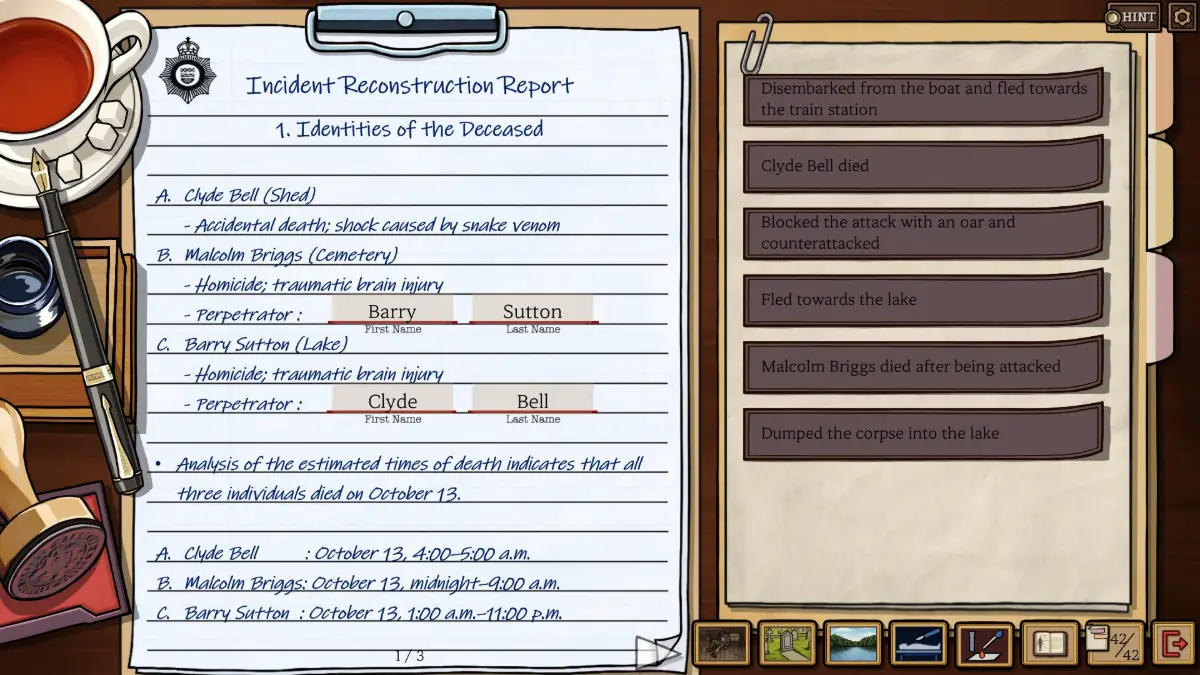
Clyde Bell. Height, blood type and fingerprint fit both him and Marek, so the sketch breaks the tie.
Cemetery Body
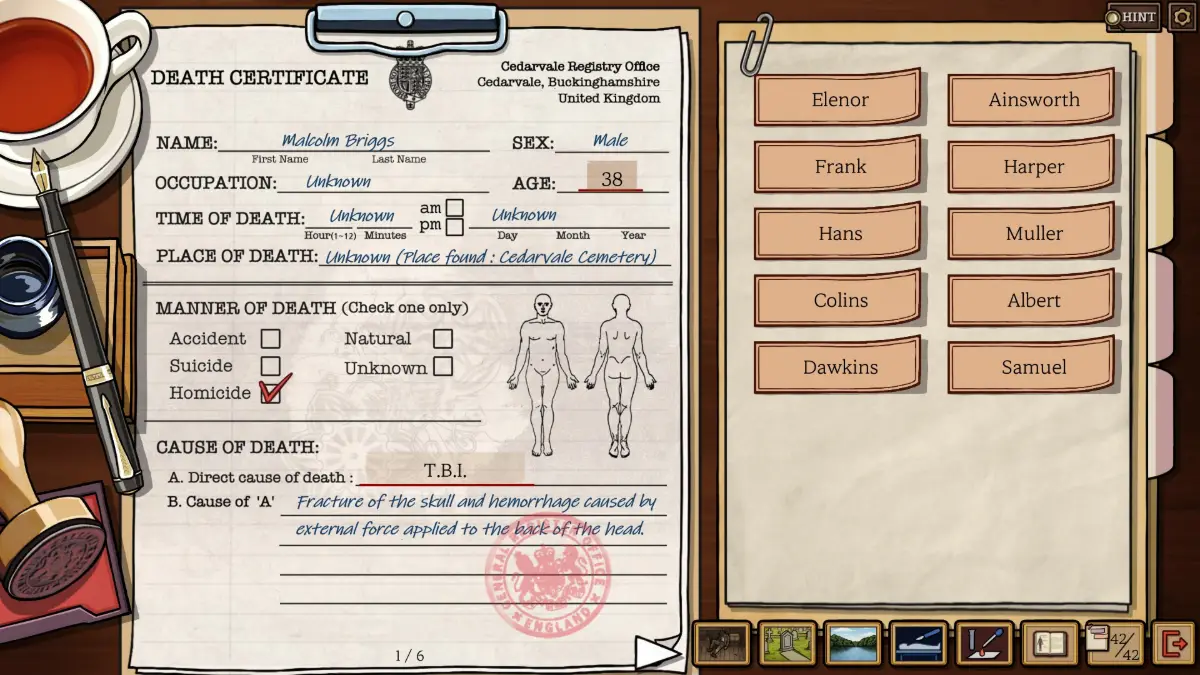
Malcolm Briggs. He is the only profile within an inch of 6’0″, and the fingerprint confirms it. The note on the body also calls him Mal.
Lake Body
Barry Sutton. Blood type and height leave Thomas or Barry. Thomas has an anchor tattoo and the pathologist found no marks, and a smashed watch on the right wrist fits a left-handed man like Barry.
Forms 5 and 6: Before You Start
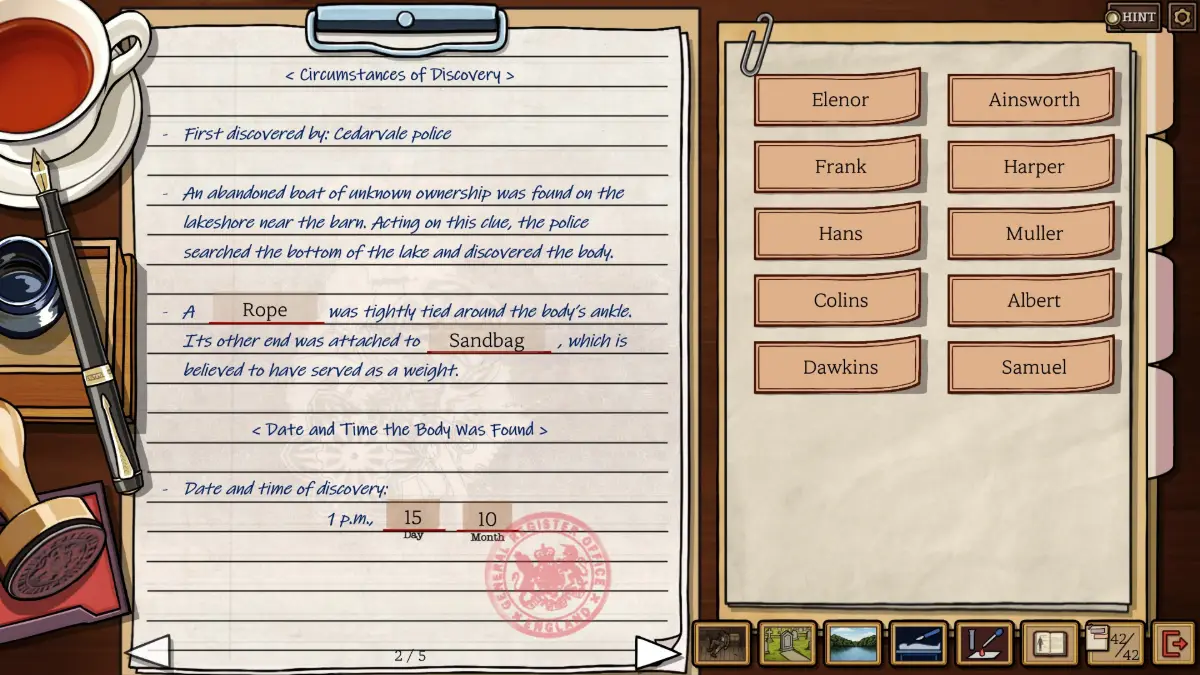
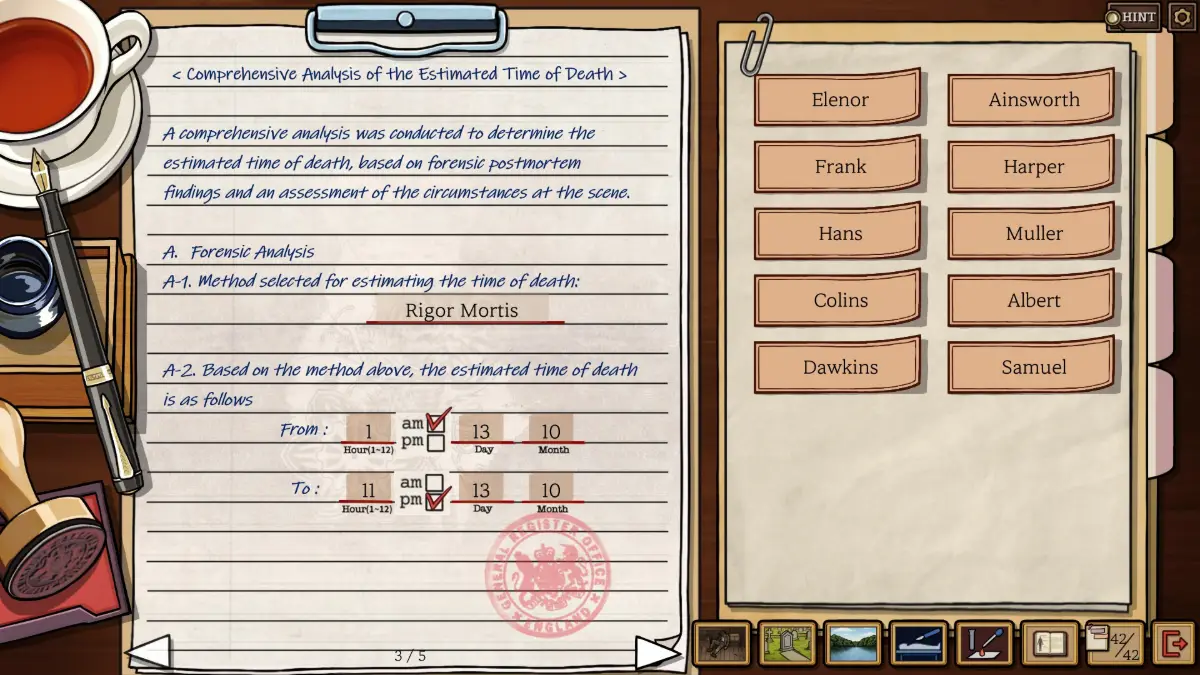
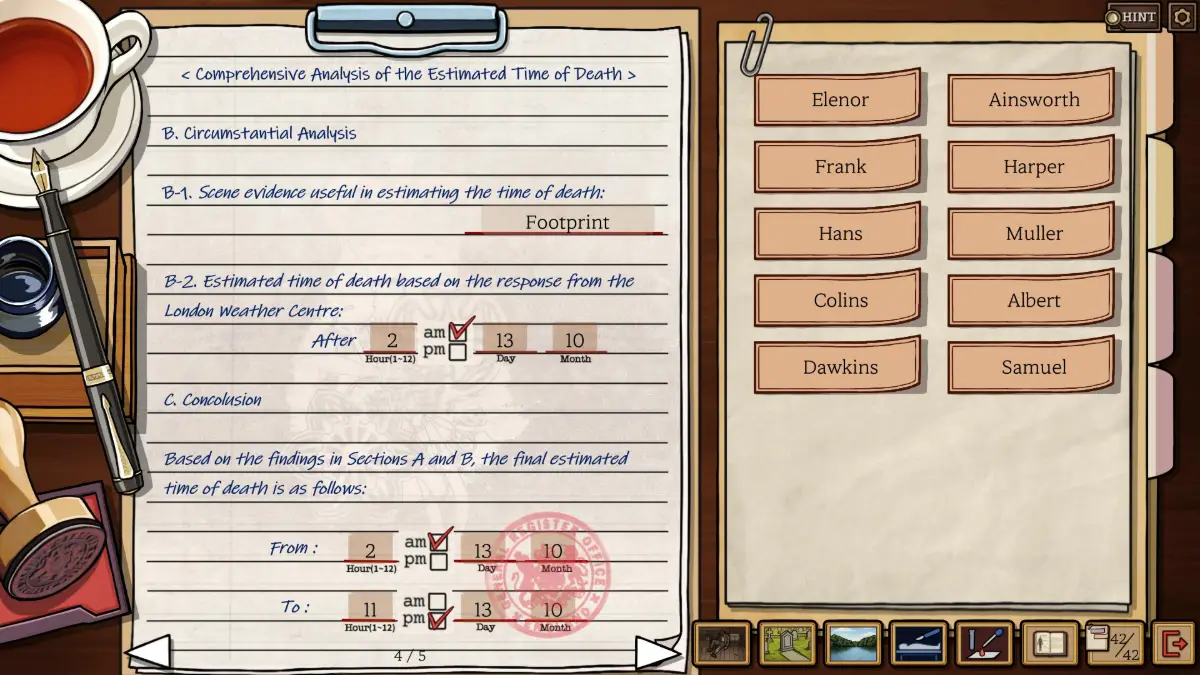
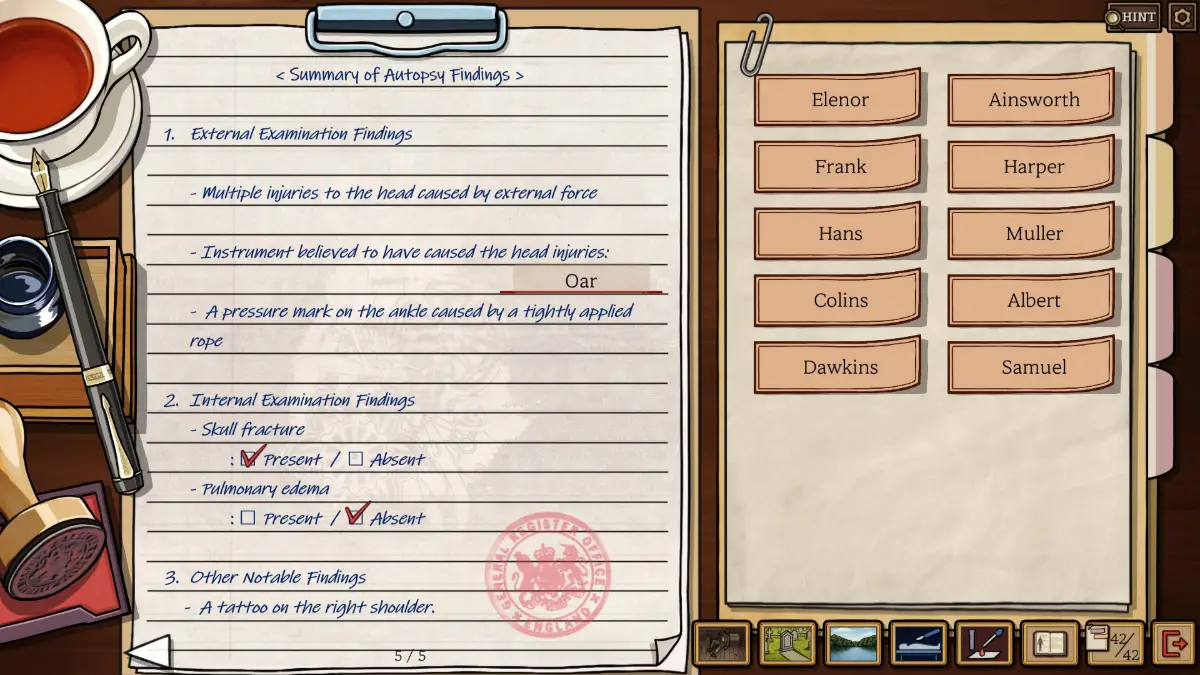
- These two reports cover the state of each body, how it was found and a rough time of death. You are not naming the killer yet.
- Avery’s notes spell out most of the answers.
- Work in 24-hour time. It makes the time math much easier.
- Birth years are in the criminal profiles.
- Both bodies were found on the same day, since the inspector and the officer came to you at the same time.
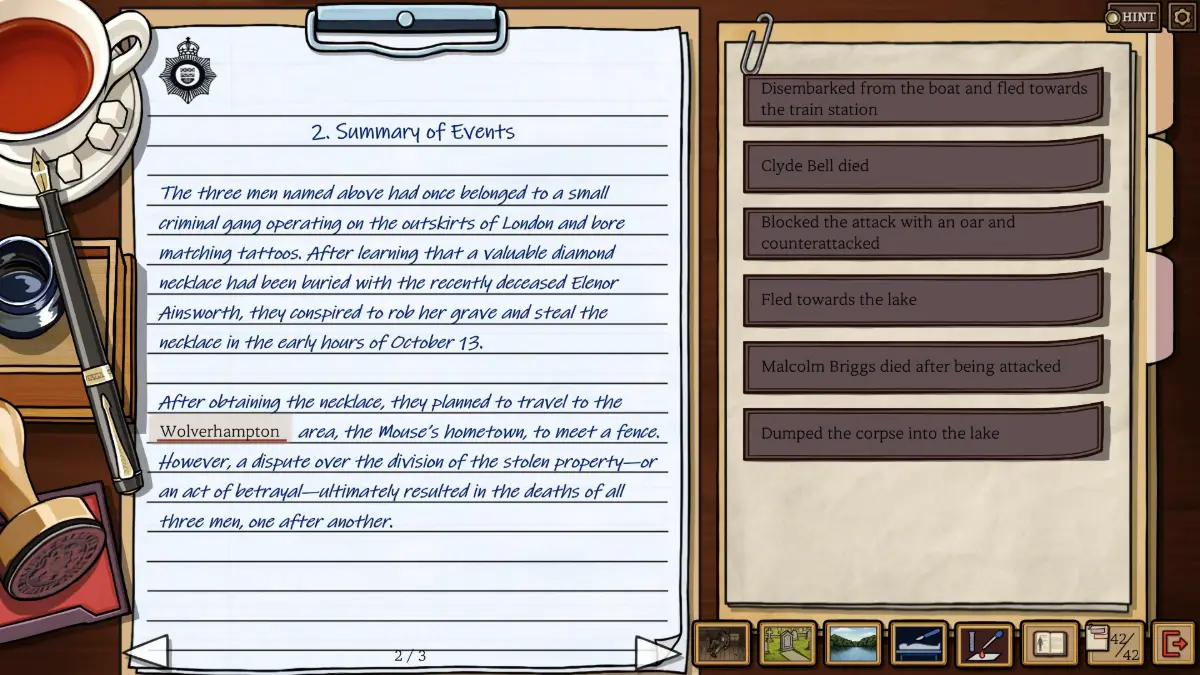
- Work out how the three men are connected before going further. A stranger in Elenor Ainsworth’s grave should ring a bell: her will had her buried with a valuable necklace.
- The cemetery victim’s plan and map are clear about the route. Dig up the necklace, row across the lake, go past the barn and leave from the train station. All three bodies lie along it.
- The pathology tests narrow the times down, but also remember the shed victim’s time of death. These two seem to have died before him.
- There are footprints for everyone except the cemetery victim.
Form 5: Cemetery Victim
- He was born in 1921.
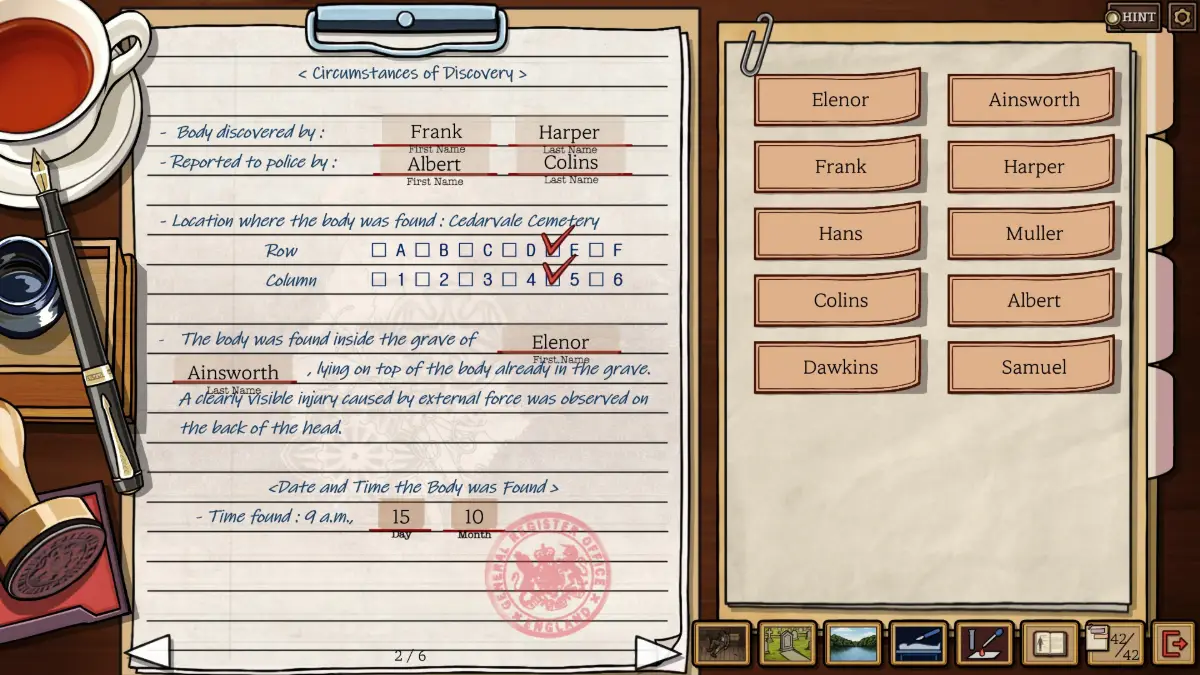
- The time of discovery is on page 2. You have to work out the date yourself.
- One question asks which square of the cemetery map he was found in. Sketching it can help, as in Episode 4, but this map is easier, with more landmarks and a regular layout.
- The worker on the left found the body and the one on the right reported it.
- His blood is on the sack, which barely narrows the weapon, since the sack held four tools.
- The weather report came in right before the identification. Avery points out that the cemetery footprints could only be that firm in very particular weather.
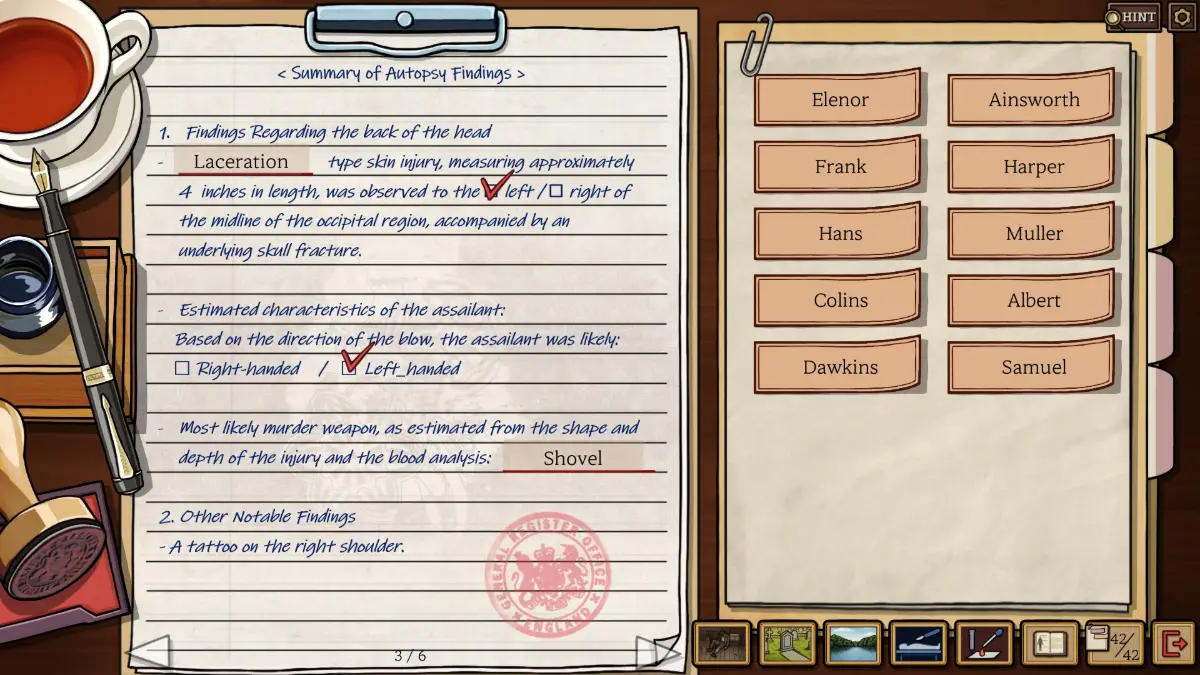
- The pathologist describes the wound as narrow and deep, and the cut is four inches long. You get a decent look at it at the scene.
- Count the graves between Elenor’s and the west path, then between hers and the north path.
- The weapon has a long, thin, flat edge, and the killer would have had it in hand while digging up the grave.
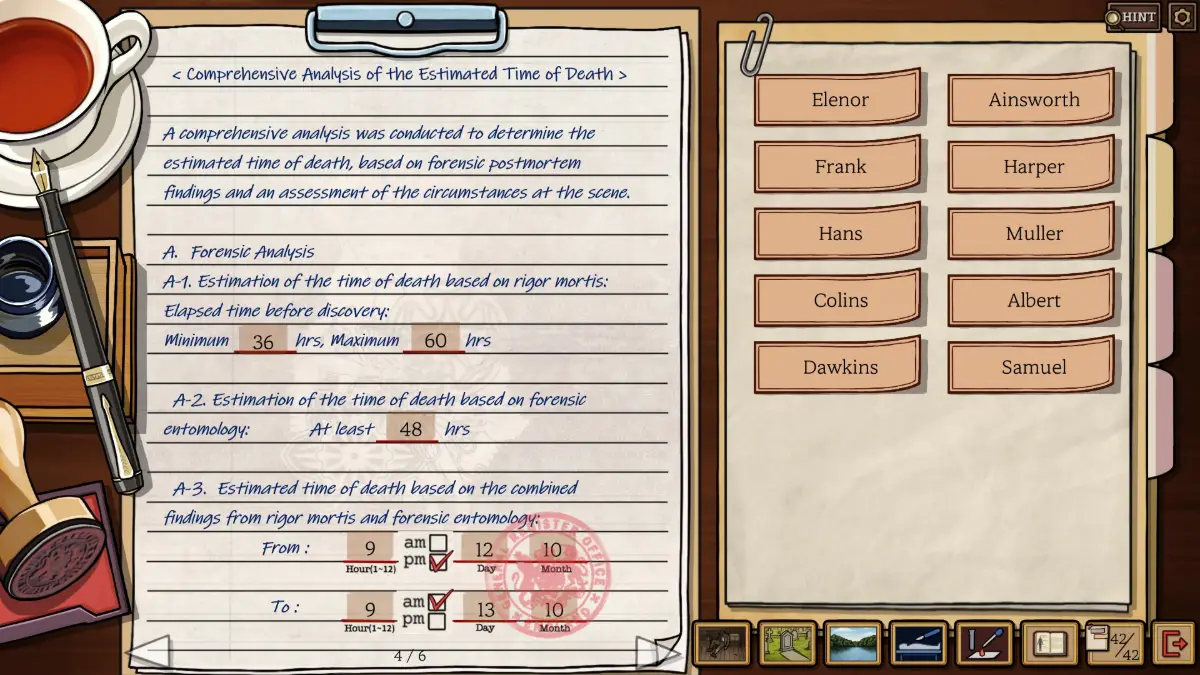
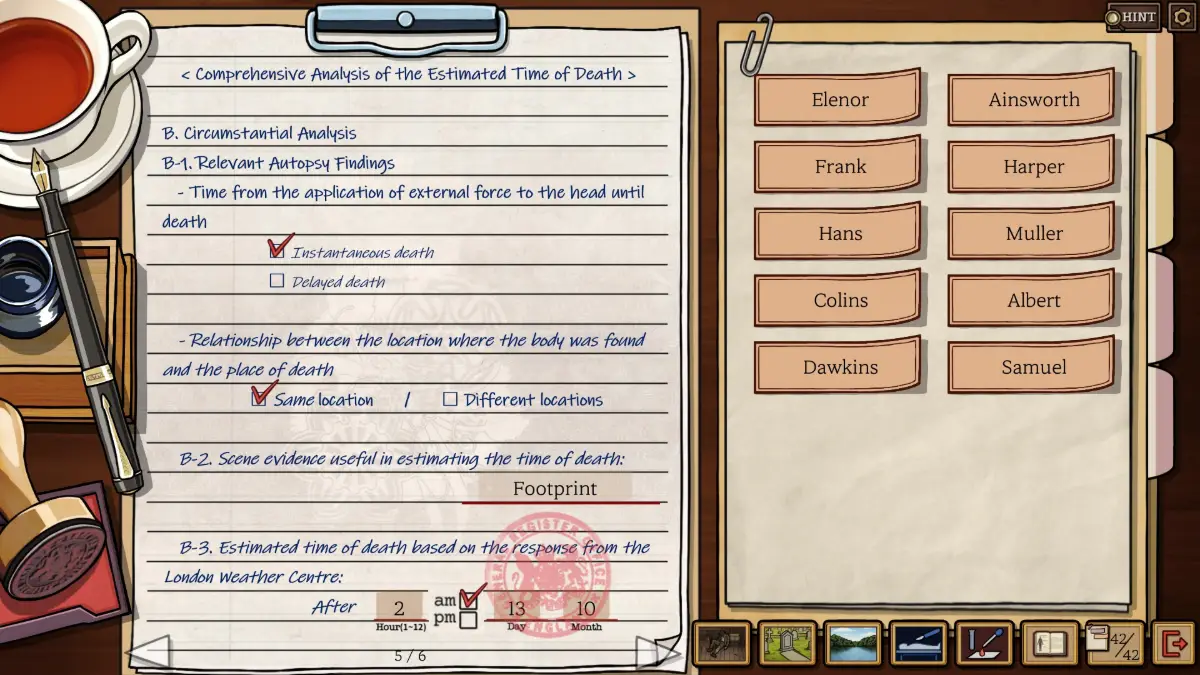
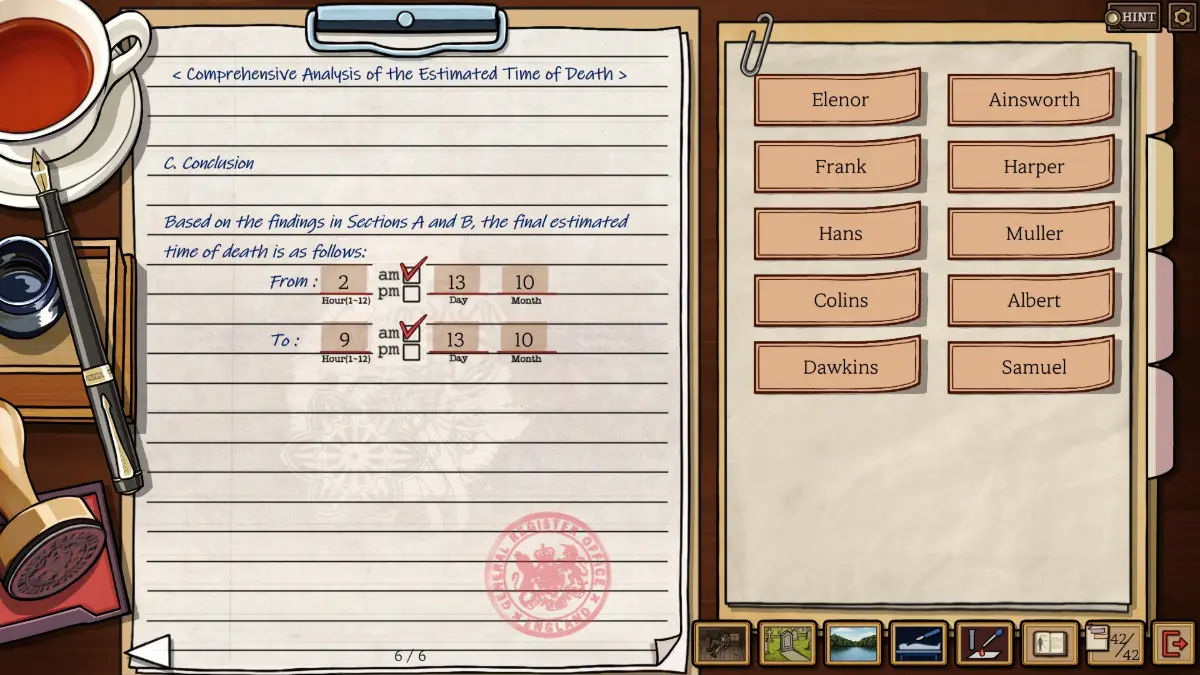
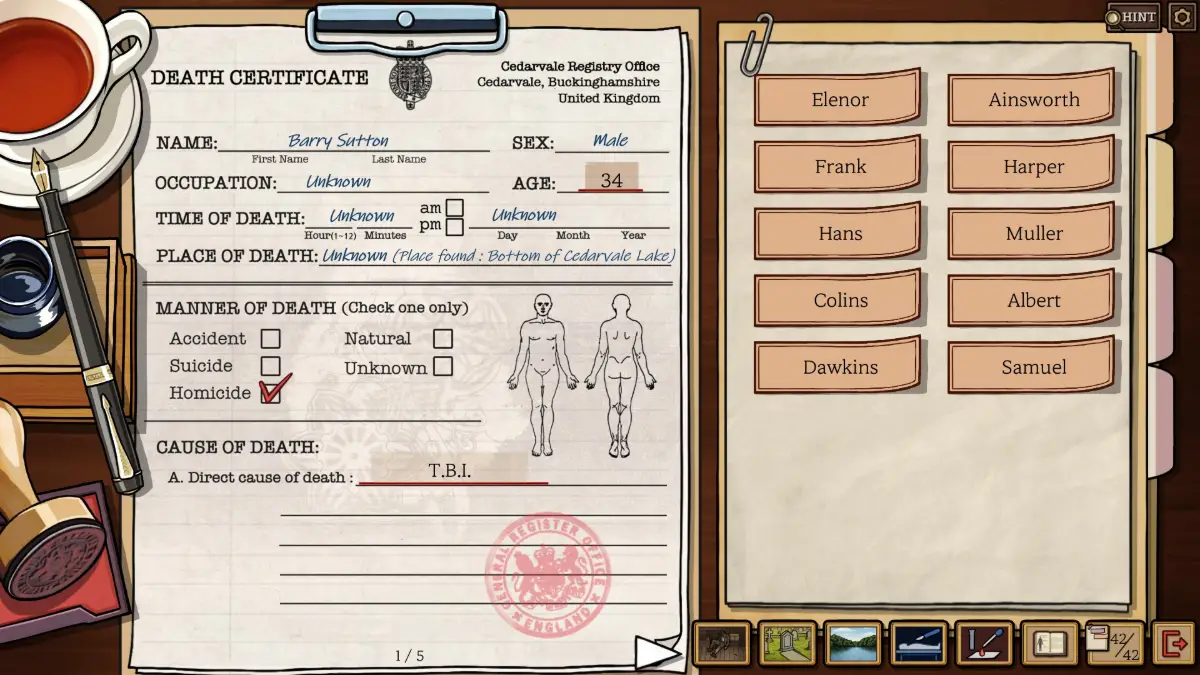
Form 6: Lake Victim
- He was born in 1925.
- The real question is whether he was knocked out and drowned, or killed first and dumped in the lake. The medical book lists the signs of each.
- The report asks for something at the scene, tied to the weather report, that helps date it.
- His blood type matches the oar.
- Only the state of the body gives a usable time of death. You need both an earliest and a latest time.
- Pulmonary edema shows up as cloudiness from fluid in the lungs, not as a change in their size or shape.
- His boots are very muddy for a man who spent that long underwater. When did he walk through clay-like soil?
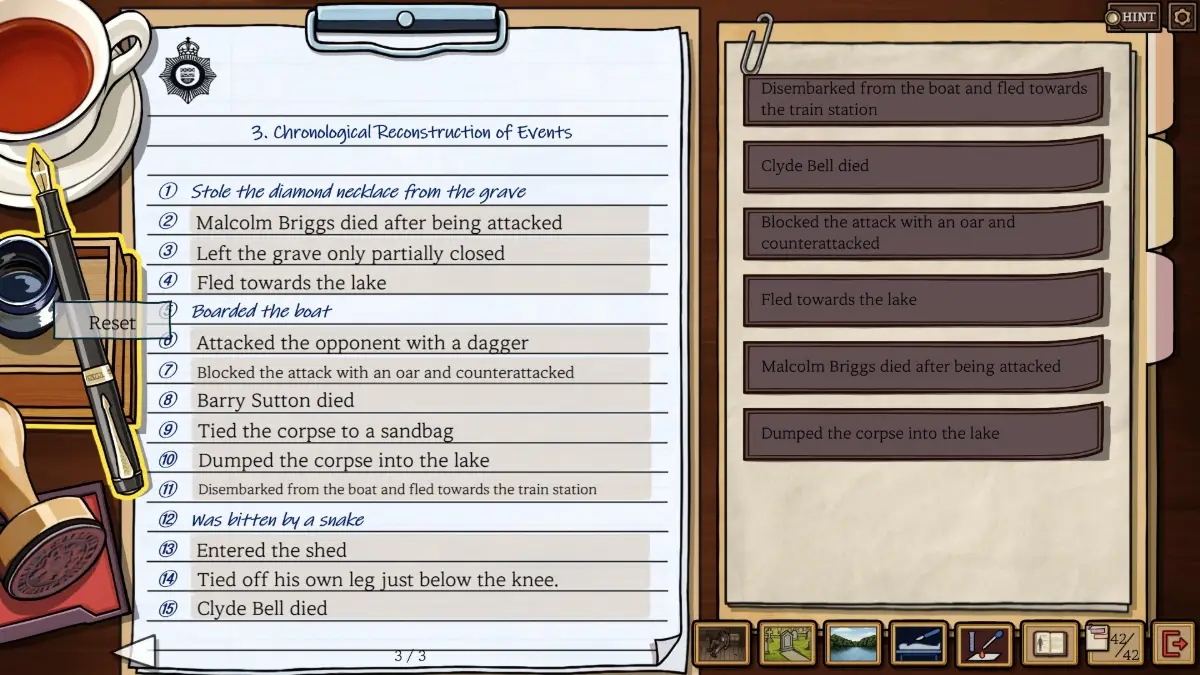
Form 7: Order of Events
- You already know most of the sequence from working out the deaths.
- Go back to the shed with fresh eyes. Where did the dagger come from?
- The forensic results showed that the cemetery victim was killed by a left-handed person.
- The plan was to dig up the necklace, cross the lake by boat, pass the barn, catch the train and sell the necklace to a fence in another city.
- There was no trust between the thieves. The note says Mal takes half now that Colin has backed out, and the other two split the rest. Anyone who drops out, or can no longer collect, leaves a bigger share for the others.
- A dead man cannot kill anyone, so each murder leaves fewer suspects for the next one.
- The fight on the lake is the tricky part: who struck first? In the boat they sat facing each other while one of them rowed.
- The note calls one man Mal and another Mouse. To find out where the fence is, you need to know where Mouse comes from.
- The gang is one tall man, one heavy man and one short man. Which of them would get called Mouse?
Previous: Episode 5. Every episode is listed in the Death at Fleming Manor walkthrough.