In this guide, you’ll find all the hints and solutions for The Procedure in The Rise of the Golden Idol.
The Rise of the Golden Idol: The Procedure Walkthrough
Chapter 3 – The Machine: Scenario 3
The Procedure: A Bizzare Operation Ends in Bloodshed
Scene 1, Bloody Room
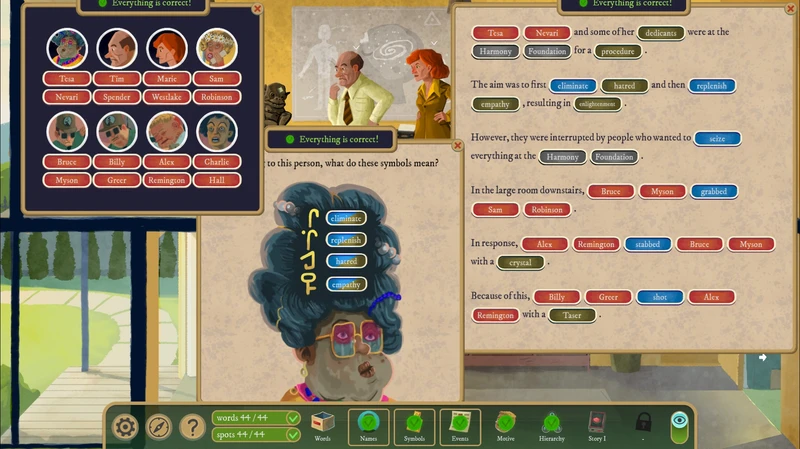
- Symbol Over Door: Empathy
- Injured Guard: Taser
- Healthy Guard: Bruce. Tweet
- Morning Orders: Spender, Marie, Taser
- ID Card: Billy, Greer
- Bloody ID Badge: Myson
- Injured Man: Neil, Remington
- Screaming Woman:
- Cat Poster: Mittens
- Letter: Hall, Harmony, Foundation, Procedure
- Agenda: Elminage, Replenish
- Reader machine: Crystal
Scene 2, Harmony Foundation
- Black board: Order, Empathy, Justice, Chaos, Hatred, Injustice
- Trash can: Dedicants, Seize, Enlightenment, Crabbed, Stabbed
- Tesa’s Level Readings: Procedure, Sam, Alex, Charlie
- Tim: Tesa, Pen
- Marie:
- Pen
- Reason Institute Letter: Reason, Institute, Westland, Nevari, Harmony, Foundation
- Blue Dresser: Illuminate, Replenish, Purify, Eliminate, Obscure, Contaminate
- Yellow check blazer: Tim, Spender,
- Answering Machine Call 1: Hatred, Shot
- Blonde lady: Robinson, Harmony, Foundation, Procedure
This ones gives you an Events scroll, and then a Motive scroll when you fill in the first.
- The clock says 9:25 PM, so, according to the cult agenda, they were measuring their levels at the time of the incident
- Have you ever played Eternal Darkness? In that game, you cast spells by making sentences out of runes, each representing a word. So heal was Absorb Self and attacking was Protect Area. The idol operates on similar principles
- The Runes scroll asks for what Tesa BELIEVES the runes to mean. That’s not to say that she’s absolutely right. They reflect her spiritual views more so than they reflect the magical system
- Tesa’s notes assign names to empathy/hatred values. Is that enough to ID people?
- It’s hard to see what happened in the room with the attack, but someone lost a flip flop, broke a crystal off the table, knocked over the stool, attacked the guard, and dropped the crystal
- We already know from the chapter select and scenario 2 that Spender/Westlake evict Tesa and the Harmony foundation. The Hippies didn’t seem pleased about it last time, so it’s unlikely they went quietly
- The phone messages state that a person filled with hate is being abruptly brought along to the event. This person is new and likely wasn’t formally invited like the others.
- Does the enlightenment reading on the machine match anyone?
- The procedure room, when combined with the agenda, appears to be set up for someone to have their levels read at the stool, and then they’re placed in the chair to have their empathy/hatred manipulated with the idol.
- If that’s the case, then remember that it’s 9:25 and they were still doing readings. Why is someone in the chair early?
- Tesa believes that every day, her dedicants are closer to enlightenment. That is, their empathy goes up and their hatred goes down. If that’s the case, someone’s values correspond to the length they’ve been in the program
- The guard’s radios show the injured one message for police and the uninjured one deploy something.
- The woman on the phone has a nasty mark on her wrist. Where’d that come from?
- When the bloody crystal hit the floor, it rolled a pattern of its facets. Whoever used that bloody crystal would have a distinctive stain from its facets.

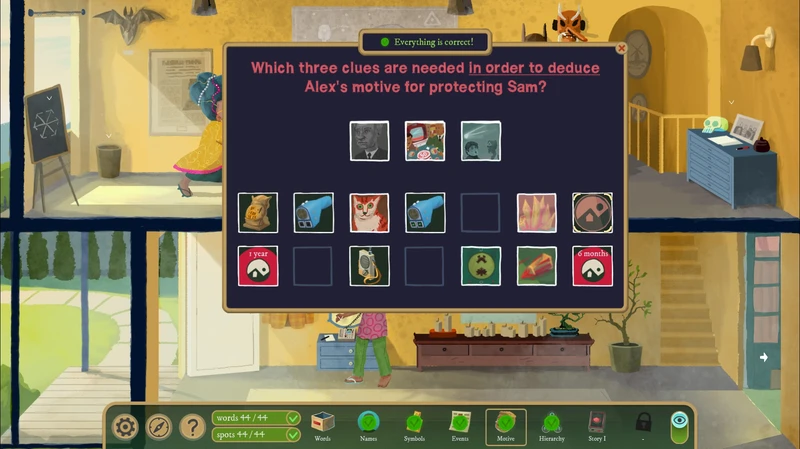
Motive Scroll
- The phone messages show someone asking to bring a second person along, abruptly. Two of the dedicants must already know one another
- It’s possible for a picture to portray the same person at a different age than they are at the present or in another photo.
- Remington’s note says that he was taught to always stand up for family. Is anyone here related?
