All Queen’s Domain guides
Filling the Queen’s Domain bestiary to 100% means finding all 188 entries. Most of them are regular enemies you run into just by playing. The hard part is the secret enemies, bosses, mini-bosses, and loot lizards. They never respawn, and many sit behind hidden walls, keys, or items you only get late in the game.
The list below assumes you have unlocked every location and have probably reached Ending 1, maybe Ending 2 as well. Expect spoilers for late-game areas and bosses.
Where to Find All 188 Bestiary Enemies
- Enemies are listed by region, in the same numbered order as the bestiary.
- Bold names are secret enemies, bosses, mini-bosses, or loot lizards. None of them respawn.
- Directions are given for the one-of-a-kind enemies. Regular enemies show up on their own as you play through the game.
- If an enemy has no directions, search the region it is listed under.
Isle of Neasied (1–15)
- Ratty Bug
- Chicket
- Forest Eye
- Meganeura
- Skeletal Fighter
- Skeletal Archer
- Chilopoda
- Coelacuda
- Mimic: It sits near the base of the center tower, posing as a chest.
- Star Lizard
- Shrine Guardian
- Grave Guardian: In the Cemetery beside Deimpo Mausoleum, find the small stone building with a single skeleton inside. Jump around to its back to get in, then pull the lever by the door. A hidden staircase opens, and the enemy is waiting there.
- Mossy Golem: On the cliff above the starting beach, where the Chilopoda are buried, a mossy stone sits in the middle. Kill every buried Chilopoda, then hit the stone a few times to wake the Golem. It may also appear on its own once the Chilopoda are dead, but this is not confirmed. Players in the comments confirm that hitting a moss-covered rock activates it.
- White Tree Guardian: You need all 5 Trident Keys. Go to the area with 2 Ratty Bugs and the tree holding 2 Forest Eyes. To the right of the first dungeon entrance, on the path with the shortcut back to the front entrance of Deimpo Mausoleum, a bush hides a fake wall. Behind it are 3 Trident Key slots, then 2 more, and then the room with the enemy.
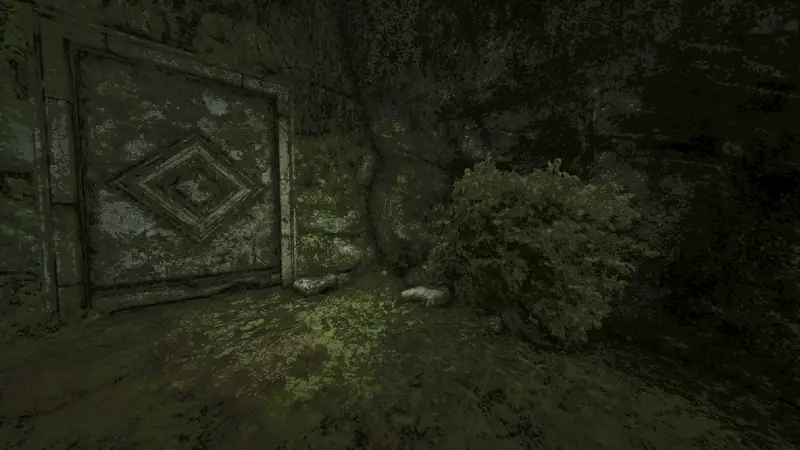
- Forgotten Sentinel: On the Duck Merchant’s island to the east, behind the Mausoleum. Cross the water to get there. The enemy stands on the bridge to the Duck Merchant’s shop.
Obmuer Temple (16–35)
- Red Nibbler
- Hardshell Meganeura
- Barnacle
- Skeletal Warrior
- Skeletal Soldier
- Skeletal Arbelist
- Homopiscium
- Toxic Homopiscium
- Glaucusion
- Baleful Chilopoda
- Yepo of the Royal Orbewa Guard
- Erda of the Royal Orbewa Guard
- Wami of the Royal Orbewa Guard
- Aquatic Star Lizard
- Dagoom the Sea King
- Toxic Serf
- Homopiscium Priest: It stands on top of Obmuer Temple, out on the surface of the island.
- Rotten Thorny Gape: Inside the temple, in the room where you fight the 3 Royal Orbewa Guard mini-bosses. The room has an upper water area where you start, a lower water area you drop into, and a dry area at the top with the centipede guard and the door that opens once all 3 are beaten. A dirt slope runs from the lower water up to the dry area. On the wall to the right of that slope, still partly in the water, a small hidden wall hides the enemy. One of the lenses you get later reveals it, so you can come back if you can’t find it.
- Flesh Gargoyle: At the top of the island, right above the spot where Erma, the fish woman, lives. Look near the pointed rock with cloth wrapped around it in a spiral.
- Treacherous Sea Prince: Bring every Orbewa Egg to Erma, then leave her alone for a while. When you return, the enemy is there.
Tower of Knowledge (36–56)
- Book Bug
- Grand Book Bug
- Cultic Book Bug
- Gargoyle Warrior
- Gargoyle Arbelist
- Pus Bag
- Crawler
- Candle Crawler
- Poltergeist
- Manticore
- Iron Star Lizard: About halfway up the open center of the tower is an easy-to-spot platform ringed with candles. The enemy sits in the middle of them.
- Learned Star Lizard
- Necronomicon
- Skeletal Executioner
- Necrotic Baphomet
- Necrotic Eye of Balor
- Necrotic Bael
- Necrotic Shambler
- Docile Gargoyle: Outside the tower, near the wing portal, stands a row of gargoyles. Close to the food dish, one of them wears a monocle and has a pile of books in front of it. Hit it a few times and it turns hostile.
- Bones of Archivist Inha: Right after the trap door, climb the stairs, turn around, and jump over them to the ledge above. A hidden wall there opens into a small dungeon with Pus Bags and this enemy.
- Brass Drilling Unit: You need the Flying Mushroom Fossil. It is at the top of the tower, under the giant bell.
Deimpo Mausoleum (57–77)
- Giant Spider
- Giant Bat
- Venerable Skeletal Mercenary
- Venerable Skeletal Knight
- Venerable Skeletal Marksman
- Chattering Skull
- Grave Eye
- Impaler
- Wheel Dancer
- Azure Crawler
- Golem
- Wandering Stalker: Directly below the group of injured knights with the supply chest. It is invisible.
- Ujji’s Reanimated Corpse: Go back to the small group of injured knights after you beat the Mausoleum boss or find the supply chest key. Getting far enough in the game may also trigger it, but this is not confirmed.
- Grave Star Lizard
- Poenir, Rotten Wings of Despair
- Duenir, Depraved Horns of Agony
- Noble Sentinel: On the roof of the Mausoleum.
- Bound Spiker: In the spider cave, a stone column keeps rising and sinking. When it reaches the top, slip into the small gap inside it. It works as an elevator and carries you down to a hidden room with this enemy.
- Wodaso’s Temple Keeper: You need the Cube throwable. Go to the huge chamber with 3 tall pillars of stone cubes. Each pillar has a button at a different height. Hit all 3 buttons with the cube to light the 3 torches and open a hidden chamber.
- Metallic Pus Bag: Just before the room with the Mask of 2nd Sight and the boss entrance, there is a raised area with silver goop oozing out of it. Climb the rubble pile beside it, then air dash inside.
- Bone Machine: You need the Flying Mushroom Fossil. In the safe, temple-like area with green stained-glass windows and lots of plants, fly up to the ring of windows overhead. One of them is broken. Slip through it to find a spaceship and the enemy.
Ancient World (78–100)
- Sapphire Rhino
- Ungulacrita
- Scarlet Watcher
- Ochre Coelacuda
- Vermilion Homopiscium
- Sepiicanis
- Nautigallus
- Dolomite Golem
- Viscous Thorny Gape
- Ancient Pail Chopper
- Ancient Aegus Wing
- Ancient Drilling Unit
- Ancient Mecha Knight
- Ghost Manticore: A player reports it at the 5th wind gem shrine.
- Raging Star Lizard: Just left of the big metal bridge to Siraatsu Castle is a cliff with Sepiicanis on it. Look for the bubbles. Climb the cliff, or drop down from the upper fish pond area, and you’ll find the enemy pressed against the cliff side.
- Deep Star Lizard
- Ancient Besom Cutter
- Josami Lord Saijha
- King Upobna: Near the upper fish pond, not the lower one. Fliers with a crude drawing of a fish man cover the cliff wall. The gap between them is a hidden wall, and the fliers lying on the ground point to it.
- Strange Explorer: Give all 10 Data Modules to the scientist. Leave or rest, then come back to start the fight.
- Arch Sepiicanis: In the underground lab on the separate island with 1 of the 3 signal towers. It is the same lab that holds the shock rifle. In the room you drop into from the vents, a hidden wall sits behind some boxes, right next to the food platter. The enemy is behind it.
- Furtive Nautigallus: On the same separate island with the signal tower, up on a cliff near the piles of scrapped robots and the save crystal.
- Aureate Ratty Bug: Out in the open on the cliffs right above the spot where you first enter the Ancient World.
Siraatsu Castle (101–124)
- Pail Chopper
- Aegis Wing
- Drilling Unit
- Mecha Knight
- Besom Cutter
- Auger Impaler
- Fated Wheel Dancer
- Josami Berserker
- Josami Sentinel
- Agate Thorny Gape
- Tourmaline Chromobula
- Regal Star Lizard
- Drilling Unit X
- Besom Cutter Pro
- Duke Obetda
- Duchess Ubhaer
- Ritual Blood Tauropod
- Ritual Blood Stalker
- Queen Siraatsu
- Enraged Queen Siraatsu: The second phase of the Queen Siraatsu fight. It starts when you fight her with the True Holy Sword Akunra.
- Soul of Sipeha: Not required for 100%. Ending spoiler: it appears when you fight Queen Siraatsu with Okbujo’s Judgement.
- Albino Bookbug: In the storage room near the room with the bar and the big table full of food. A note behind the bar hints at what it is. Attack the book in the storage room.
- Gilded Pus Bag: Behind a hidden wall in the 2nd-floor hallway lined with bedrooms. It is almost straight across from the doorway to the room with 2 Drilling Units, a console, and a chest against the back wall.
- Cosmic Bones: In the second area, take the one-way drop into the big open room filled with oil or water. This is the room with the piles of robot scrap and the flying Tourmaline Chromobulas. Right after landing, fly across the oil to the empty platform on the right, where you’ll find a hidden wall.
Assorted Dungeons and Verdant Hollow (125–155)
This is the messiest part of the bestiary. It mixes enemies from several small dungeons with some that show up in later areas such as Verdant Hollow. The dungeons are the one under the caves below the Tower of Knowledge, the one by Obmuer Temple, and the Forgotten Dungeon.
- D1, Tower of Knowledge dungeon: Clear away the flesh in the cave area, then keep heading down.
- D2, dungeon near Obmuer Temple: At the fish statue, go left instead of right (right leads into the temple). Drop onto a small cliff with a food platter, then keep going left into the dungeon.
- D3, Forgotten Dungeon: The only named location without a teleport. Walk along the bridge between the Tower of Knowledge and Deimpo Mausoleum, jump over to the round tower structure, and fall into a small cave and dungeon area. A much longer fall from there takes you into the Forgotten Dungeon itself. The upper area is called the sub part below, and the deep one the main part.
- Mechanical Spider
- Dappled Giant Bat
- Putrid Chicket
- Shrouded Crawler
- Thorny Gape
- Stygian Barnacle: It has nothing to do with the entries around it. It lives at the top of the Tower of Sin, in a lush forest area, and shoots black ink balls at you.
- Black Skeletal Reaper
- Black Skeletal Butcher
- Black Skeletal Gunner
- Obsidian Golem: In the cave-like part of the Forgotten Dungeon with the pools of blood water. Look for a cave opening set very low, close to the blood water. Inside are candles and a few pots, and the Golem appears there.
- Sparkle Bug: Locked in a cell in the main part of the Forgotten Dungeon. A player found the way in: in the cave section, find the gunner standing in complete darkness on a huge root, across from a reaper and a butcher, and drop down to the right of it.
- Scarlet Mimic: It is not in the Forgotten Dungeon itself but in the small dungeon right above it. Walk along the bridge between the Tower of Knowledge and the Mausoleum, jump to the small round stone tower on the left, and fall into the Mechanical Spider caves. Go through them until you can jump over a small pool of blood, which puts you in the dungeon. Jump over the large pit that leads down into the Forgotten Dungeon, take the ramp on the right, and keep going up until you reach a room full of Occultists and spiders, with one chest and barred windows facing the Tower of Knowledge. A broken patch of floor there lets you drop down to a second “chest”, which is the Mimic.
- Gleaming Star Lizard
- Occultist Josami Warden
- Occultist Josami Templar
- Fanatical Star Lizard
- Lost Sentinel
- Black Skeletal Witch Husipo: In the main part of the Forgotten Dungeon.
- Cursed Skull: Witch Husipo summons it during her fight.
- Blood Angel Lord Yuumed
- Blood Angel Lord Woyeki: 144 and 145 are fought together. You need the Blood Angel Josami Key, which you earn by clearing the blood ritual gauntlet between Verdant Hollow and Rotting Cavern. It is a large round pool of bright red blood and hard to miss. With the key, go down into the main Forgotten Dungeon and explore until you find a big red door to use it on.
- Manticore Cultist
- Orphic Ungulacrita
- Mystic Watcher
- Forest Walker
- Pale Nibbler
- Ghost Coelacanth: It swims around the big lake in Verdant Hollow. Its bright blue glow makes it hard to miss.
- Huge Rotting Bat: In the Rotting Cavern, right behind the door that needs the 4 black triangle pieces. It waits in the room with the snake statue.
- Dragon Lord Usunha
- Malachite Dragon Wujomiod: 153 and 154 are fought together. They are behind the massive door surrounded by 8 green torches inside the Verdant Hollow temple. Take the lens inside the temple, then use the Mask of 2nd Sight to find all 8 statues holding a round disk. That opens the door.
- Vespula Ungulacrita: It roams the forest almost exactly in the middle of Verdant Hollow and is hard to miss. Check the cliff near the collapsed section of bridge.
Rotting Cavern (156–171)
- Vile Serf
- Pungent Shambler
- Noxious Glaucusion
- Fetid Meganeura
- Rotten Homopiscium
- Perverted Mass of Warped Flesh
- Depraved Mass of Charred Flesh: It floats around the sewer-like dungeon in the center of the Rotting Cavern.
- Rotting Eye: In the same sewer-like dungeon, go down the tunnel where the turquoise turtle switch was. A hidden wall on the right side of the tunnel hides the enemy. A player notes that the wall only becomes visible after you find Jigeki’s lens.
- Jejano The Forgotten: On the central island of the Rotting Cavern, above the sewer-like dungeon, a small set of ruins has a closed doorway sitting oddly on the side of the cliff. Hit the small bell next to it with a throwable weapon to open the door.
- Gigantic Serf: Keep walking through the rotting water until the big fish takes the bait and attacks you.
- Blood Angel Berserker
- Blood Angel Sentinel
- Blood Angel Warden
- Blood Angel Templar
- Ritual Blood Chromobula: 166 to 170 are all fought in the blood ritual gauntlet, in the large ruins between Verdant Hollow and Rotting Cavern.
- Irdunuub, Priestess of Jigeki: Behind the locked door of Jigeki’s temple in Verdant Hollow. You need all three key pieces. One drops from the Gigantic Serf, one is in a cave under the big metal bridge to Siraatsu Castle, and one is in the hidden chamber under the Mausoleum spider caves. To reach that chamber, wait for the stone elevator to rise all the way, step into the small pocket, and ride it down.
Record of Sin (172–181)
- Lost Book Bug
- Mystic Book Bug
- Champion Keeper
- Vigilant Keeper
- Eye of Silver
- Beryl Chromobula
- Tauropod: 176 to 178 only spawn after the Herald of Okbujo boss has been activated or defeated.
- Stalker
- Raw Glaucusion: In the basement of the Tower of Sin, where you collected the 3 blue orbs. Go through the broken walls into the Stalker caves and take the cave on the left, the one where you can drop down to either side. Pass through the hole in the wall, and the hidden wall is just left of the blue plant roots.
- Herald of Okbujo
Petrified Garden (182–188)
- Living Stone Skeleton
- Living Stone Chilopoda
- Living Stone Homopiscium: Players say it is the petrified fish man with a crown standing just behind the altar, and that you have to hit it to wake it up. Another player mentions 4 crowned fish men scattered around the area. They only wake up after a few hits, and with the mask equipped you can find them standing in front of the sigils.
- Living Stone Spider
- Living Stone Crawler
- Epha Mimic
- Lost King Ojjama
Entries 182 to 187 stay inactive and out of reach until you defeat Lost King Ojjama and place all 5 trident pieces in their matching color slots. The colors match the gems on the 5 statues found around the world.
Credit: @PovKetz