All One Million Coins guides
This One Million Coins speedrun route consistently finishes in under 20 minutes, and on version 1.1 it reached an 11m 03s leaderboard time, all without cheats or exploits.
One Million Coins: Speedrun Strategy
This route reached times under 20 minutes. In version 1.1, it once held the top leaderboard spot with a time of 11m 03s. It isn’t the most optimized route, but it was done without cheating.
Cheating and Exploits
Some leaderboard times do come from cheating. A very early 47-second time is most likely one of them. How to cheat, and how cheating should be handled, is not covered here.
Other exploits probably exist as well. In 1.0, for example, you could save and quit to reset certain cooldowns. Whether tricks like that should count toward a time is your call. This route doesn’t use bugs on purpose, but you may still feel some parts go beyond intended use.
Nodes
Most builds are fun to play, but the nodes are not equally strong. The advice below assumes the current final goal: collecting all 1 million coins and depositing them.
Version 1.0
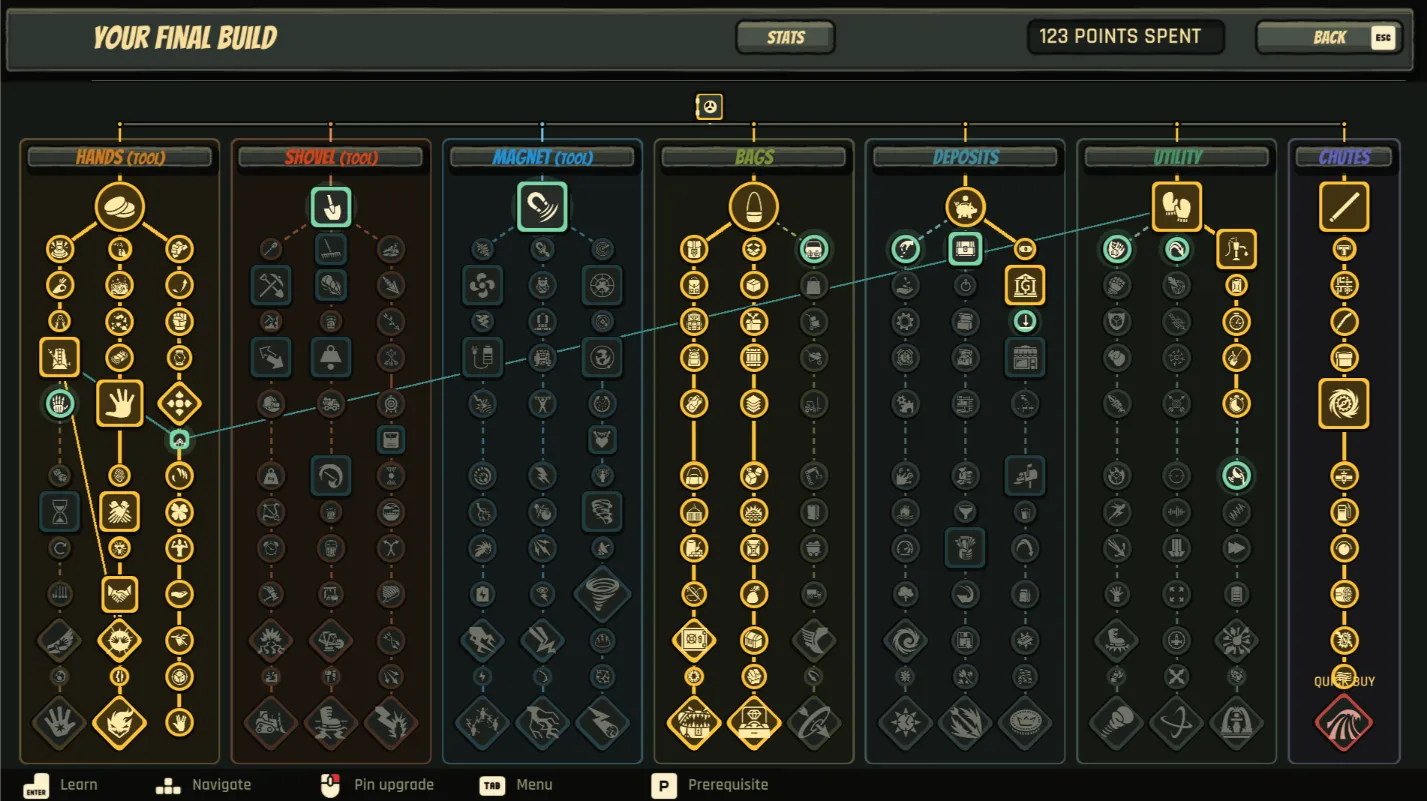
If you only want the time achievement, this order should empty the whole map automatically in under 30 minutes:
- Take all the left side chute upgrades.
- Take the right side chute upgrades (overdrive).
- Take all the goldrush nodes (deposit tree).
Version 1.1
Nodes fall into three groups: gathering coins, capacity, and depositing coins.
- Gathering: The hand, shovel, and magnet all have strengths and weaknesses, but hands are the strongest overall. Gathering by hand is too slow for very fast times, so speed, width, strike, and lightning upgrades matter less than options that give huge bursts. The double grab (hand tree active ability) scales partly by percentage, so a very large capacity makes each use very strong, reaching 25k+ by the end.
- Capacity: Early on, it lets you avoid depositing coins by hand. Later, it raises the percentage part of the hand active.
- Deposit: Depositing by hand is also far too slow for top times. The best run with this route lasted 663 seconds, so even 15–30 seconds spent depositing is too much. Auto collection (chute and portable bank) is by far the strongest choice early on, and the auto deposit in the utility tree takes over late in the run. The utility pump works by percentage, so it keeps up with your capacity even when you hold almost the full vault.
Map
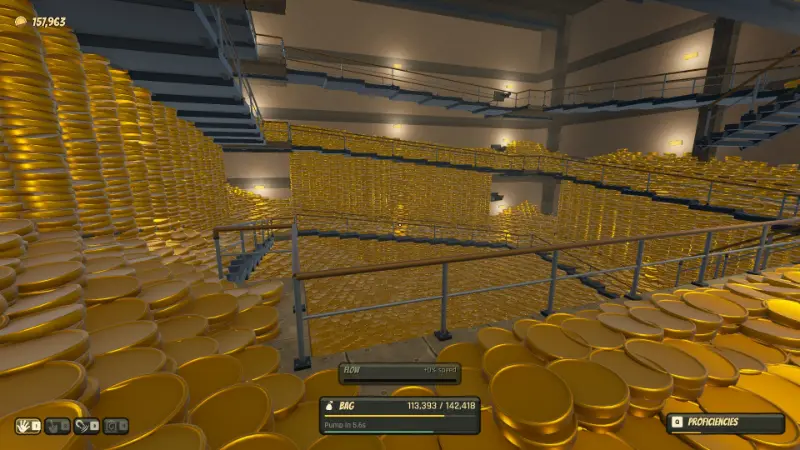
The coins don’t sit in one big pile. They form about five piles close together:
- Middle
- Top (opposite the elevator)
- Left
- Right (outside the railings)
- Elevator
Gather only from the middle for a while and look around: you’ll see four outer shafts of coins. Work these shafts from the top. Hitting them from the bottom or the side keeps lightning and some active abilities from reaching their full effect.
As your build gets stronger, make a point of knocking down those four outer shafts instead of staying focused on the middle.
Speedrun Walkthrough
This route is for version 1.1, after the first rebalance.
Early Game
- Pick up the first 25 coins by hand. It’s the only thing you can do at the start.
- Spend your first point on the first chutes upgrade. It only gives 1/s, but that beats grabbing coins by hand.
- Turn in your capacity and keep gathering by hand.
- Rush the portable bank, which takes 3 points. Put each new point into faster deposits and empty your small capacity. You should only need to turn in about 2 times.
- When you earn your 4th point (1 chute, 3 deposit), place the portable bank. It gathers 1000 coins per second, many times more than you can gather by hand.
Mid Game
You’ll usually place the portable bank around 3–5 minutes in. From here, the bank does most of the work while you help out. The goal is to balance gathering speed and capacity, so you collect as many coins as you can without ever having to deposit them.
- Take the first 3 big cap (left side) upgrades.
- Take ghost hand 1 (middle hands tree).
- Add a few more capacity upgrades as needed.
- Take flow (left side hand tree).
- Keep taking capacity upgrades until the full left side tree is done, then switch to the grab active. Before this, the active is still too weak to be worth it.
Late Game
You’ll usually get the grab active around 8–10 minutes in. Once you have it, it’s usually worth going straight down its full tree for the biggest percentage increase. You can also take the middle capacity tree at this point for an even bigger cap, around 800k by the end.
The main boosts for the hand active seem to be:
- Capacity size, for the percentage part
- Hand gather size, from the other 2 lines
- Ghost hands, which also seem to help a lot. It’s unclear whether that comes from the coin amounts or whether the ghosts use the active too.
By now, each active should gather 10k–25k coins, and you’ll start getting several upgrade points per use. Spend them in this order:
- Fill out capacity.
- Fill out the middle and left hand lines.
- Put the rest into auto deposit (up to 25%) and chutes.
Draining sections: The active can pull so many coins that it empties a whole section (see the Map section). Right now, the active fails if there are coins above the target. Drain sections too fast and you may have to walk back up to reach the others, which is slow. From early to mid game, hit each section from the top so you don’t leave an empty bowl in the middle.