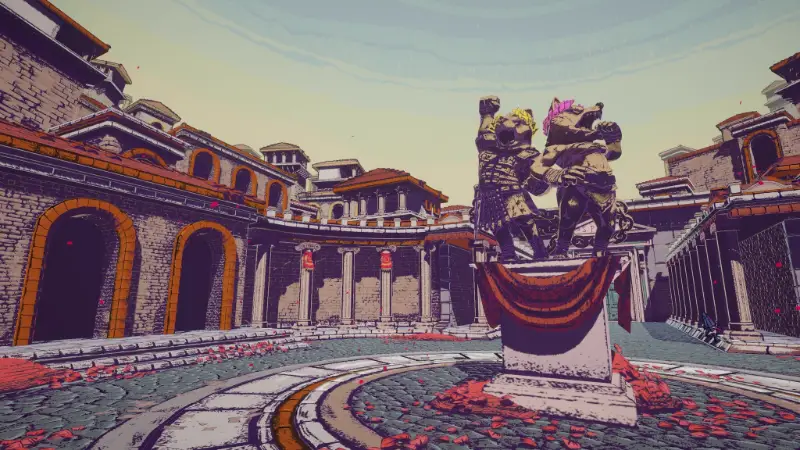
Get started in Chained Beasts with practical tips that help new players survive the arena and grow stronger.
Chained Beasts: Beginner Guide

Overview
You play a member of a defeated people, taken prisoner by the emperor. The fights are staged to keep the common folk distracted. Your goal is to survive them, and in the end bring down the dictatorship and win your freedom.
You can play alone or in a team of up to 4 players. A stable internet connection matters a lot here. A player with a weak connection keeps getting kicked from the lobby:
- Best case: they reconnect, and the whole team starts the day over. This happens even if they drop 0.01 seconds before the last NPC goes down.
- Worst case: some players get stuck on a black “Loading” screen while they can still hear their allies fighting and the chains rattling. No fix has been found for this yet.
When you create an online lobby, turn on the “Crossplay” option. It probably won’t stop the bug, but friends can then join with a code instead of waiting for a manual invite.
Classes
There are 8 beasts in the game right now. Each has a base trait and a bonus for every level.
| Beast | Base trait | Level 1 | Level 2 | Level 3 |
|---|---|---|---|---|
| Rhino | Shield durability x2 | -30% damage taken | +50% stun duration | Shield throw |
| Goat | +20%* movement speed | Rolling costs 50% less stamina | “Vigor” effect when HP is below 25% | Longer chains that also deal extra damage |
| Wolf | Higher chance to tear off limbs | +200% damage with limbs | Limbs give gold when picked up | Limbs restore HP when picked up |
| Panther | -15 HP, +20%* damage dealt | +50% special attack damage | Rolling into enemies knocks them down | A series of hits on one enemy raises your damage |
| Bear | +15 HP, -20% movement speed | Invulnerability and rage for 2.5 seconds after taking damage | +20% damage with blunt weapons, plus a short stun | Revive after death with 10% HP and rage |
| Eagle | — | +50% throw damage after a melee kill | +50% throw damage after a backstab | +50% throw damage after a block |
| Lion | Unlocks posing after killing enemies | Posing (Tab) boosts damage and speed for all players for 10* seconds | Posing (Tab) gives gold | Posing (Tab) gives weapons |
| Monkey | +1 skill reroll per level | +2 random skills, +1 ailment (2/3) | +50% fist damage; the special fist attack launches enemies | +1 skill every 3 levels, with only one skill to choose from** |
Values marked with * or ** are estimates that haven’t been reliably confirmed. The HP bar moves in steps too large to read exact numbers by eye.
Base HP is 45 for the Panther, 75 for the Bear, and 60 for every other beast.
Class Notes
A higher beast level is not always an upgrade. Here is how each one plays:
- Rhino: Overpowered at level 1. Stun duration doesn’t matter much, and a perk can give you the same effect. The shield throw seems useless.
- Goat: One of the nicest beasts to play, thanks to the speed boost. Without speed, the Goliath fight in Germany can go very badly. Every level is good. The extra chain damage is easiest to use in a solo run.
- Wolf: At level 1, torn-off arms and legs hit extremely hard. Two of them are enough to kill a boss. At levels 2 and 3, limbs vanish when you pick them up and give you either a few coins or some HP instead. Coins only help with challenges and achievements. The HP gain is tiny, roughly 2–5 points by feel, and hard to notice mid-fight. Two Wolves in one team is a waste: the limb chance doesn’t stack, and you’ll compete for the same limbs.
- Panther: Strong at level 1. Special attacks, especially from behind, kill most grunts in one hit. The mace is a must-have weapon for this beast. Level 2 adds knockdowns, which only help in rare cases. You can keep enemies on the ground by spamming throws, but skipping straight to level 3 is the better call. At level 3, the spear is a must-have.
- Bear: Tanky and strong, but awkward to play. The invulnerability after taking damage is overpowered. It cuts damage from fire and from bosses that slam you into walls. Skip level 2. Level 3 is good for solo play but not overpowered: 10% HP is only 7–12 points. The Bear is slow, so stray arrows and spears hit it often. Boots and speed perks are a must.
- Eagle: A niche pick. A boosted throw almost kills a spear-wielding slave in one hit. A throws-only run works well because of the high damage and long range. Level 3 is the easiest to use and adds the most DPS.
- Lion: Mostly about striking poses. It’s a support beast for the team. Bring at least one per group, since the boost lasts about 10 seconds and is very strong. At levels 2 and 3, the crowd throws gold or weapons while you pose.
- Monkey: Useful for rerolling a skill into a better one, but only once. Two extra skills at the start help you settle on a build, but the two-skull debuff hurts. Level 2 is just for fun: fists need heavy investment through skills, surgeon upgrades, and a brass knuckles purchase from the shop. Level 3 is so niche there’s little to say about it, and it’s not worth risking a run on.
Mechanics
Spamming the left mouse button works on the first difficulties. Each new difficulty asks you to learn every mechanic and actually use it.
- Blocking: This is essential. Pick up a shield, press the block button, and turn toward an enemy that is about to attack or throw something at you. A shield takes several hits, but only one from a boss, so keep moving and grabbing new ones. A successful block also stuns the enemy for a couple of seconds.
- Stun: A stunned grunt stands still, dazed. It can’t block, and it’s easy to get behind it.
- Backstab: Hits from behind deal extra damage, so take every chance you get. Some skills give +50% backstab damage. Attacks on a downed enemy count as backstabs, and backstabs give 3 seconds of Vigor.
- Chains: Characters are often chained to a rock, a log, another player, or a mechanism. A rock slows you down and sometimes gets stuck. A log gets stuck much more often, especially in the Goliath boss fight. Try not to tangle yourself on anything. Wrapping the chain around enemies, though, is a good idea. It can knock them down, bosses included, which opens a short window for a backstab. If you wrap the chain tightly around a grunt and then roll, it deals solid damage.
- Throwing: You can throw scrolls, chairs, barrels, and body parts. Green barrels release a few snakes when they break, which deal light damage to anything nearby. Red barrels explode when thrown, and explode after a short delay when you hit them.
- Training: Level up, and do it hard. From the second difficulty on, you train between fights. Each session fills 1 to 3 bars, and reaching a skull gives you a debuff. The more you overlevel, the fewer bars you gain each time. Heavy overleveling made for the strongest runs. It gets you the most useful skills, but the run then relies on luck. Some debuffs are easy to live with (limp, hernia), and some are very unpleasant (hallucinations, farsightedness). If the debuff is one you can handle, go for it. If you see Red Meat in the shop (experience stops dropping at the end of training), buy it.
- Economy: Save gold whenever you can. If the surgeon offers a debuff, or a chance of one, for money, take it.
- Debuffs: Don’t be afraid of them. Seven or more per run is normal. Runs have been cleared with 11–12 debuffs by training to the limit every day and putting everything into experience. Almost all debuffs are playable.
Debuffs to watch out for:
- Unpleasant: paranoia (you can’t tell enemies from hallucinations), confusion (your inputs are delayed), farsightedness (nearby items are harder to see).
- Very dangerous: madness (your controls are swapped around), impulsivity (you buy items and pick skills automatically).
Shop
The shop has a lot of goods, sorted into four types:
- Instant effect: Works right after you buy it. Cures ailments and restores HP.
- Passive effect: Stays active from the moment you buy it. A must-have.
- Equipment: Yours for good, and you pick it up in the lobby before a fight. Each player has a single equipment slot. To take an item off, walk to an empty rack in the lobby and press E. There is plenty of storage: you can own at least 6 pieces, and nothing gets removed.
- Arena: Spawns in the arena at the start of every fight.
Every purchase is permanent. The shop opens only two or three times per game, so hoarding gold makes little sense. Unless you farm gold hard, you’ll have enough for one good shopping trip at most.
Top buys:
- Red Meat: Experience doesn’t drop at the end of training, which spares you extra debuffs.
- Poisoned Apples: Half of the enemies enter the arena with lower health. Handy, since you’ll face a lot of grunts.
- Orange Slice: Water heals 12 more HP. One of the strongest buys, as long as you don’t take too many hits.
- Speed Sandals: +25% movement speed. A frequent pick.
- Weighted Vest: You move 20% slower but get 2 experience points at the start of training.
- Ankh: If you die in a fight, you come back with 50% health. It breaks after one use.
- Explosive Arrows: Good against bosses and mini-bosses that surround themselves with grunts. You get only a few shots, but they can turn a fight.
- Blazing Obsidian Sword: Deals strong fire damage. Hit, let the flames burn out, then hit again.
- Pincers: Almost always a must-have, though your teammates will want them too. Hold them and strike your own chain to break it and free yourself.