This guide gives tips for designing, cutting, sewing, trim, thread color, and earning money in Dressmaker.
Dressmaker: Tips and Tricks for Beginners
This guide collects practical tips for Dressmaker in four parts: general tips for making a dress, working with trim, making money, and changing thread color.
General Tips and Tricks
Design the Dress
Measurements and requirements
- Do not measure a client twice. Press the load button under Confirm to bring back their saved measurements.
- A requirement marked “max” is an upper limit. You can stay below it, even at 0.
- Your first draft does not have to match every requirement. Fabric has a strong effect on the score. Accessories have only a small effect.
The draft bars
- The yellow line is your target.
- The dark green bar is the value you are sure to get.
- The striped green bar is a range. Your result can fall anywhere between its low and high ends, depending on how much of the fabric you use.
Choosing items
- Gold highlights help your score. Red highlights hurt it. Gray means no effect.
- Some patterns, fabrics, and accessories give negative values.
- Always use the filters. You can filter by design type and by fabric.
- Anything you add on the design page gets a star. It then moves to the top of the lists when you cut and decorate.
- To see more of a fabric you already own, tap it in your inventory.
- Small dots under a design name show that it has more options.
Cut the Patterns
- Check the direction of each piece. It is easy to place one upside down.
- Straightening a pattern is optional. If you skip it, you fit more pieces on the fabric. The quality drops a little, so sew to 100% to balance it out.
- Rotate a piece with the arrows or the mouse wheel. The wheel is slightly faster.
- Hover over a piece for a moment. The game shows where it goes on the mannequin.
- To unroll more or less fabric without trimming it, press A or D, or use the arrows.
- To recycle a cut piece, drag it out of the side menu. This helps if you dislike the fabric or made a mistake.
Sew and Assemble
Sewing
- If sewing is hard, turn on “sewing assist” in the settings. The game then moves the fabric for you.
- Even with sewing assist, go slowly. Stop near corners, or tap in short bursts.
- Bad sewing lowers your quality. If you sew better afterward, your sewing percentage rises again.
Unsewing
- Be careful when you unsew a piece during assembly. You will have to sew it again.
- If a piece will not come apart, something pinned on top of it is probably blocking it.
Accessories and camera
- Hold Shift while you add an accessory to make copies of it and place them quickly.
- For full X, Y, and Z rotation of advanced decorations, turn on “Accessory Rotation Gizmo” in the settings.
- Pan up and down with WASD. Turn the mannequin with the scroll wheel.
Finish the Dress
- If you cannot finalize a dress, you probably missed a pattern or left something unsewn.
- In photo mode, you can change the mannequin color, the background, and the lighting.
- Gifting a dress raises your level with that person. Each new level unlocks new patterns for your sketches.
Extra Tips
- Press Ctrl + Shift + C to open the “cheats” menu. It seems to let you import and export designs.
- To report a bug, use the game’s Discord.
Working with Trim
Place trim
- Click once to drop a pin after a short stretch, about a few inches or centimeters.
- Keep going. You do not need to click again to continue.
- Place more pins wherever the dress curves or folds.
Short stretches work best. Several pins let the trim follow the curves and folds of the dress.
Edit or delete trim
- Hover over the red pins at the ends or in the middle of the trim. The selected stretch turns yellow.
- Click to start working on it. The last pin you placed becomes active.
- Right-click to remove the trim back to the previous pin. Repeat to go back further.
- To continue the trim from an earlier spot, left-click a highlighted pin.
- To remove a whole lace or trim, click it once. Then click the X in the square at the top.
- You can move pins that you have already placed on any lace or trim.
Camera for trim work
- Hold the scroll button and move the mouse to turn the camera. This also lets you look above and below the dress.
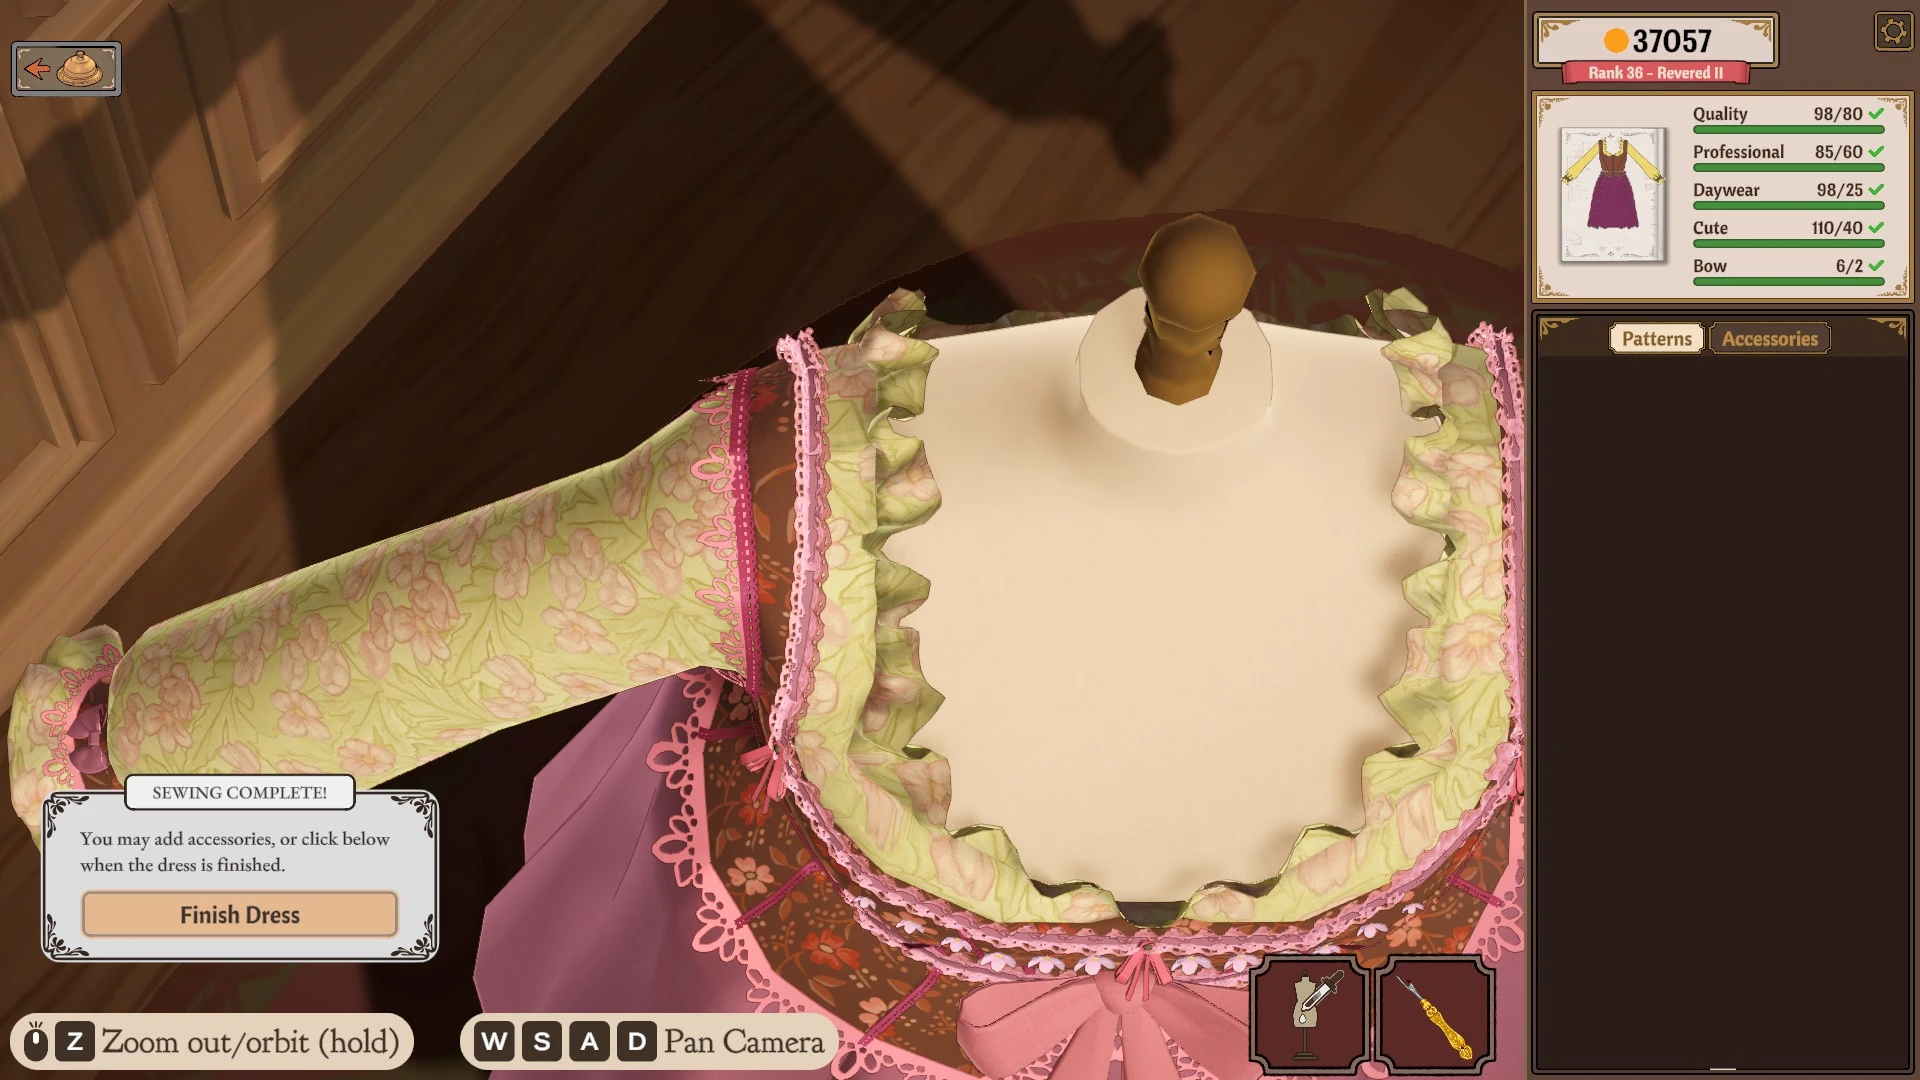
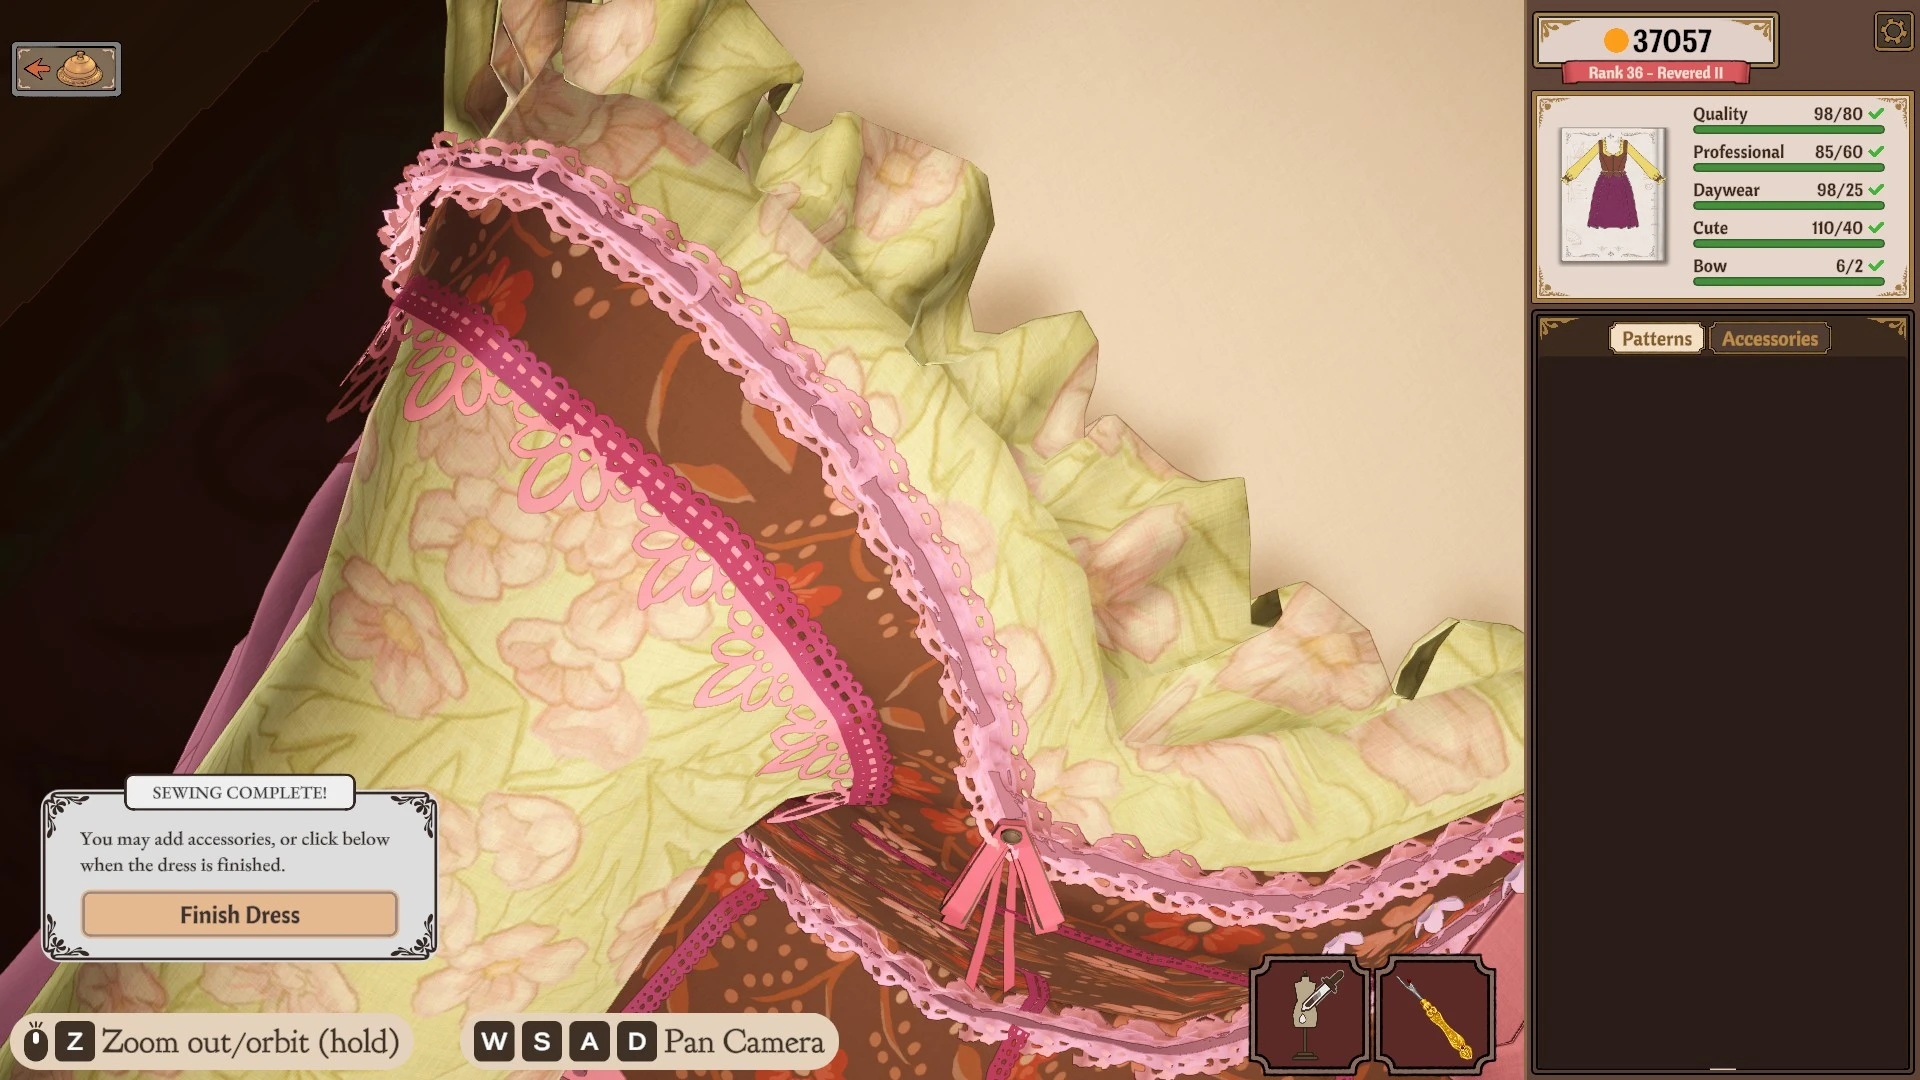
- Zoom with the Z key or by pressing the scroll button. Zoom a second time to get extra close.
- Zoom in when you add small items. Details are hard to see from far away.
- While zoomed in, move the camera with WASD. Turn the dress by clicking and dragging.
- If the dress stops rotating, leave the mannequin for the shop and go back.
Zoom level 1:
Zoom level 2:
Fix trim problems
- Cuffs: Zoom in close and move the camera around the cuff as you work, so you can see the back and sides. The method is the same as for the whole dress, only smaller.
- Upside down: Drag the trim in the opposite direction, for example right instead of left.
- Clipping into the dress: Tilt the trim up a little with the adjustment buttons.
- Wonky trim: Go back to the last good spot, place a pin, and continue. A fold or curve probably caused the problem. A pin tells the trim how to handle the change ahead.
- Layering: The raise and lower buttons bring a piece of trim in front of other trim.
- Closer to the fabric: The raise and lower buttons do not seem to push trim deeper into the dress.
- Parts in the way: You can take off parts such as the sleeves while you work on details. If the sleeves are in your way, take them off or add them last.
Finish the trim
Trim is sewn on automatically when you finish the dress. To preview the dress without pins, go back to the fabric tab.
Making Money
- Burlap is free. Selling it earns a little. Selling your scrap material earns much more.
- Commission jobs seem to pay twice: once to make the dress and again when it is done.
- If you buy too much material by mistake, make a quick dress from it and sell it off the rack. You will get your money back, and more.
- The pigeon unlocks fairly early. It lets you invite certain characters to your shop so you can make them a dress.
- To check the price of a commission dress, press Sell and then cancel. Do not confirm the sale by accident.
Unlock off-rack selling
An off-rack dress is one you make for the shop, not for a commission.
- Finish your first three dresses.
- Open your sketchbook.
- Turn to the next page.
How the price is set
- Material: Costlier material gives a higher price.
- Labor: This depends on the time you spend.
- Quality: A multiplier of up to 150%. Cut on the grain and sew to 100%.
- Prestige: A multiplier of up to 150%. It depends on your rank in the game.
Another player’s formula:
(Materials + Time spent sewing) × ([Quality bonus + Prestige bonus − 100] ÷ 100) = Sell price
For example, cloth worth 500 gold with 150 quality and 110 prestige returns about 805 gold. Selling off-rack seems to always make a profit.
Make a high-value dress
- Make a simple dress.
- Cover it with accessories made from expensive fabric.
- Hold Shift and click to place them one after another.
- Sell the dress off the rack.
In one example, a simple dress held about 98 Ruby Brooches, layered on top of each other on the chest. The dress was worth 6,576 gold. After labor and bonuses, it earned 11,239 gold.
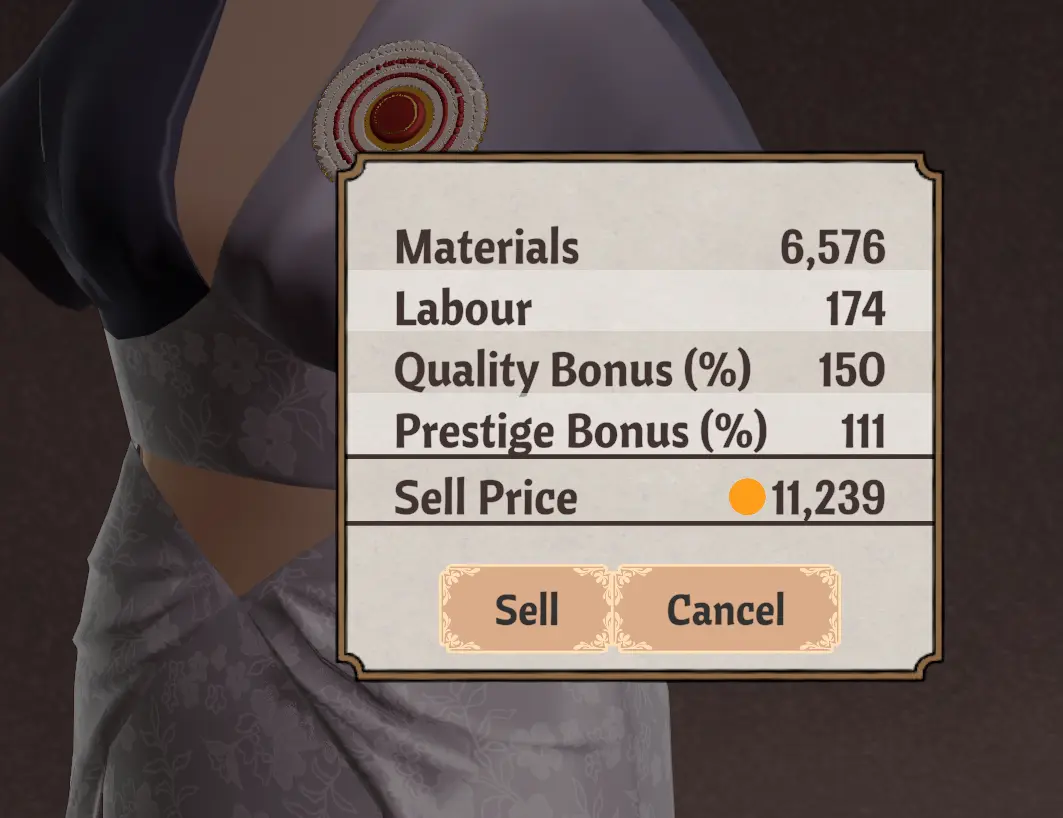
The more you spend on materials, the more you get back. Two or three dresses like this give you enough gold to treat your favorite characters.
Changing Thread Color
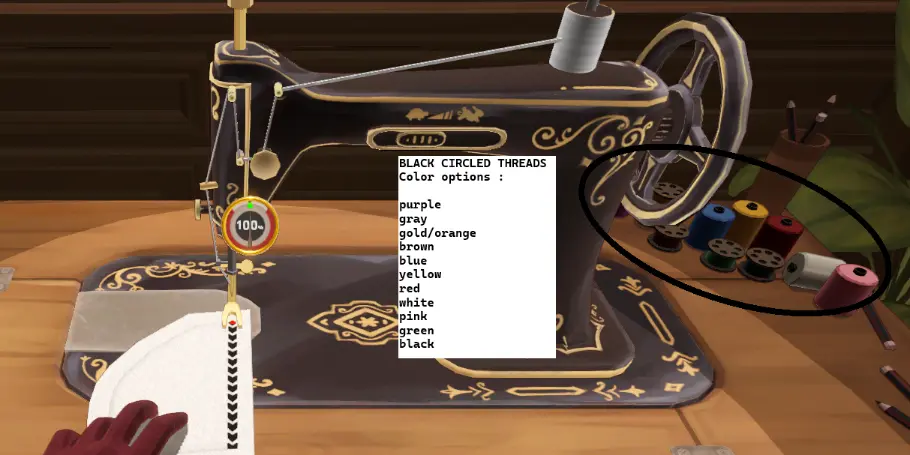
Thread color has no effect on the result for now. Change it if you want to see the thread more clearly or match your fabric.
- Go to the sewing screen.
- Click one of the colors in the corner.