This guide showcases the most efficient early game factory layouts in Satisfactory.
Satisfactory: Best Early Game Factory Layouts
Explore clear and readable factory layouts to streamline your production, whether you’re a beginner or a seasoned player.
Note: You may notice that some splits/merges in the diagrams show more than three inputs or outputs. This is because they serve as placeholders, not specific instructions, allowing you to apply whichever split/merge method fits your build.
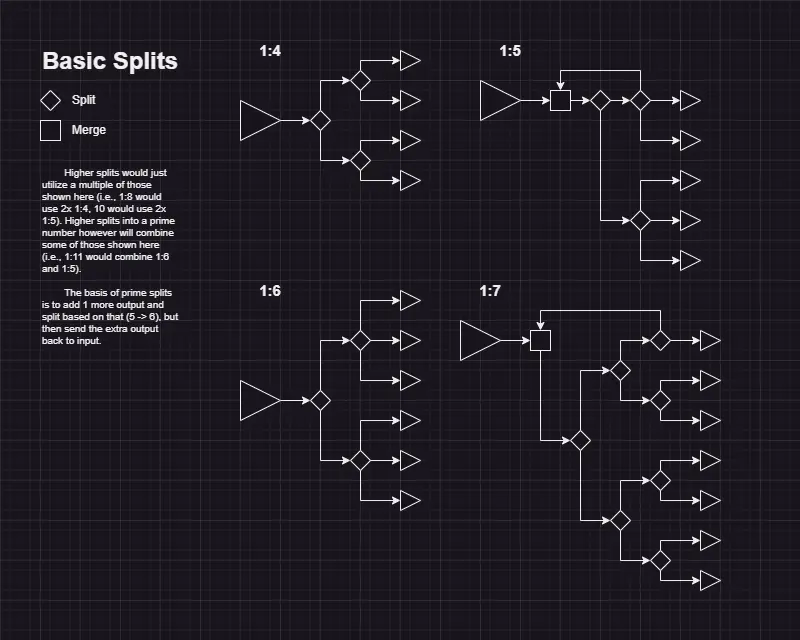
Basic Splits Explained
Higher splits would just utilize a multiple of those shown here (i.e., 1:8 would use 2x 1:4, 10 would use 2x 1:5). Higher splits into a prime number however will combine some of those shown here (i.e., 1:11 would combine 1:6 and 1:5).
The basis of prime splits is to add 1 more output and split based on that (5 > 6), but then send the extra output back to input.
Basic Parts
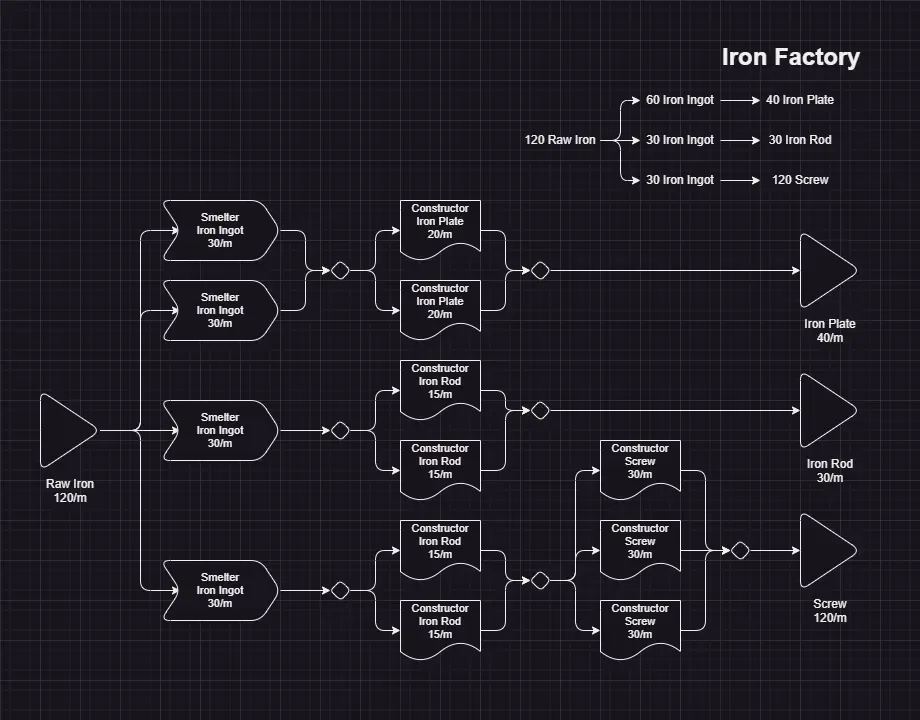
Iron Factory (Iron Plate, Iron Rod, Screws)
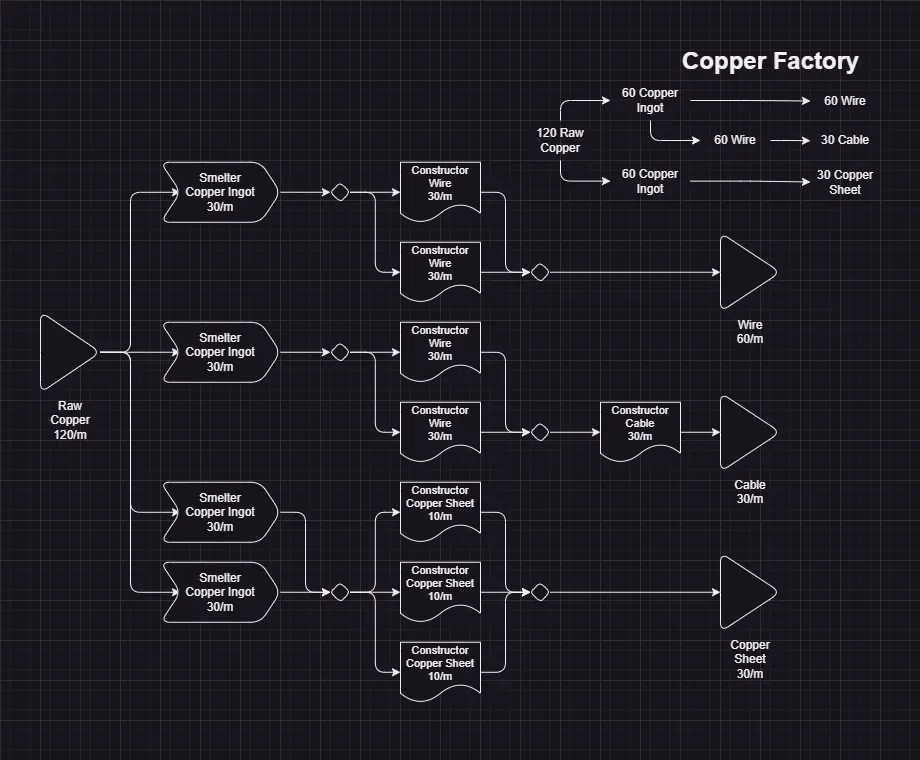
Copper Factory (Wire, Cable, Copper Sheet)
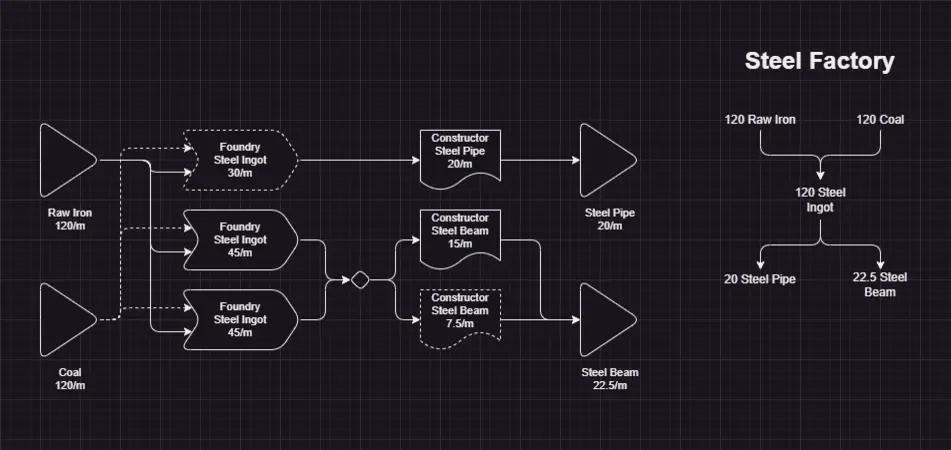
Steel Factory (Steel Beam, Steel Pipe)
Industrial Parts
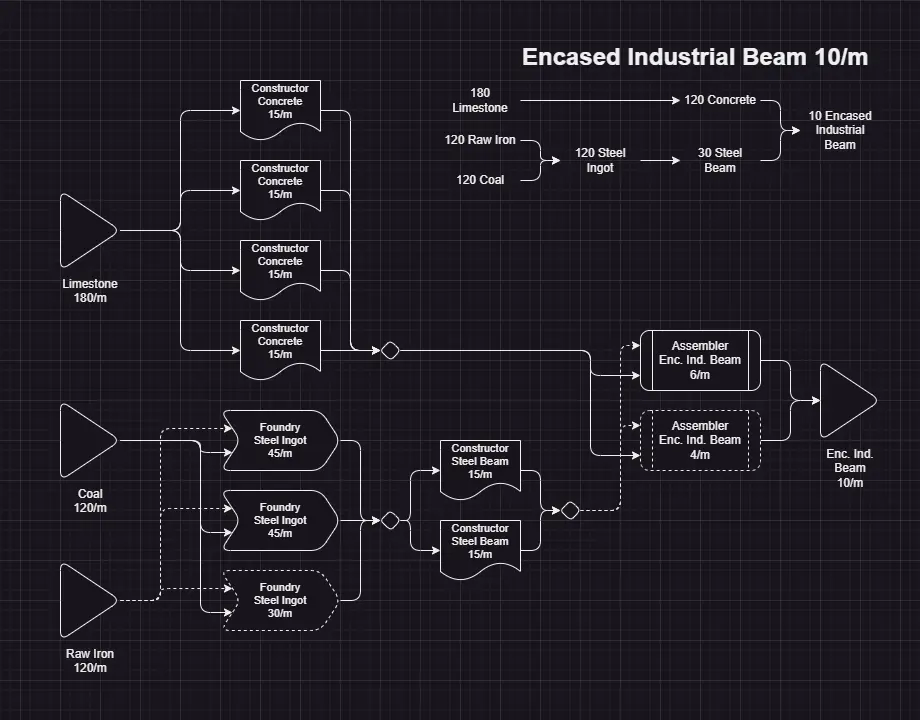
Encased Industrial Beam
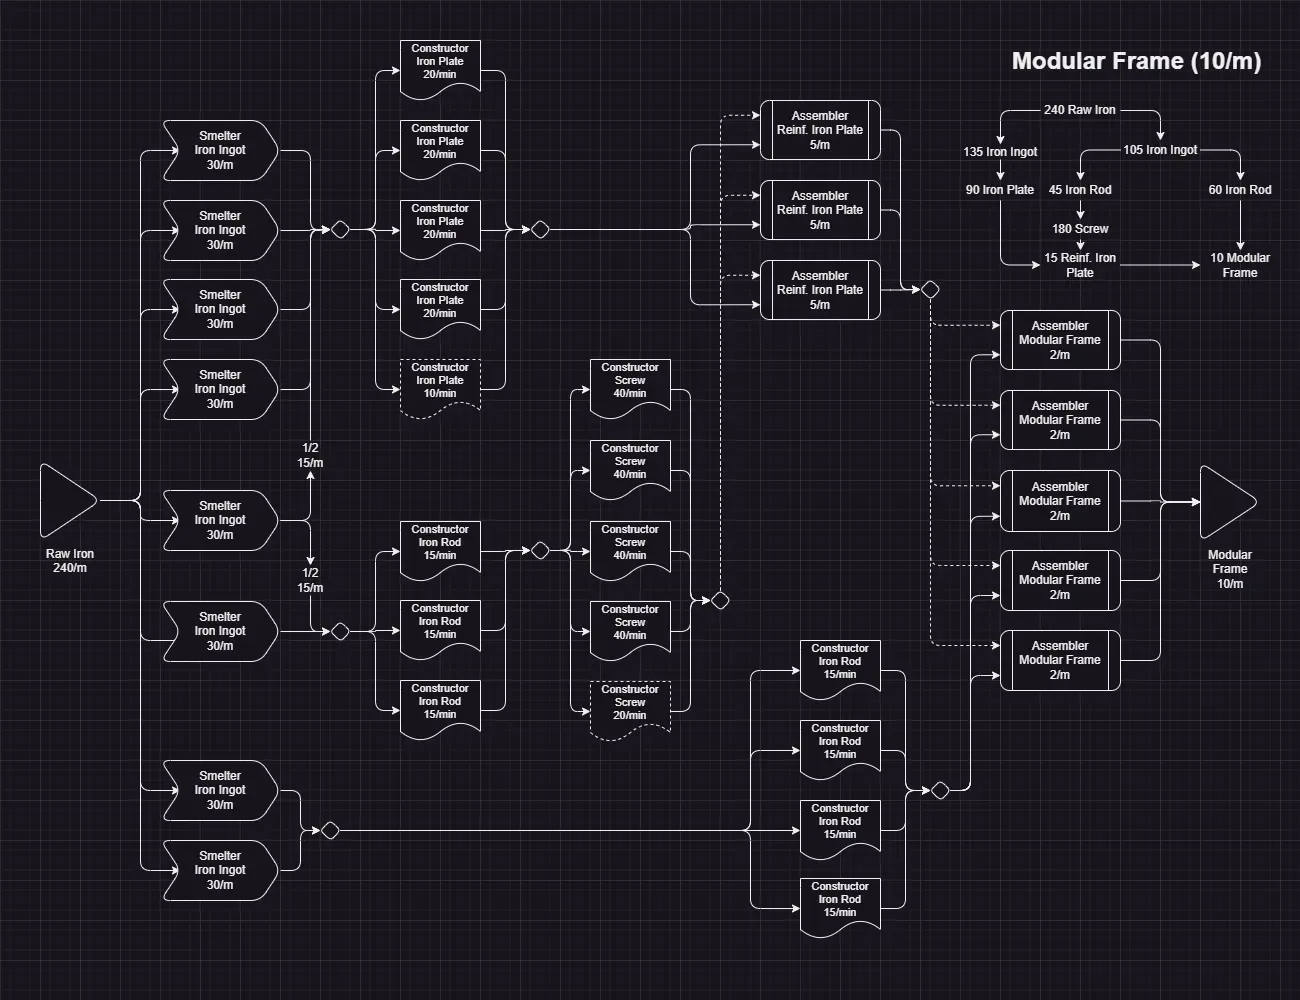
Modular Frame (10/m)
Reinforced Iron Plate (20/m)

Rotor (16/m)

Credit: @bunger