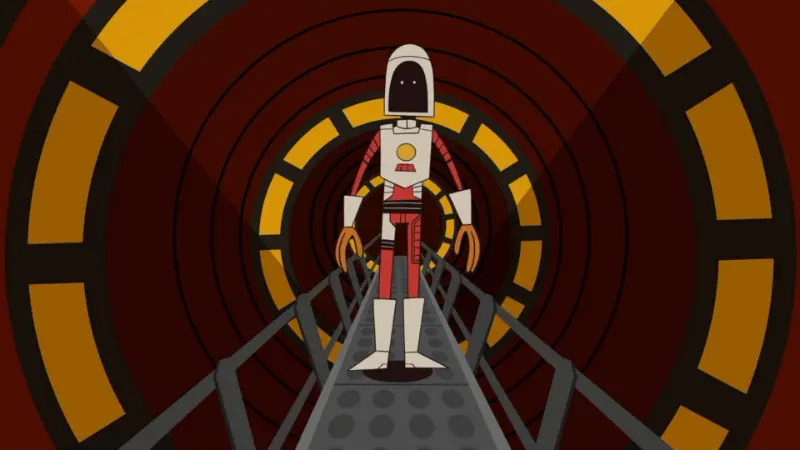
Finish the whole story with only the wrench, following a Story Mode route with door and turret codes for RetroSpace.
RetroSpace: Wrench-Only Run Walkthrough
This route takes you through the whole game using only the wrench. It was played on Story Mode difficulty.
Finish the game once the normal way before you try it. The route relies on things you already know, such as door codes, to keep moving.
The Warren Wrechman achievement needs a wrench-only run. A single pistol shot, even on the Android Mainframe, is enough to lose it.
- Faster paths probably exist, especially through the Borealis Gardens, which can be confusing.
- You will end the run with plenty of loot, so you can skip some of the later looting to save time.
Start
- After you wake up, go up the slope and take the wrench from the cryo pod.
- Pick up the items nearby.
- Go up the next slope and take the hand wheel. Fit it to the pipes and turn it.
- Drop through the hatch, grabbing items on the way.
- Go down the slope.
- Remove the battery and drop it in the puddle.
- Hit the fuse box with the wrench to charge the battery.
- Open the door with code
0937. - Loot the room.
- Turn on the janitors portal with code
1234. The symbols are a circle with a line, a figure 8 with two dots, a triangle with a line, and a square with a line. - Climb the ladder and jump up into the crawlspace.
- Loot the lockers, then climb the ladder.
- At the end of the corridor, turn left.
- At the far end of the room, turn left again.
- Climb the ladder.
- Cross back over the conveyor belt and go through the door.
- Deal with the mothman.
- Run down the corridor to the large door.
- Watch the Nebula cutscene.
- Go left and jump over the junk barricade.
- Loot the lockers and corpses here.
- Go into the garden.
- Walk to the end of the corridor, deal with the moth head, and take the fire extinguisher.
- Go left and follow the path around to get the shotgun.
- Keep going around and pick up the map attachment.
- Turn left and go through the small door.
- Take the hand wheel, fit it to the pipes, and turn it.
- Loot the room.
- Return to the corridor and turn left.
- Break the glass, jump through, and deal with the mothman.
- Save first. Then jump off the balcony and use the fire extinguisher to break your fall. The save lets you retry until you get the hang of it.
- Aim for the lowest platform below you.
- Pick up the keycard.
- Climb halfway back up the ladder.
- Before you reach the hatch, jump from the ladder onto the small ledge.
- Go right.
- Skip the first vent.
- Drop to the ledge and keep going right.
- Go through the vent and ride the lift up.
- Go straight through the green-light hatch door.
- Follow the corridor, jump up to break the glass, and enter the office.
- Take the sucker and loot the room.
- Enter security code
5315to make the turrets friendly. - Go back down the corridor to the lift, then around to the right and down.
- Break the fan blades and enter the janitors room.
- Loot the room. A blueprint lies on the side away from the portal gate.
- Go through the portal.
- Walk forward and talk to MIA.
- Loot the Haven.
- Talk to MIA again and take the head from the box.
- Go to the portal and select Status Chambers.
- Go through the portal.
- Go back up the stairs.
- Avoid the turret and keep climbing.
- At the terminal, enter code
1477to make the turrets friendly. - Open the biometric scanner door.
- At the end of the corridor, break the fan for loot.
- Take the cleaning products. Turn around and jump onto the ledge with loot and a card on it.
- Follow the corridor down and around, looting as you go.
- Go to the end of the corridor.
- Wait for the scream. Then go to the control panel, staying clear of Steve.
- Enter security code
2177to make the turrets friendly. - Loot the containers.
- Pick up the Block head in front of the counter under Steve.
- Walk around to the capsules for loot and a keycard.
- Use the keycard on the door without a head.
- Loot the room and climb the boxes to the vents.
- Keep left and loot the corpse.
- Continue around to the right and drop into the hall.
- Turn left before the steam pipe and follow the corridor to the disco room.
- In the disco room, stay along the left wall, break the glass, and jump through.
- Turn right.
- Kill the mothman and take the first door on the left.
- Go through the green vent door.
- Drop down and follow the corridor straight ahead.
- Keep following the corridor and deal with the moth head.
- Climb the ladder.
- Walk around into the storage room.
- Loot the dead mothmen. Climb the ladder to find DJ Charlatan’s loot.
- Use the platform to jump to the other side of the room. Go through the vent to reach the next portal.
- Loot the room, then keep heading down.
- Turn left to loot, then go through the green-light vent door.
- Loot this room, then open the door next to the snack machine.
- Loot the room and lift the quarantine lockdown with code
1234.
Alt Timeline
- Loot the room and scrap items you don’t need while MIA talks.
- Return to the Mutamod machine. For a wrench run, take Rhino Body.
- The turrets are active, so move carefully.
- Sneak up the ladders and use the platforms to get back to the DJ Charlatan area.
- Move forward and break the vent grills.
- Drop into the medical room and go left through the door.
- Deal with the mothman.
- Go around to the left and back into the main medical chamber.
- Deal with the mothman.
- On the terminal, enter code
2177to make the turrets friendly. - Loot this area too.
- From the console, turn left and walk to the door. Hit the panel with the wrench to power the door control.
- Save, then hack the door.
- Walk down the corridor to the room you dropped into from the vents.
- Open the door with code
2236. - Get the pig man’s attention, then hide in the small room left of the door control.
- Let Steve handle him.
- Once Steve is done, loot the body and go into the morgue.
- Search the ground level. Any drawer with a green light can be opened.
- When you are done, climb the ladder to the left of the door you came in through.
- Follow the gantry and loot the lockers.
- Ride the pneumatic tube.
- Use the door panel on the right side of the small room you arrive in.
- Follow the corridor and break the vent to drop into the washroom.
- Go to Nexus Plaza and watch the cutscene.
- Run right, keeping close to the pool. On the far side of the plaza, run to the door marked Security and open it.
- Walk toward the torch, then look back to find an open vent panel.
- Go in and take the blueprint.
- Follow the vent up and over without triggering Steve.
- Keep winding through the vents. When you come out in the main corridor, you jump back to the current timeline.
Repair Engineering
- Once you are on your feet, turn right, then go left into the room to avoid Steve.
- Loot the corpse at the far end of the room, then follow the corridor around to the right.
- Deal with the mothman.
- Run around Steve to the control desk and enter code
5973. - With your back to the control panel, take the left door and loot the room.
- A vent at the left end of the room leads into the locked room.
- Follow the vent into the locked room.
- Loot it, then go back to the room where you entered the vent.
- Be careful: the mothman behind the first door on your right is bugged. You can’t hit him with the wrench while he is inside, and he gets stuck trying to leave. He can still shoot you.
- Go back to the control desk room and open the opposite door with code
3333. - Loot this room.
- Return to the control desk room and walk away from the Cerberus Sector door.
- Jump over the glass balcony. Have the fire extinguisher ready to break your fall.
- A mobile Steve unit patrols here. Take the Level 2 security card lit by the torch, then sneak left past the robot.
- Run forward and climb the ladder.
- Deal with the moth head.
- Go past the fires. You can run past the moth heads and up the ladder on your right.
- Head right, back to the security console room, then keep going back to where you first came in.
- Watch for the mobile Steve unit on patrol.
- You can kill it, then loot the pig man’s body and search the room for more loot.
- Go back to the main door. It now opens into Nexus Plaza.
- Start running, because Steve is active. Turn hard left into the Train station doorway.
- Go down the ramps, avoiding Steve, and turn right into the train station.
- Loot the platform quickly. Cash and food sit by the Heal-O-Dome.
- Board the train and set course for Engineering.
- Use the ride to sort your inventory.
- Get off at the Engineering station.
- Collect the loot around the room.
- In the alcove to your right as you enter, pick up a large box to block the steam. Then take the hand wheel, fit it to the pipes, and turn it.
- Jump up to get a blueprint.
- Go up the stairs and enter Engineering.
- Follow the corridor to the main chamber. Marco asks for help.
- Go right and take the stairs up to the left.
- Loot this room. Go right (the way you came in) and note where Marco’s office door is.
- From the door, look left and jump over the railing onto the girder. Walk along it and drop down to your right.
- Break the vent and drop into the room.
- Rush forward and deal with the mothman.
- On the control panel, enter
0715to make the turrets friendly. - Crouch and loot.
- Find the vent in the far corner of the room.
- Break the grill and follow the signs for Janitors.
- Go left down the ladder. Collect the loot and activate the portal.
- Keep going left and drop down the ladder.
- Hit the generator 3 times to start it.
- Go back up to the room where you entered the security code.
- Open the door and run around to the left.
- Deal with the mothman.
- Keep running up to the control room.
- Take the stairs all the way up.
- If a pig man chases you, let Steve take him out.
- Find the generator and hit it 3 times to start it.
- Loot, then go back to the main hall. Head for the bottom level, under the stairs that lead up to The Core.
- Find the generator and hit it 3 times to start it.
- Go up the stairs and take the red-light corridor to the Core.
- Enter the Core. Deal with the 2 mothmen and turn the 3 hand wheels by the core.
- Go back through the office for some cash. There is more booze and cash on top of the building.
- On your way out, note the disc on the floor in front of the doors. You will come back to this spot later.
- Take the corridor back to the main room. Follow the sign left for the stairs and train station.
- Go all the way up to Marco’s office, dealing with a mothman on the way.
- Talk to Marco. Loot the small room, then click the painting behind the desk to open the secret compartment.
- Leave the office, use the girder to drop back down into the office, and go to the janitors Haven.
- Marco’s console is now available there.
- Buy increased inventory and upgrade it to max, along with hacking and sucking. These only cost recycled parts, which you should have plenty of.
- Take the portal back to Engineering.
- Return to the train station exit.
- Select Nexus Plaza and listen to the NPCs’ requests for help during the ride.
Help Daliah and Joey
- Go back up to Nexus Plaza.
- A console sits on your left. Go to it and enter
4712to make the turrets friendly. - Turn right and enter the Security Station.
- Go back to the ladder you climbed after taking the Level 2 key card. Go through the door ahead, marked Security Floor 2.
- Follow the path right and jump up to the lift.
- Climb the vents to the green-light vent door.
- A mothman corpse lies where the corridor starts. Take its security card, then deal with the moth head.
- Turn around and go to the security console.
- Enter
3757to make the turrets friendly. - Turn around and go right, past the mothman corpse.
- Follow the stairs up and around to the right.
- Deal with the mothman and enter the compliance sector.
- Run down to the left and hit the terminal to switch it on.
- Use the keycard to get into the office.
- Loot the room and go to the far end.
- Open the door to Dahila’s Office with code
7375. - Talk to her, take the cash beside her, and leave through the door you came in.
- Open the green-light hatch and drop down.
- Go left for some loot and a medkit. Come back and continue straight ahead.
- Break the vent and make your way to the Janitors break room.
- Turn on the portal, loot the room, and continue through the green-light hatch door.
- Follow the corridor through the gas until you come up into a computer room.
- Go to the far side of the room and break the screen to disable a machine brain.
- Open the door to aggro the enemies and let them fight each other.
- When it is clear, run out of the room and go left.
- You are back in the main corridor leading to Dahila.
- Go right, right again, then bear left at a short corridor with 2 doors.
- Take the left door, the one with all the suspicious moth heads.
- Enter the room, break the glass, and jump into the next room.
- Loot the room first, then open the door.
- Break the monitor to destroy the second machine brain. Then sprint out of the room to escape a very angry Steve.
- Return to Daliah and give her the news.
- This area has a lot of loot, so explore and stock up on cash and scrap.
- When you are done, drop back through the hatch by Daliah’s office and go to the Janitors Haven.
- At the Haven, open the door by Daliah for ammo and weapons. You can also use blueprints there to upgrade your weapons.
- Go back to the Nexus Gardens to collect cash and scrap for upgrades.
- With an upgraded wrench this is easy, as mothmen go down in one hit.
- There is a lot of loot at the top of the garden. Go to Zone C and wait for the lift to cycle.
- At the very top of the garden, find a disc on the floor like the one in Engineering. Note where it is.
- When you are full, go back to the Haven and upgrade your suit.
- You need the Cloaking Device.
- Go back to the Nexus Gardens, then to the train station. The train waits at the platform.
- Select Grand Dome to travel toward the Luxury section.
- At the Grand Dome Station, use the cloaking device to loot both sides of the platform.
- Go up the stairs into the Grand Dome.
- Loop the ground floor for cash, food, and scrap. Deal with the pig man.
- Sweep the top floor, then head to the Luxury Section.
- In the security office, enter code
1999. - Leave through the other side and loot that area.
- Continue down the walkway. Loot the weapons and ammo, turn toward the Heal-O-Dome, and go through the door.
- You will find lockers with loot and a vacuum tube.
- Take the tube, loot the room, and trigger the portal.
- Skip the crew section tube for now and go back to Luxury.
- Cloak and take out the android. If one pulls its head off, run, because it is about to self-destruct.
- Enter Luxury.
- Follow the corridor to the Luxury Main Doors.
- Hack the door on your right. With upgraded hacking, this is no problem.
- Loot this area, then go to the red pole and climb it.
- Loot the main room and the two rooms off it.
- Turn on the portal. If you want any upgrades, now is the time to jump back to the Haven.
- The emergency shield is worth buying if you have the cash. Enemies can swarm you here.
- Enter the vent in the break room. Follow it left and be ready to deal with a baby.
- Break the vent into the room and hack the terminal.
- Go down the steps and turn on your cloak.
- Kill the android on the landing, then go up the stairs and kill the android in the bar.
- Loot the bar.
- Sneak down the stairs to the fembot room.
- Stay cloaked and crouched. Go to the cell on the far right and take the access card.
- Return to the landing and go through the door ahead.
- Follow the corridor right and open the door.
- Quick save.
- Take out the two fembots and enter code
1919to end the rebellion. - Loot the room and go down to the fembot area to collect 250 cash.
- Go back up to the bar, heading left. A vent faces you as you enter the bar. Go through it and work your way around the ledge.
- Break the grill on the far side of the room and follow the vent down to Joey.
- Tell him the rebellion is over. Loot the room and his desk.
- Go to the door and move the objects out of the way. Open it and crawl through.
- Do a quick loot lap of the room. Then head for the main doors marked Grad Station.
- On the way out, grab the Thank You! 🙂 bag with 50 credits and a doughnut.
- Go back to the Grand Dome and make your way to the police station.
- Take the platform on the left and drop into the pit with a body and a vent grill.
- Break the grill and drop down.
- Follow the vent. Halfway along, pick up the hand wheel. Once in the room, place it on the pipe above the vent.
- If you need upgrades, go back to the Haven and buy them now.
- Return to the Grand Dome and go down to the station entrance on the other side of the room.
- Set course for Borealis Gardens.
Help Dr Green
- Search the platform for food, ammo, and a blueprint, then go up the stairs.
- Enter the Garden Lobby.
- Open the door on your left and check the long corridor for loot.
- In the main Rose lobby, go left to Garden A.
- Ignore the plant women and go straight to the far side of the room. Jump up onto the raised walkway.
- Walk back along it and look on your right for a console you have to jump to.
- Jump over and trigger the console.
- Jump back to the main walkway and run back the way you came. Run past the plants into the main Rose lobby.
- Go right to the Garden D|C door. In the hall, loot the locker room.
- Leave the room and turn left. Enter the vent hidden behind some plants.
- There is a pile of cash and a moth head. Keep left to find the cash. Go back to the room and keep heading up, away from where you came in.
- Enter the garden dome and turn right. Follow the gantry to the lockers and door. Loot, then go down the steps while cloaked.
- Run around to the right, avoiding the plants, and trigger the red console.
- Go back to the stairs and climb. Circle the dome and take the stairs to the top level.
- Watch out for mushroom boys. One wrench hit takes them down, but they tend to explode.
- Avoid the puddles and walk to the maintenance doorway.
- Cloak and go through, down the ramp.
- Keep left and walk through the door.
- Past a janitors doorway is a green-light hatch. Open it and go down.
- Follow the path right and drop down the ladder just before the steam.
- In these vents, cash is on the left and a ladder is on the right. Take the cash and climb the ladder.
- Follow the vents and drop down. You are now on the other side of the steam. Go right and deal with the two mothmen. Head toward the steam and pick up the hand wheel. The valve is back near the main corridor.
- Fit the hand wheel and turn off the steam.
- Go back to where the steam was and turn right at the corpse. This leads to the janitors break room and portal.
- Turn on the portal and go back to the Haven to upgrade your kit. The biometric scanner and the motion sensor are good picks.
- Return to Borealis and turn left as you leave the break room.
- Follow the corridors to the right until you reach the Heal-O-Dome.
- Cloak and run in. Go to the centre and trigger the console. The mushroom boys rush you, but they explode after a delay, so you will be clear of the blast.
- Take the stairs up and walk around the dome to the Garden B entrance doorway.
- Loot the antechamber and enter Garden B.
- On your right is a ladder facing away from you. Climb it and look toward the centre of the room.
- Run to the console and jump when you hear the walkway collapse.
- Trigger the console.
- Dr Green says the lab is now open. Cloak and use the extinguisher to jump down to the Entrance doorway.
- Deal with the plant woman and go through the Laboratory doorway.
- Follow the long corridor to the end.
- Enter the lab.
- Take the gun and ammo and walk around to the right. Loot the storeroom on the right.
- Go back into the corridor and through the door ahead.
- Loot the next room.
- Return to the main corridor and walk to the ladder.
- Climb up and open the hatch.
- Take the cash and go through the vent.
- Cloak and run in. Turn left, avoid the lift, and take the first left over the bridge into Dr Green’s office.
- Have the usual chat.
- Break the glass wall to reveal the switch to her secret office.
- Loot the secret office for a blueprint and a Shard Head.
- Jump over the balcony and use the extinguisher to avoid the plants on your way back to the Gardens.
- Enter the hallway and turn left toward Garden B.
- Run in and climb the ladder up to the walkway above the main floor.
- Go to the doorway marked Garden C.
- Turn left and take the first doorway on the left.
- Drop down the ladder and go around to your right.
- Go through the doorway and turn right just before the stairs. This is where you turned off the steam near the janitors break room.
- Go around to the right and enter the break room.
- Go down the stairs to the portal and enter it.
Help Nebula
- Set the portal to Grand Station and go through.
- Enter the vent ahead and follow it to the exit.
- Jump up and turn left toward the Police Station.
- Cloak and go past the turrets.
- Go straight to the large doors and open them.
- One door here malfunctions. While it is open, place one of the large crates under it. It locks later in the game, and you can’t open it if you need to come back this way.
- Loot the corpse, then the reception office on the right.
- Leave the reception office and go through the door ahead into the main police station area.
- Another disc lies on the floor in front of you. Note its location.
- At the console in the left corner of the room, enter
9947to make the turrets friendly. - Turn left and take the first door on the left. Loot the Pig Man corpse.
- Go forward into the storage area.
- Go around to the right and loot the corpses Steve has kindly left for you.
- Run forward into the break room.
- Move the boxes and take the access card from the table next to the audio log.
- Loot the room and the corpses.
- Return to the main police room.
- Turn right and go up the stairs.
- Trigger the switch behind a plant next to some bins.
- Turn left and go through the green-light hatch that was behind the mutamod machine.
- Take the cash, turn on the portal, and go down through the hatch. Be careful, as the ladder doesn’t always catch you.
- Loot the desk and insert the keycard from the break room.
- Climb back up the ladder and enter the portal.
- Set the portal to Grand Station and go back through.
- Go down the vent ahead.
- Jump up at the end and continue to Grand Station.
- You will be told to go to the crew section. Ignore it.
- Go around to the left and up the steps.
- Deal with the mothman.
- Continue to the control zone.
- Open the doors.
- Take the cash by the statue.
- Cloak and enter the Control Zone Lobby.
- Go straight past the turret into the room with the oval walkways.
- Take the left walkway and jump to move ahead.
- Right away, jump onto the railing and use the ledges to get down.
- The fire extinguisher helps you make the long drop and avoid the fan blades.
- Pick up the blueprint, ammo, key card, and hand wheel.
- Move the two large crates and pick up the hand wheel again.
- Jump down the vent and ride the lift up.
- Climb the ladder and go left.
- Drop the wheel on the walkway, cloak, and go left. You need to jump to do this.
- Turn left into the office.
- Loot the desk and enter code
7649. - Leave the office and go to Storage, avoiding puddles on the floor.
- Open the storage room with your keycard and go in.
- Go left and take the AMIRA chip from the Captain’s Storage.
- Loot this room and go back to the Control Zone Lobby.
- Turn right into the Brain Room.
- Block the steam with a crate and hit the generator 3 times.
- Open the door with the panel and go in.
- Use the beams to get down and walk toward the console.
- Insert the Reconfiguration chip.
- Climb back up the beams and enter the room.
- Drop down and loot the area under Nebula.
- Climb back up and talk to Nebula.
- Return to the Control Zone Lobby.
- Jump over the barrier and turn left. A vent here leads to the Control Zone janitors break room.
- Break the vent, then go back and loot the lobby.
- Return to the vent and take it to the break room. Loot the room and go through the portal.
- Enter the Haven and talk to everyone. This is a good time to upgrade your suit and mutamods.
- After you talk to all the NPCs, Nebula contacts you.
- Go to the portal room and set the location to Grand Station.
- Go through the portal and down the vent ahead.
- Jump up and go to the Grand Station Chamber.
- Cross the chamber to the right, then go left and down toward the platform.
- Call the train.
- Set the next stop to Great Dome.
Great Dome
- Leave the train and go up the stairs.
- At the top, turn left and follow the corridor around to the right.
- When you leave the stairs, turn left and look for the red, shimmering portal gate.
- Click it to trigger a time shift.
- Listen to the Void Child’s monologue.
- Go back down to the platform. If you are low on supplies, you can loot this area, but by now you should have plenty of medkits and food.
- Call the train.
- Travel to Borealis Gardens.
- Search the platform for loot and go up the stairs.
- Cloak before the long hall. Mushroom boys and a Pig Man wait there.
- Enter the Rose Chamber and turn left through the lab doorway.
- Run past the plant lady to the lab.
- Enter the lab and take the ammo.
- Go past the Heal-O-Dome into the locker room for some loot.
- Go through the door ahead, take the cash, and go through the next door.
- Pick up the flower and go to the main room.
- Wait until Rose is away from you. Drop down and look left for the tube that takes the flower. Save here.
- Put the flower in the tube. Then turn around and jump back up the wall to the balcony.
- Return to the room where you found the flower.
- When the coast is clear, jump through the green-light hatch. Go up and around to the left into the room with the green tubes. Two tough plant ladies are here. Press H to use a medkit when your health drops.
- Take the hand wheel in this room and run back to the flower tube. If you get hit, you drop it, and it can be hard to find. Try not to get hit.
- Fit the wheel to the tube and turn it. Note this spot: a disc will be here when you return to the original timeline.
- When Rose comes close, she curls up and you can take a sample from her.
- Jump back up the wall and return to the platform.
- Remember the angry plant lady you left outside the lab door.
- Board the train and travel to Grand Station.
- Go up the steps toward the Luxury Sector. Two mothmen and a Pig Man are here. Cloak past them or kill them, as you prefer.
- Go down the walkway into Luxury. In the security room, enter code
1999. Loot the room and go down to the Luxury Entrance. - Bear left and take the blueprint, gun, and ammo.
- Loot the locker room.
- Follow the corridor to the large Main Hall Doors.
- Turn right and loot the storage room.
- Go back to the main corridor and take the lift ahead down.
- Search the private room areas. Kill the baby with Joey’s head and the two other babies. A quick wrench hit kills them before they can laser-eye you.
- Go past the Heal-O-Dome and turn right.
- Get ready for the Dark Side of Science.
- In the lobby, you must attach 3 hand wheels to three electrical outlets, repair a generator with 3 wrench hits, break the glass dome above, and then turn the hand wheels one after another.
- Cloak and sneak into the room.
- Cross the room toward the Stairs Doorway and go into the small doorway on the left.
- This room has a generator and a hand wheel. When the coast is clear, take the wheel and fit it to the outlet just outside, on your right as you leave. You can’t cloak while doing this.
- Wait in the doorway, cloaked and crouched. Then run right to the Dressing Room Male, avoiding puddles.
- Deal with the baby and the android.
- Skip the loot and just take the hand wheel.
- Go back to the Dressing Room Male doorway and look right. An outlet sits next to the vent grill.
- Run to it and fit the hand wheel. Cloak and run to the Dressing Room Female.
- Deal with the baby and the android.
- Skip the loot and just take the hand wheel.
- As you leave the Female Dressing Room, look right to see the final outlet. Run to it, attach it, then run through the Stairs doorway.
- Take the hand wheel and fit it to the final outlet.
- Loot the lobby and put out the fire on the stairs.
- Switch back to the wrench and go up the stairs.
- Two androids are up here. Cloak and wrench them.
- There are traps up here. If you hear fast beeping, run away from the sound before the explosions. This seems to be new since the latest update.
- This breaks the glass dome.
- Duck back in and repair the regenerator with the wrench.
- Loop around the room, turning on the generators to electrocute the Many Machine.
- Take its sample. Retrace your path through the Private Rooms to the Grand Station platform. Cloak here, because the turrets can turn hostile.
- Board the carriage and travel to the Great Dome.
- Return to where you went through the portal gate into the Alt timeline and talk to the Void Child.
Deliver the Samples
- Turn and walk through the portal.
- Pick up the head on the floor!
- Walk through the doorway ahead and go left.
- Jump over the railings and move the boxes to reveal the vent. It has a Janitors This Way sign. Don’t worry about the Pig Man.
- Go down the vent into the break room.
- Go through the portal and set the location to Police Station.
- Head back toward the break room. Go through the green-light hatch, down the stairs, and take the first door on the left.
- A few mutants wander here. Let Steve handle them.
- Run through the warehouse into the next room.
- Loot the extinguishers on the right wall.
- Turn around and go to the To Experimental door.
- Open it with the Star Head.
- Go down the long corridor and listen to the NPCs.
- Go straight through the room and down the stairs.
- Take the lift down.
- In this room, you must put a fresh battery in each tesla coil. You can loot the side room. The easiest method is to run around avoiding the horror and drop the red batteries in a puddle next to a fuse box, which you can trigger with the wrench.
- Watch your stamina, because the horror chases you. Pick up a battery when you are on the far side of the room from it, since you can’t run while carrying one.
- Some moth heads run around to make it harder. Wrench them and use health packs if you start taking damage. The Unicelular mod is very useful here to distract enemies.
- Lure the horror into the electrical fields to kill it.
- Use the cleaner spray to remove the acid and take a sample.
- Call the lift and head to the central brain. Go back through the storage area into the main hall and up to the portal.
- Go through and set the location to Control Centre.
- Take the vents into the main lobby and go left to the Brain Room.
- Talk to Nebula and place the sample in the slots in the central column.
- AMIRA announces that the process has started.
- Talk to Nebula.
- After the conversation, 4 samples drop from the ceiling.
- Pick up all four samples.
- Go back to the lobby and through the vent to the break room.
- Enter the portal.
- Set the location to Nexus Gardens.
- Go through and walk forward, ignoring the fan corridor on your left.
- Drop onto the box and leave the room through the door.
- Deal with any mothmen on the ramp who spot you. Keep following the corridor on this level, past the beer pong table.
- Wind through the corridor and deal with the moth heads.
- Climb the ladder and deal with the mothman.
- Ride the lift up.
- Cloak and deal with the android ahead.
- Many enemies here will attack each other. Stay cloaked and keep left. Jump onto the sloped, plant-covered ledge that leads toward the central column.
- Jump onto the ladder and dodge past the plant lady. Go right and scramble up the ladder.
- Go around to the right and place a sample on the disc on the floor.
- Make sure the sample is placed.
- Jump over the railing and use the extinguisher to break your fall at the foot of the lift.
- Face the It’s a Long Way Down sign and look down to see the beer pong table.
- Jump off with the extinguisher pointed down and steer to the beer pong table. This can be tricky.
- Go left through the Nexus Garden Storage door.
- Jump over the crates and trigger the switch to lower the ladder.
- Climb the ladder and return to the break room.
- Enter the portal.
- Set the location to Borealis Gardens.
- Enter the Gardens.
- Go up the stairs and out into the pipe corridor.
- Go around to the right and up the ladder.
- Turn left and cloak.
- Go through the door, jump over the railing, and turn right into Garden D.
- As soon as you are in, jump over the railing on your left and use the extinguisher to break your fall. Continue around to the right and go through the entrance doorway.
- Follow the corridor and take the Entrance doorway on your left, just past the locker room.
- Go around to the right and through the Garden B | Lab door.
- Run left past the plant lady toward the lab.
- Follow the corridor around to the right.
- Place the sample on the disc near where you put the flower for Rose. This is much easier.
- Cloak and drop down.
- Place the sample and ignore the hostiles. Turn around and jump back up the way you came.
- Retrace your steps to the gardens. You don’t need to cloak. Run left into Garden B. Take the second column in, the one with a walkway joining the walkway around the garden.
- The Garden C doorway is on your left. Go through it and follow the path left. Go through the dark doorway and down the ladder.
- Go around to the right and through the door.
- Deal with the mothmen and enter the pipe corridor where you placed the hand wheel earlier.
- Go around to the right and turn right at the corpse into the break room.
- Enter the portal.
- Set the location to Police Station.
- Enter the Police Station.
- Turn on your cloak.
- Stay on this level and go through the green-light hatch.
- Ignore the enemies. Run down the stairs and place the sample on the disc in the middle of the room.
- Go back up the stairs and into the portal.
- Set the location to Engineering.
- Enter Engineering.
- Turn left, go down the ladder, and enter the vent.
- Wind through the corridors to the moth head room.
- Jump over them and run past the pig man toward the stairs to the core chamber.
- Enter the chamber and deal with the mothman by the door. Place the sample, then retrace your steps to the break room.
- By now the moth heads and the Pig Man have taken care of each other.
- Enter the portal.
- Set the location to Control Centre.
- Enter the Control Centre.
- You jump to the Alt Time Line.
- Cloak and head for the oval walkway room.
- Run past the plant ladies.
- Keep running past the pig man and use the star head to enter the cockpit.
- Run down the stairs and use the mic on the desk to talk to the Void Child.
- Go back up the stairs and enter the void gate.
- Turn around and go through the doors.
- Break the glass and press the button. You don’t need to pick a destination.
Run Review
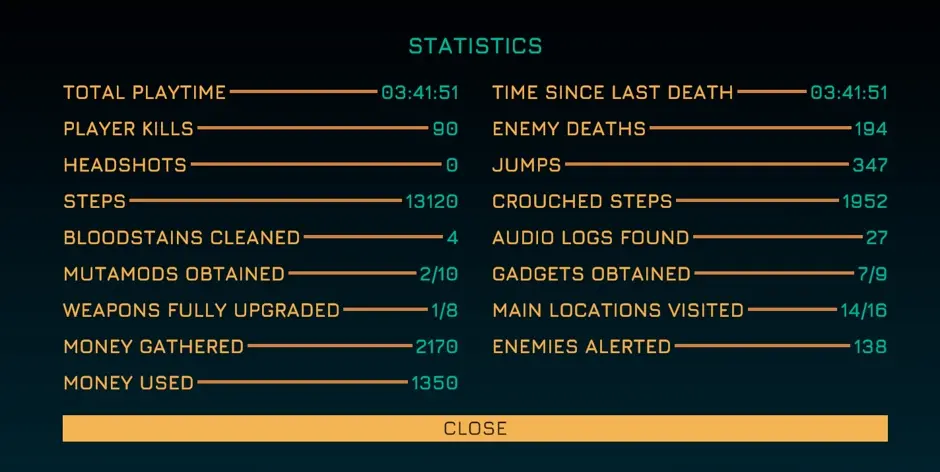
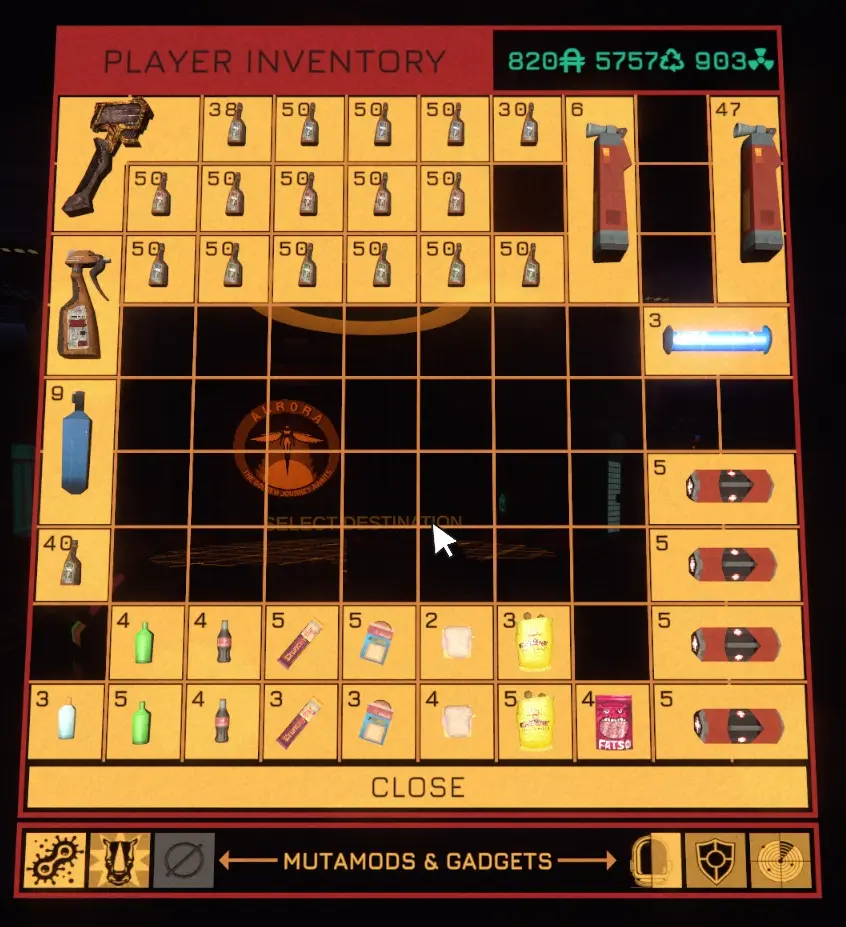
This route finished the game in 3 hours 42 minutes, with lots of cash and medkits left over. A repeat run could be up to 40 minutes faster with these changes:
- Skip looting the top of the garden early in the run.
- Get Cloaking first. It is the must-have gadget, and buying it second, after increased inventory, was a mistake.
- Save inventory management for train rides.
- Take Rhino Body. It is a great mod, and the combat difference is clear once it reaches level 3.
Credit: @oldoldboy