Guide covering all aspects of Ice World: from resource gathering to building, crafting, and combat, with helpful tips along the way.
Ice World: Beginner Guide
You start your adventure in Ice World with just a bottle of water, a trusty Ice Pick, and the clothes on your back. Begin by finding some trees and using your Ice Pick to gather around 40 Wood. Once you have enough, head over to a Stone Node—these are easy to spot, with their brown lumps against the white landscape.
Collect enough Stone and Wood to craft a Furnace (20 Wood and 20 Stone). Once it’s ready, place it down and craft a Mallet. Use it to continue gathering from the Stone Node; if you’re fortunate, you’ll collect Iron Ore. You’ll need about 30 Iron Ore to create the essentials since each Ingot requires two Ore. Your goal is to make enough Ingots for a Metal Axe, Pick, and Shovel—no need to waste resources on Stone tools when the Iron ones are worth the wait.
As soon as you have five Iron Ingots, craft a Stone Axe temporarily for faster wood collection, which you’ll need to fuel your furnace. Prioritize crafting a Metal Pickaxe next, and finally, the Shovel. Once equipped with all three, set out to find a spot for your first home.
Keep an eye out for any unusual ice or snow formations sticking up from the ground, as these can often be broken to yield valuable Ice. You’ll need a significant amount, so gather as much as you can.
Broken tools can’t be repaired without a Repair Kit, which requires Iron and Ropes—resources you can’t afford to spare early on. Once your Ice Pick or any other basic tools wear out, toss them and focus on maintaining your metal tools. Only use your repair resources on the best gear and weapons you plan to keep long-term.
Early Base
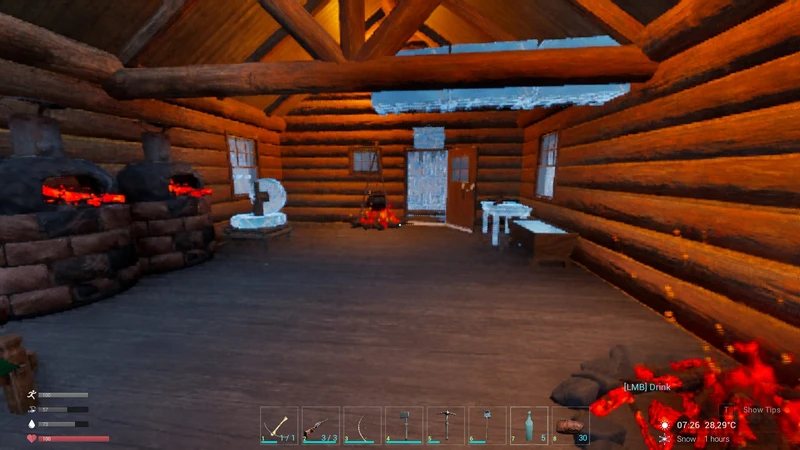
For a solid base, you’ll need at least 200 Ice, and even then, that only covers the basics of a bare, insecure setup-so let’s hold off on that for now. If you’re in the Snow Village (a recommended starting point), you’ll find plenty of wooden cottages. Choose one close to the shop as your base.
Start by crafting 15-20 Planks and 10 Cloth. With these, make two Fence Gates and several Fences. Place a Gate on each side of the house where there’s a door, leaving a bit of space so you can jump over it. Use Fences to close any gaps from the Gate to the Door or extend from the door’s wall—whatever works best within the placement restrictions! This setup will give you a simple, functional start without the hefty resource demands of a custom build.

From the inside, you’ll find some flexibility with building; yes, you can place items on certain walls occasionally, giving you more options for organizing your base.
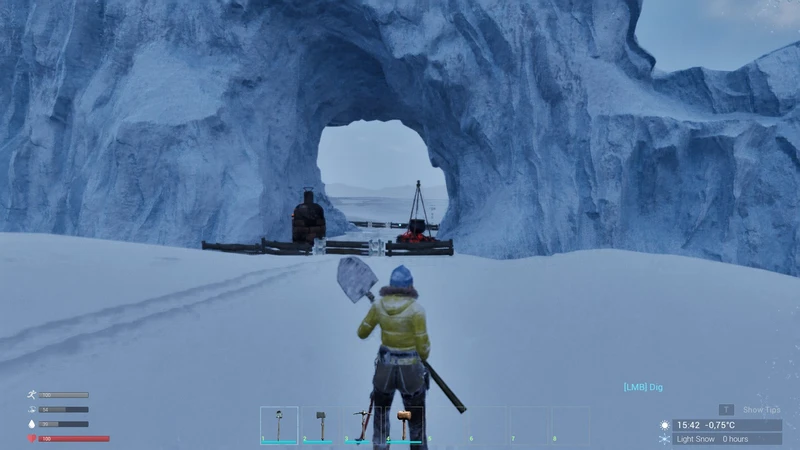
If you’re in the Frozen City, setting up a base is a bit tougher. You might need to search around for a while, but you’ll eventually find a spot that works. Fallen airplanes? That could be a viable shelter! A large rock formation with openings on both sides? Perfect! Look for something that’s easy to defend with ideally two entrances, so you have an escape route if anything persistent shows up that you need to avoid.

This is a perfectly fine base for the beginning. Just shy of some walls and you could call it an Igloo!
To place down those Buildings, you’ll need to put them on your hotbar, select them the way you would a Tool (press the right number) and work around the finnicky placing mechanics for a bit. You cannot take them back after you place them. Only destroy them! So be careful!
After your base is secure, make yourself a Campfire, just in case the weather doesn’t play nice.
Place down your Furnace from before (You DID pick it up with the mallet right? Just Right Click, go up to “Pick Up”, left click, and the Furnace will be back in your Inventory).
Hunger and Thirst Management
By now, hunger and thirst are likely setting in. Thirst isn’t much trouble: build a Campfire with a pot (you’ll need more Iron, so hopefully, you stocked up). Use your Shovel to gather Snow and melt it over the Campfire for easy access to fresh water.
Food, however, is more challenging. You can buy Raw Meat or Fish from the Trader and cook it if you’re in a pinch, or you can hunt. I recommend the Light Crossbow for hunting since it’s easy to reload on the move and each bolt is cost-effective. While it deals slightly less damage than the regular Bow, its advantages make it worthwhile. Unfortunately, the Crossbow requires Bones, so start with the Bow instead. Ten arrows should be more than enough to start.
To hunt effectively, craft 10 Fences and 2 Gates. Arrange a 3×3 square of Fences, placing the Gates on opposite sides. Lure your target into this enclosure, then quickly shut both gates. From there, you can safely shoot at it or finish it off with your weapon-your trusty Ice Pick might still have a purpose!
Remember, food is your primary source of healing, but it restores health gradually rather than instantly, so be cautious. Food may be scarce early on, but as you progress, you’ll have plenty. Fishing could be an option for variety, but with a stockpile of meat already, it may not be necessary just yet.
Crafting and Gathering
Crafting can be done on the fly, that means, you set up your crafting queue, and go on doing other things! The only piece of wearable equipment right now is the Backpack. There’s two. Don’t bother crafting the smaller one, go for the large one right away.
Fiber is hard to come by in the beginning, being only gatherable by cutting trees, but after a while you’ll have enough. Trust me.
After the Backpack, I suggest making 20 Cloth for a Bed, and an extra 8 Cloth for the Assault Rifle, later, when you have the necessary resources to craft it.
All your extra Fiber will be crafted into Ropes and sold. Why? Because Fiber can’t be sold, and Cloth requires 3 instead of 2, while still being sold for the same amount of money.
After that, just continue to gather wood to run your campfires, collect the resulting charcoal and use THAT for your furnaces. 8 wood can barely smelt 11 iron ingots. Charcoal can almost smelt 20. Also, using wood on Campfires and then the Charcoal on Furnaces is simply smart. Almost 3 times as effective an use of that Wood!
Planks can be used to burn too, but I didn’t check if it was more efficient. The current setup is good enough. Futher testing required!
You can and should craft multpile furnaces. Two Campfires (a normal one for food and the pot one for snow > water) should suffice. Especially if you keep them active at all times.
Shovel some Snow, full up that Campfire with three stacks and let the Pot Campfire go indefinitely, from time to time check how much is left, and shovel some more!
Shoveling grants you, among other things, the occasional Iron Ore, Gold Ore and Stone. Clay can be sold, Sand can be sold (or smelted into Glass and then Sold). Right now they seem to have no use, or I might be missing it.
Make an Ice Maker, use the Water you got from your Snow to make Ice, and that Ice to make a Workbench and a Mill. Save a bit of that charcoal to make Gunpowder with Sulfur you have mined. Make Gunpoweder in batches of 20, because you’ll need exactly 20 for the Bullets. Grenades and such I didn’t touch yet. But the Rifles seem good enough right now!

Weapons Breakdown
Melee Weapons
Among melee options, the top choices are the Cutlass, Heavy Iron Sword, and Metal Axe, each excelling in specific roles. The Cutlass is slightly faster, making it ideal for quick strikes, while the Heavy Iron Sword has a sweeping range, hitting multiple enemies and providing the longest reach. The Metal Axe, meanwhile, delivers the highest damage per hit.
While it’s hard to determine which has the best DPS, either the Cutlass or Metal Axe likely leads. The Heavy Iron Sword’s extended reach is useful for defensive strategies, such as attacking from behind a Fence, though the other two can also be used this way with less range.
Ranged Weapons – Bows and Crossbows
Bows and Crossbows offer a key advantage in resource efficiency: arrows and bolts can usually be retrieved after use. Bows deal the highest damage per hit and fire quickly once you master the timing for releasing and holding.
Crossbows have a slower firing rate and lower DPS, but their bolts are cheaper to craft, allowing you to carry a larger supply. The Light Crossbow, which can reload while moving, is particularly practical for staying mobile. Overall, it’s often a choice between the Light Crossbow’s mobility and the Bow’s stronger damage output.
Ranged Weapons – Rifles
There are three rifles, but the first is best avoided due to its inferiority compared to the others.
The Assault Rifle has higher DPS, but it requires more Iron and deals less damage per shot, making it less efficient for resource use. The Long Rifle, on the other hand, has greater damage per bullet, doesn’t need gunpowder, and consumes less Iron. Its superior range is helpful, although this doesn’t heavily impact current gameplay.
If you have an ample supply of Iron, charcoal, and sulfur, the Assault Rifle is effective for tougher fights, but it can be resource-intensive. The Long Rifle is ideal for ranged hunting and conserving resources, offering a powerful and cost-effective option for controlled engagements.
Essential Tips
Maximizing efficiency is crucial in Ice World’s harsh conditions. Between Axe or Pickaxe swings, try to gather nearby resources by holding Left Click for swinging, then quickly looking around and pressing E to grab items. Early on, time is precious with limited water, zero food, and freezing temperatures; every second outside counts. Carrying a spare campfire lets you set up near a dense cluster of trees, so you can stay warm while gathering wood.
Trees leave stumps that yield extra resources when broken down. Position your camera well, and circle the stump while swinging and pressing E to pick up fallen wood as you go.
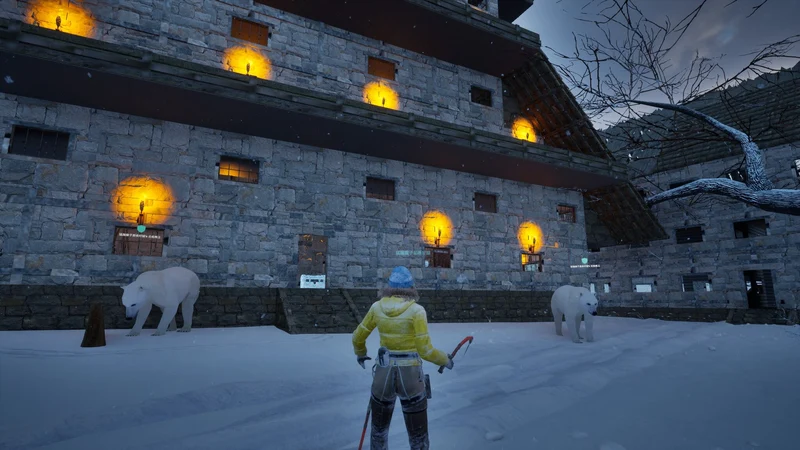
Wildlife is fairly easy to deal with: bring a couple of Fences and form a 2×2 or 3×3 square. Stand in the center; animals can’t reach you, letting you attack freely.
For building, remember that each wall can support only one roof section, making a square layout ideal. Start with a 2×2 foundation, then expand with more 2×2 sections as needed. Door Walls create passages, and you don’t need much room at this stage—anything beyond 2×2 is excessive.
Certain items like Clay, Sand, Glass, and eventually Cloth (after crafting the Backpack and necessary tools) currently have no known use. Also, shop inventories don’t vary, so setting up near one saves you from traveling to others for the same goods.