Unlock all 54 achievements in Hell Deck, including the 2 hidden ones, with run plans and deck-building tips.
Hell Deck: 100% Achievement Guide
Hell Deck has 54 achievements, and 2 of them are hidden. The sections below give tips and suggested runs for each one.
Most achievements unlock on their own as you play and climb the Ascension levels. The hardest ones are a different story: they depend heavily on RNG. You need specific units, relics or items to show up in a run, and some rely on random effects like dice rolls or the Slot Machine.
Plan on many runs before everything lines up. If a run doesn’t give you what you need, restart and try again. That’s how the game is meant to be played.
- Total achievements: 54 (2 hidden)
- Missable achievements: None. Every achievement can be done in a new run.
- Time to 100%: 30–60 hours
- Hardest part: Ascension 10 and the RNG-dependent achievements
- Achievements are grouped by theme, one theme per section.
- You can earn many of them in the same run.
- The hidden achievements have their own section at the end. Skip it if you’d rather discover them yourself.
Global Strategies
These principles make your runs far more consistent. Without a solid deck, most of the hardest achievements and the higher Ascension levels are out of reach.
Deck Size
Taking every card you’re offered is tempting, but a bloated deck is one of the most common reasons a run falls apart.
- A smaller deck draws the cards your strategy relies on more often.
- Each weak or off-plan card you add makes your key cards show up less.
- Skip a card selection when nothing fits your plan.
Strategy
Pick a direction as early as you can and build around it, instead of collecting random good cards. Hell Deck units are at their best when they support each other. Two strategies that work well:
- Meat + Demon
- Hell-Toads + Bellows Keepers
Stay flexible for the first few nodes. Once a strategy takes shape, prioritize the cards that make it stronger.
Upgrades
Upgrades are essential to make any deck work. A good strategy without them stalls quickly, especially against Elites, bosses and on higher Ascension levels. Keep upgrading your key cards throughout the run.
Card Combinations
A single carry will rarely clear everything. To get through all the game throws at you, you usually need several cards working together. Think about how your cards interact, not only how strong each one is alone.
Chests and Events
The best overall approach is to ignore chest and event nodes. They’re rarely worth it compared to fights, which are what make your build scale. The one exception is an achievement that needs a specific event.
Shops
Shops can pay off, especially with The Pact Blessing, which makes all shop items 80% cheaper. If you’re low on Souls or your build already works, avoid them entirely. They rarely stock interesting items, with a few exceptions.
Recommended Builds
These are three of the easiest scaling builds in the game. They’re suggestions, not strict recipes: try other cards and upgrades, and adapt them to your own runs. They make a great starting point for most runs, unless the achievement you’re after needs a specific setup.
Why These Builds
- They don’t depend on relics. Cards alone are enough, so they work in almost every run.
- They scale every wave. Your board gets stronger after each fight, so the more battles you play, the stronger you get.
To make the most of that scaling:
- On the map, pick combat nodes over Shops, Events and Chests.
- Put card upgrades above everything else. They’re what makes these builds strong quickly.
- Fight Elites to get the upgrades you’re missing and extra relics, while still gaining from the wave scaling. It’s risky, but it pays off.
Build 1: Meat + Demon
Helps with: Demon Tamer, Hell’s Michelin Star, Arise.
| Icon | Card | Copies | Notes |
|---|---|---|---|
 | Demon | 4 | Gets stronger by devouring Meat. |
 | Butcher | 2 | Upgrade: “Each wave, summons 2 Meat”. |
 | Hell-Chef | 1 | Turns Meat into Seared Meat. |
 | Gravedigger | As many as needed | Add them until only 4 free squares are left on the grid. |
Build 2: Hell-Toads + Bellows Keepers
Helps with: Back from Hell, Wrath.
| Icon | Card | Copies | Notes |
|---|---|---|---|
 | Hell-Toad | As many as needed | Fill the grid with them. Take Upgrade 1: “When attacking an enemy with 10+ [Burn] stacks, deals AoE damage (500% ATK)”. It’s the only upgrade that works. The other two will ruin your run. |
 | Bellows Keeper | 2 | Boosts adjacent [Burn] units. If you upgrade it, choose Upgrade 2 (+0.2 ATK SPD to adjacent units) and not the others. |
 | Ashen Knight | 1 or 2 | Upgrade 2 is very strong, especially with the Bellows Keeper’s ATK SPD boost: “+1 ATK each time it attacks an enemy affected by [Burn]”. Upgrade 1 also has synergy: “Each wave, when adjacent to Bellows Keeper, grants all enemies 15 [Burn] stacks”. |
Build 3: Rats
Helps with: The Black Death, Arise.
| Icon | Card | Copies | Notes |
|---|---|---|---|
 | Rat | – | Upgrade 1: “After 3 waves, summons a Rat”. |
 | Sewer Rat | 4 | Upgrade 1: “Each wave, 50% chance to summon a Rat”. |
 | Snake | 1 | Gets stronger by devouring Rats. |
 | Gravedigger | As many as needed | Add them until only a few squares are left on the grid. |
Ascension Achievements
Nothing tricky here. Clear each Ascension level in order, and lean on the Recommended Builds section for help.
How Ascension Works
- Ascension levels are extra difficulty levels. Clearing one unlocks the next.
- Each level adds a new modifier on top of the earlier ones, so Ascension 10 has all ten modifiers.
Ascension 1 to 10
| Achievement | New modifier | |
|---|---|---|
 | Ascension Clear Ascension 1 | Elite HP +10% |
 | Ascension 2 Clear Ascension 2 | Normal enemy HP +10% Stage Soul reward -33% |
 | Ascension 3 Clear Ascension 3 | Normal enemy spawn +10% |
 | Ascension 4 Clear Ascension 4 | Item slots -1 Relic slots -1 |
 | Ascension 5 Clear Ascension 5 | Adds an Angel Halo to your deck at the start of the run. It’s a useless card that is only removed after 30 waves. |
 | Ascension 6 Clear Ascension 6 | Shop item prices +30% Card removal cost +100% |
 | Ascension 7 Clear Ascension 7 | Enemy HP scaling +2% |
 | Ascension 8 Clear Ascension 8 | Special enemy HP +10% Special enemies spawn x2 |
 | Ascension 9 Clear Ascension 9 | Enemy cap: 100 → 90 Stage reward rerolls: 1 |
 | Ascension 10 Clear Ascension 10 | Boss HP +10% Enhanced Elite & Boss abilities |
Progression and Cursor Abilities
These come naturally as you play. No special setup is needed.
Progression
| Achievement | Requirement | |
|---|---|---|
 | Welcome to Hell | Defeat 100 enemies |
 | Faithful Servant | Defeat an Elite |
 | Combat Power 1,000 | Reach 1,000 Power |
 | Combat Power 3,000 | Reach 3,000 Power |
 | Combat Power 5,000 | Reach 5,000 Power |
 | Combat Power 10,000 | Reach 10,000 Power |
 | Combat Power 99,999 | Reach 99,999 Power |
 | 666666 | Reach 666,666 Power |
Combat Power 99,999 and 666666 need a deck that keeps scaling. The Meat + Demon and Rats + Snake builds from the Recommended Builds section are the easiest way to get there.
Cursor Abilities
Each of these unlocks a new Cursor Ability, which you can then pick in the lobby before a run.
| Achievement | How to unlock | |
|---|---|---|
 | Time Devourer Power of the Hunted | Play 1 game |
 | Piercing Gaze Power of the Watcher | Clear Chapter 2 |
 | Soul Devourer Power of the Soul Eater | Clear Chapter 3 |
 | Binding Wisdom Power of the Blind Owl | Reach 50,000 Power |
 | Finale of Chaos Power of the Enlightened One | Clear Ascension 1 |
Unit Challenges: Build Runs
These achievements are tied to specific units. You can group most of them into the same run, and the groups below follow the Recommended Builds wherever possible.
Meat + Demon Run
The Meat + Demon build destroys Meat every wave, so all four of these trigger naturally.
 | Demon Tamer Raise a Demon unit’s ATK to 250 |
- A Demon gains ATK each time it devours Meat: +8 base, +15 with Upgrade 2, +20 with Upgrade 3.
- Seared Meat (from the Hell-Chef) counts as Meat with a x2 destruction effect, which doubles the gain.
- Run only a few Demons, so the Meat isn’t split between too many of them.
- The Blessed Carnage relic gives adjacent units +5% ATK every time Meat is destroyed.
- Gravediggers make this much easier. They bring destroyed Meat back, so your Demon has more to eat.
 | Hell’s Michelin Star Successfully cook 10 dishes with Hell Chef |
- The Hell-Chef cooks a Seared Meat each time an adjacent Meat is destroyed.
- With lots of Meat on the grid, it often lands next to some, so 10 dishes come fast.
- Upgrade 2 cooks 2 Seared Meat at once. Upgrade 3 cooks one just from being next to Meat.
- Gravediggers make this much easier. They bring destroyed Meat back, so the Hell-Chef has more to cook.
 | Overlord Have the Archdemon hit every enemy on the field with a single attack |
- The Archdemon gains +0.3 AoE and +3 ATK every time any unit is destroyed.
- Units die constantly in a Meat build, so its AoE grows every wave until one hit covers the whole field.
- Its Upgrade 3 also triggers Demon effects one more time, which makes it a perfect fit for this build.
- Gravediggers make this much easier. Every unit they bring back can be destroyed again, so the Archdemon grows even faster.
- The Power of the Blind Owl Cursor Ability makes it trivial. Lock the Archdemon on the top-left tile to improve its odds of hitting every enemy as the wave starts spawning.
 | Arise. Have the Gravedigger revive the same unit at least 3 times |
- When an adjacent unit is destroyed, the Gravedigger has a 35% chance to bring it back (45% with Upgrade 1).
- It works best with units that die every wave, like the Meat your Demons eat.
- More Gravediggers raise the odds that one of them lands next to it.
Rats Run
 | The Black Death Have at least 25 Rats in the deck |
- Rats breed on their own: a 10% chance to summon a Rat when next to another Rat, and Upgrade 1 summons one every 3 waves.
- Sewer Rat Upgrade 1 gives a 50% chance to summon a Rat every wave.
- The A Pair of Rats item adds 2 Rats to your deck.
- Don’t use the Cheese Trap, and avoid Rat eaters (Snake, Hellcat) until you reach 25.
 | A Meow-nstrous Appetite Have a Cat unit devour at least 9 Rat units |
- Once you have plenty of Rats, add a Hellcat. It devours adjacent Rats and gains +1 ATK SPD for each.
- Placement is random, but with a deck full of Rats it will nearly always land next to some.
- Make sure you have a steady supply of new Rats to reach 9, such as Sewer Rat Upgrade 1 (50% chance to summon a Rat every wave).
- Skip its Upgrade 2. It destroys the Hellcat at the start of every wave.
Squirrel Run
 | Thunder Squirrel Defeat an enemy with a Squirrel’s Lightning Strike |
- Take Squirrel Upgrade 2: each attack has a 33% chance to strike a random enemy with lightning for 2000% ATK.
- That one-shots most normal enemies, so the achievement will come on its own.
 | Buff Squirrel Raise a Squirrel unit’s ATK to 100 |
- Squirrels start at only 5 ATK. Take Upgrade 1 (+2% ATK on every kill). It’s the upgrade that makes them grow.
- Flat ATK bonuses go a long way at low ATK. Gravedigger Upgrades 2 and 3 give adjacent units +3/+4 ATK.
- Relics make it much easier. Urn of Greed gives all units +3 ATK (Temp) for every 100 Souls you hold, so saving Souls pushes your Squirrel toward 100. Bundle of Acorns also gives Squirrels +5 ATK (Temp) every wave.
Unit Challenges: Specific Runs
Each of these needs its own run, or at least a part of your deck built just for it.
 | Bloodstained Blade Have a single Usurper destroy the Haughty King 5 times |
- The Usurper devours an adjacent Haughty King and takes its ATK. The same Usurper has to do it 5 times, so keep it alive.
- One of the best combos is Usurper + The Haughty King + The Heir. When a Haughty King is destroyed, The Heir absorbs its stats and becomes a King, which turns back into a Haughty King after 5 waves. Your Usurper gets a new target again and again.
- Other ways to get Haughty Kings: Haughty King cards, and extra Kings (each becomes a Haughty King after 5 waves).
- The Young Master relic adds an Heir to your deck at the start of every battle stage, which feeds the combo. Be careful with it, since it keeps growing your deck.
- Keep your deck small. Fewer other units means a Haughty King lands next to your Usurper more often.
 | The Great Escape Trigger Runaway Goat’s effect 5 times in a row |
- The Runaway Goat‘s effect only works while a Reaper is on the field and NOT adjacent to it.
- A good plan is to fill the grid with goats and run a single Reaper. With only one Reaper, most of your goats will land away from it.
- Best goat sources: the Black Matron (summons a Runaway Goat every wave, 2 with Upgrade 1) and the Red Pill relic (turns every Baby Goat into a Runaway Goat at the start of each wave).
- The Broken Clockwork relic helps too: adjacency effects get a 30% chance to trigger one more time.
 | Faith Rewarded Trigger the ability of a Fallen Nun or a Corrupted Cultist |
- Both units activate when 3 of them are lined up in a row on the grid.
- This is mostly event RNG. Both are Legendary, and the easiest way to get 3 is The Desecrated Sanctuary event: Worship gives 3 Corrupted Cultists, and Nun’s Hymn gives 3 Fallen Nuns.
- Take every event node you can until you get it.
- Keep your deck at least 3 cards smaller than the grid (13 cards or fewer on a 4×4 grid), so all 3 cards always fit on the grid together.
 | Friendly Fire Have The Eye of the Abyss trigger its ability on another Eye unit |
- The Eye boss adds Eye cards to your deck. The Eye of the Abyss sends 1 adjacent unit back to the deck.
- You can’t choose where the Eyes land, but the Power of the Blind Owl Cursor Ability (unlocked with Binding Wisdom) helps: hover over a card for 2+ seconds to lock it on its tile.
- Mostly, you need an Eye boss fight that lasts long enough for several Eye cards to join your deck, without dying. It often happens without even trying.
 | Dealer’s Dice Roll a 100 with a Dice unit |
- Every wave, each Dice rolls a random temporary ATK between 1 and 100.
- The easiest way is to add a Gambler, the only unit that acts on the Dice directly. It rerolls the Dice when its ATK is 20 or lower.
- The Gambler’s best upgrade is Upgrade 3. It turns an adjacent Dice’s temporary ATK into permanent ATK, so its rolls add up wave after wave.
- Its Upgrade 1 helps too: a 50% chance to trigger the Dice effect one more time, and it can stack.
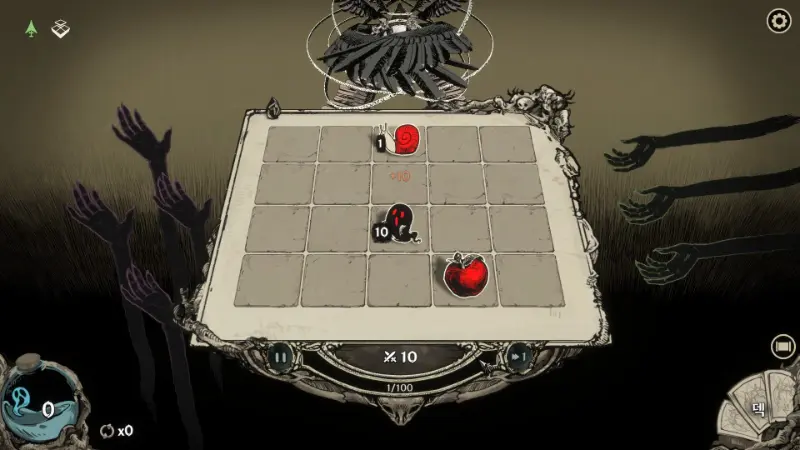
 | Snail Lover Clear a chapter with at least 16 Snails Difficulty: Very hard |
- This is one of the hardest achievements. The real challenge is getting 16 Snails and ONLY Snails into your deck.
- Snails get a bonus based on the tile they land on: the base card gives +299 ATK (Temp) on a corner tile, Upgrade 1 gives +299 ATK (Temp) on an outer tile, and Upgrade 2 gives +499 ATK (Temp) and +2 Range on an inner tile.
- Upgrade 1 (outer tile) is the strongest, since most tiles are outer tiles. The Architect Blessing (5×4 grid) makes it even stronger.
- That one card upgrade is all you need. Once you have it, avoid Elites as much as you can.
- Placement is random, but the Power of the Blind Owl Cursor Ability (locks a unit on its tile) helps keep at least one Snail on a corner.
- This is almost impossible without relics. Attack speed matters most:
- Sofa of Sloth: +0.1 base ATK SPD to all units after every wave without adjacency effects. Snails have none, so it helps enormously.
- Cheering Snail: +5 ATK SPD to all Snails.
- Slot Machine (4 units with the same name in a row: +1 ATK each wave) and Family Portrait (5+ units with the same name: +2 ATK each wave): your Snails’ damage keeps climbing through the run.
- Snail Lover: +3 ATK to units on corner tiles.
- Feel free to fill the board with The Mouthless, The Earless and The Eyeless. Each buffs an adjacent unit and destroys itself every wave, so they don’t break the build. Their ATK SPD, Range and especially AoE buffs cover for the Snails’ low damage until they ramp up.
- Watch out with Sofa of Sloth: these monkeys trigger adjacency effects, which cancel the Sofa’s bonus. Once you have the relic, skip them, since the Sofa is stronger. The exception is when you need The Eyeless’ AoE to clear the field.
The Seven Deadly Sins
Most of these come naturally while playing the Recommended Builds. Only Greed, Sloth and Pride take some planning.
Earned Naturally
 | Gluttony Trigger Devour at least 10 times with a single unit |
- The Meat + Demon build takes care of it, since a Demon devours Meat every wave.
 | Envy Have a unit destroy or devour another unit with higher Power |
- The easiest options are a Hellcat (3 ATK) devouring a Rat (10 ATK), or a Usurper devouring a Haughty King.
 | Lust Create at least 5 units in a single wave |
- No unit creates 5 units by itself, so stack several summoners to raise your odds.
- For example: Butchers (Upgrade 1: 2 Meat per wave), the Hell-Chef (up to 2 Seared Meat with Upgrade 2), Sewer Rats and the Black Matron (1 Runaway Goat per wave).
 | Wrath Defeat an enemy after dealing damage equal to at least 1,000% of its Max HP |
- It unlocks on its own once your units hit hard enough to massively overkill normal enemies, for example a scaled Demon or a Squirrel’s lightning (2000% ATK).
Needs Planning
 | Greed Fill all Relic and Item slots |
- You start with 4 Relic slots and 3 Item slots. Stop using your items and keep buying until every slot is full.
- From Ascension 4, you lose 1 Relic slot and 1 Item slot, so 3 Relics and 2 Items are enough.
 | Sloth Skip every card selection throughout an entire stage |
- In one battle node, skip every card reward you’re offered.
- Do it early in a run with a solid deck, so skipping doesn’t put you in danger.
- Don’t take the Madness or Wheel of Fate Blessings that run. They stop you from skipping card rewards.
 | Pride In Chapter 3, use [Chronos Hourglass] and defeat 2 Elites in a single battle Difficulty: Very hard |
- This is the rarest of the seven. You pick Chapter 3 when starting a run, so it has to be done in a Chapter 3 run.
- The Chronos Hourglass repeats the last wave one more time. Shops and random rewards never offer it. The only source is The Abandoned Altar event, by choosing [Seize] for 300 Souls. Check every event until you get it, and keep 300 Souls on hand.
- Once you have it, fight an Elite. Your build must be able to handle any Elite and deal enough damage to kill it twice. An Elite battle can end without a kill, and that doesn’t count.
- Use the Hourglass right away, at the start of the Elite’s first wave. Using it after the first Elite dies makes the achievement fail.
- Unverified: using it on wave 4 against an Elite that was close to death (but still alive) did not bring the Elite back. Wave 1 seems to be the only wave that spawns the Elite, so it may be the only wave the Hourglass can copy it from.
Relics, Items and Resources
 | Nest Egg Gain the maximum number of Souls from [Sailor’s Stash] |
- The Sailor’s Stash relic stores 30 Souls at the start of each wave, up to 500, and returns them all when destroyed.
- Wait until it holds 500 Souls (17 waves), then hold click on the relic to destroy it.
 | Soul Collector Hold at least 10,000 Souls |
- Spend nothing in shops, except on the Sailor’s Stash. It pays for itself once fully charged (500 Souls).
- Take everything that boosts your Souls by a lot:
- Greed Blessing: +20% Souls when entering each node. It compounds, so it’s by far the strongest source.
- Spectre Upgrade 3: +1 Soul on each attack. Spectres have the [Freeze] trait, so they pair well with the Jar of Frost Soul relic (+1 Soul each time a frozen enemy dies).
- 2 Ravens: they gain ATK and ATK SPD for each frozen enemy, which helps clear waves.
- Broken Statue relic: +10 Souls every time a unit is destroyed.
- Tomb Upgrade 3: gain 5% of your current Souls every 100 kills.
- Build your damage around the Souls you hold: the Urn of Greed relic (+3 ATK (Temp) to all units for every 100 Souls) and Soul Vessels (ATK based on Souls held).
 | Double or Nothing Succeed with [Gambler Hand] twice on the same node Difficulty: Hard |
- The Gambler Hand item has a 50% chance to give 500 Souls. Otherwise, you lose 200 Souls. Two wins on the same node is a 25% chance.
- Important: a second Gambler Hand can’t appear in the shop while one is still in your inventory. Use the first one in the shop, then look for the second.
- Fill your 3 item slots with other items to improve your odds. Items you hold leave the reroll pool, so the Gambler Hand shows up more often.
 | Bestie Defeat a boss with the Demon obtained from the Starter Pack |
- Restart runs until your starter pack includes a Demon. That’s the hardest part.
- After that, make sure no unit devours or sacrifices your Demon.
- A Meat build is the safest way to win the boss fight.
 | Paw Enforcement Remove the maximum number of Rats with the Cheese Trap Difficulty: Hard |
- The Cheese Trap item destroys 5 Rats from your deck. Just have at least 5 Rats when you use it.
- Do it after The Black Death in your Rats run.
 | Jackpot Trigger the Slot Machine Relic’s effect the maximum number of times Difficulty: Hard |
- You need the whole 4×4 grid filled with 16 identical units, and ONLY those. The Slot Machine then triggers on every row, every column and both diagonals. Getting there isn’t easy.
- The Hell-Toads build from the Recommended Builds works well (Upgrade 1: AoE explosion). Keep the Bellows Keepers for their ATK SPD boost, and remove them at the shop as late as possible, once you’re sure you’ll have 16 Toads.
- A Rat build (Upgrade 3: ATK when next to another Rat) is another option, but it’s harder to pull off.
- It also fits the Snail Lover run, where the Slot Machine is already a key relic.
 | Back from Hell Reach 9,999 Burn stacks Difficulty: Hard |
- Play the Hell-Toads + Bellows Keepers build from the Recommended Builds and stack Burn on a boss.
- Main Burn sources: Ashen Knight Upgrade 1 (15 stacks on all enemies each wave when next to a Bellows Keeper), Hell-Toad Upgrade 2 (7 stacks on all enemies every 2 waves) and Arsonist Upgrade 3 (20% chance to multiply the target’s stacks by 1.1).
- Careful: at low Ascension, enemies may die before you can stack enough Burn. Higher Ascension levels raise enemy HP, which buys you more time.
 | Addicted to Poison Deal Poison Damage exceeding an enemy’s Max HP Difficulty: Very hard |
- This is one of the hardest achievements. A Poison tick deals 1% of the enemy’s Max HP, so a single tick needs a x100 Poison multiplier to go over its Max HP.
- The Venom Spider is the key. Each one multiplies all Poison damage, and the multipliers stack:
- Base (x1.5 each): 1.5^11 ≈ 86 and 1.5^12 ≈ 130, so you need 12 Venom Spiders. Its Upgrade 2 makes it Rare instead of Epic, so it appears more often.
- Upgrade 3 (x2 each): 2^6 = 64 and 2^7 = 128, so 7 Venom Spiders are enough.
- Elites and Bosses only take 0.2% Max HP per tick, so it will trigger on a normal enemy.
Hidden Achievements
Spoilers for both hidden achievements follow.
 | Exodus Refuse the Blessing and clear Ascension 10 Difficulty: Very hard |
During a run, the game offers you a Blessing, a powerful bonus that usually comes with a drawback. For Exodus, refuse it and still clear Ascension 10.
If you refuse the Blessing on your Ascension 10 run, you unlock Ascension 10 and Exodus together. There’s no need to clear Ascension 10 twice.
 | Lucifer Achieve Overkill during the Lucifer Event |
The Lucifer event can appear on an event node. A fallen angel challenges you to a damage test: a short fight where you have to reach a damage goal. You choose one of 3 goals: Endurance (Souls), Conviction (choose 1 of 3 Relics) or Hubris (the Twisted Fate relic).
Go with option 1, Endurance. It’s by far the easiest goal to overkill.
No one knows exactly what counts as an Overkill, but dealing about 2x Lucifer’s total HP was enough to get it.
Lucifer’s HP scales with enemy HP, so a late-run attempt isn’t automatically better unless your build has scaled massively. Check every event node until Lucifer shows up.
Credit: @Kobaru