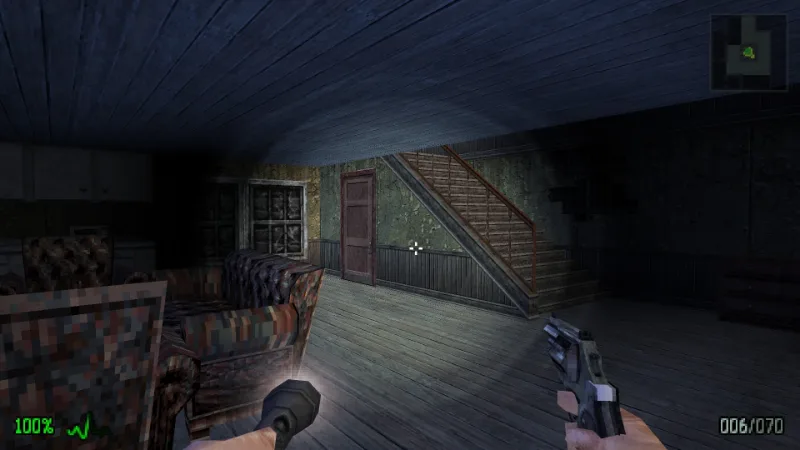
Complete the story of Dementium II, solve its puzzles, and beat each boss on the way to the ending.
Dementium II: Walkthrough
Survival Mode
Finishing chapters unlocks Survival modes. They are separate from the main campaign and pit you against waves of enemies to see how long you can hold out. Check the new modes after each chapter if you want more to play.
Enemies
Chest Maw
Chest Maws are weak and only fight up close. Kill them with the Shank to save ammo, and try not to take on several at close range at once.
Guard
Guards swing stun batons, and each swing has a clear windup. Hit them during the windup, then step away before the next swing. Later on, some guards carry guns. Stay behind cover while they shoot and fire back when it is safe.
Hopper
Hoppers leap at you before they strike, which makes slow weapons like the Sledgehammer hard to land. The Shank’s quick attacks work better. Don’t let them surround you.
Whisperer
Whisperers are hazards, not regular enemies, and you cannot kill them. If you touch one, you are pulled into an area where you have to defeat every enemy before you can move on. Keep clear of them and find a safe way past.
Aerial Hunter
Aerial Hunters attack from the air. They spit at you and dive in with the saw on their tail. Shoot them while they fly, or wait for the dive and hit them with a melee weapon. A dead Aerial Hunter bursts into Worms, so be ready for more enemies.
Spitter
Spitters shoot green acid and back away when you close in. The Revolver lets you kill them from range before they can keep their distance.
Wailer
Wailers throw black projectiles that blind you for a short time if they hit. Sidestep to dodge them, and kill Wailers with a firearm before they can keep attacking.
Slime Mine
Slime Mines stay in one place and explode when you come too close. The blast hurts you and stops you from using items for a while. Shoot them from a safe distance instead of walking up to them.
Reanimator
Reanimators spit acid and hit hard with their claws. They turn slowly, so you can circle them and use melee weapons while staying out of reach. Normal weapons only put them down for a short time, and they soon get back up. Only the Flamethrower kills them for good.
Screamer
Screamers are flying heads that try to ram you. Shoot them before they get close, and stay back once they die, because they explode.
Bosses
The Gnaw
You fight the Gnaw, the first boss, with only the Shank, plus Health Pills and an Adrenaline Syringe. It darts between the floor and the ceiling, so steady hits are hard to land.
- Ground attacks: When the Gnaw is on the floor, get close and hit it a few times with the Shank. Keep strafing around it so its sudden attacks miss.
- Ceiling attacks: It can drop on you from above. When you hear its warning cry, move away.
- Eggs: At low health, it spits out eggs that hatch into Worms. Break the eggs before they hatch so extra enemies don’t swarm you.
- Adrenaline: If it moves too fast for you, use the Adrenaline Syringe to speed yourself up and get more chances to hit.
Stay on the move, dodge its attacks, and use every opening to deal damage.
Wendigo Witch
The Wendigo Witch hides in the dark and dives at you fast. Her glowing red eyes give away where she is, and markers at the edges of the screen point to her when she is out of view. Shoot her as she comes in, or dodge the dive and hit her with the Ceremonial Dagger as she passes.
- Red ground lines: She sometimes draws red lines across the floor. Stand between them to avoid the attacks that come up from the ground. Damaging her before she finishes may stop the attack.
- False appearance: At times she takes the form of your dead wife lying on the floor. Stay back and wait for her to change into her true form and vanish.
Dodge her dives and strike during openings. Chasing her into the dark won’t help.
Gorgamesh
Gorgamesh hits very hard but slowly, so there are gaps between its attacks. Use them to land melee hits or shoot it from range. The narrow gap between the wall and the platform where you entered the arena is too small for Gorgamesh, so you can attack from there in relative safety. You will meet another Gorgamesh later in the game.
Colossus
Normal attacks don’t hurt the Colossus. You need the dynamite you pick up as you flee through the corridors.
- Keep running through the corridors, and jump or duck when needed.
- Pick up dynamite along the way.
- Get some distance from the Colossus before you turn and throw.
- Keep running between throws so it can’t catch you.
Important tip: Throw the dynamite straight into its mouth. It swallows the stick and takes far more damage than from a normal hit, so do this whenever you have a clear shot. The Colossus speeds up as it takes damage, so keep moving and don’t spend long lining up throws.
Malatesta
Malatesta is the final boss. Its weak points are the large gems in its mouth and on its tail, so aim for them whenever they show. The dents in the walls and floor tell you where it will come out next.
- Wall openings: A lit dent in the wall means Malatesta is about to charge across the room. Get out of its path.
- Floor openings: When the floor dents light up, it may jump between openings or rise straight up before attacking.
- Flaming rocks: After rising straight up, it may spit flaming rocks at you. Keep moving and change direction to dodge them.
- Falling attacks: It may also drop straight onto you after rising. Watch it and move away before it lands.
Keep moving the whole fight and hit the gems when they are exposed. The gems are far from you, which makes some weapons weaker here, especially the Shotgun. Use your strongest ranged weapons and spend whatever ammo you have left. If you run dry, the Ancient Relic is a backup, though its slow attacks make it hard to use well.
Weapons
Shank / Ceremonial Dagger
The Shank is your first weapon and the only one you can use against the first boss. It attacks fast but does little damage, and you have to get close. It stays useful all game, since it lets you kill weak enemies and save ammo for harder fights. The Ceremonial Dagger, which you get later, is a stronger version of it.
Revolver
You get the Revolver after beating the first boss. It holds six shots and lets you hit enemies without getting too close. It doesn’t do much more damage than the Shank, but its range helps a lot in dark areas where you rely on your Flashlight. Save ammo when you can.
Sledgehammer
The Sledgehammer is a strong melee weapon, and it is the last new weapon you get for a long stretch of the game. Charge an attack for a crushing hit, which works well on enemies you can approach safely. It swings slowly, so it is poor against groups. It also takes both hands, so you can’t hold the Flashlight with it, which makes it a bad pick in the dark.
Most importantly, you need it to smash the boarded-up passages that block your way. Use it on every breakable wooden barrier you find.
Shotgun
The Shotgun is a strong close-range gun with damage close to the Sledgehammer’s, but it lets you attack quickly from a short distance. Its spread can hit several enemies at once, which helps when you are surrounded or facing a group. Keep some space between you and enemies so you have room to fire. Ammo is scarce, so save it for fights where the damage and spread matter most.
Flamethrower
The Flamethrower is both a weapon and a tool. It burns away the strange growths that block some doors and passages, and it is the only weapon that kills the Reanimator for good. Other weapons only stop it for a while.
Holding the attack button gives a steady stream of fire with solid damage, but short bursts usually work better. They set enemies on fire so they keep taking damage, and they save fuel.
Assault Rifle
Each Assault Rifle bullet does about half the damage of a Shank hit, but the high fire rate makes up for it. Hold the attack button to spray bullets and drop most enemies fast. The catch is that it burns through ammo, which can leave you empty when you need it most. Use it when you are in danger and need enemies dead quickly. Otherwise, stick to melee weapons or guns that use ammo more slowly.
Ancient Relic
The Ancient Relic is a weapon and a utility item. It opens certain doors in the village of Perf and the Bright Dawn Treatment Center, and it drives back the Whisperers that block some paths.
As a weapon, it works a bit like a boomerang: you throw it, it comes back, and it needs no ammo. It attacks slowly and does low damage, so most other weapons do the job better. It still works as a last resort, especially in the final boss fight.
Nail Gun
The Nail Gun is a somewhat hidden weapon in the Bright Dawn Boiler Room. Burn through the growth that blocks its passage with the Flamethrower to reach it.
It fires fast and hits about as hard as the Shotgun. With a ten-nail magazine and a longer effective range, it handles dangerous enemies well. Its weakness is very limited ammo. Don’t waste nails on weak enemies, and save the Nail Gun for hard fights where its damage makes a real difference.
Buzzsaw
The Buzzsaw is one of the strongest melee weapons in the game, even if it seems weak at first. Holding the attack button keeps damaging whatever is right in front of you, but the saw overheats fast and stops working for a while. Held down, it can overheat before it even kills a Chest Maw.
Tap the attack button quickly instead of holding it. This deals damage fast and keeps overheating to a minimum.
You find the Buzzsaw in a bathroom inside the church during the final chapter. Once you have it, it is a great choice against most of the remaining enemies and one of the best melee weapons for the endgame.
Chapter 1: Welcome Back
Leaving the Cell
Once you control William, get a feel for the controls and look around your cell. Pick up the postcard on the bed when you are ready.
Things soon go wrong. Crouch to get out of the cell, then follow the on-screen instructions until you find a small blade called the Shank. It is your main melee weapon for now.
Your first enemy, a Chest Maw, shows up soon after. Kill it, move on, and kill the next one. Follow the blood trail to keep going.
Past the man wrapped in chains, check the small nook just beyond him for Health Pills. They restore health, but not all the way if your health is very low.
Keep going and watch a short cutscene where a man is torn apart. You then return to the real world on the other side of the barred door. Go through the doorway ahead and kill the guard there.
Exploring the Facility
Walk past the broken elevator and read the paper on the floor. Go through the door, where two more guards are waiting. Move back and forth to dodge their attacks and kill both, then read the note on the wall.
A door to the north leads to a room with another note. Nothing else is there for now, but remember the boarded-up room. You will come back once you have the right gear.
Next, go through the double doors to the east. The swirling red mirror on the wall is a save point that also restores your health. Use these mirrors whenever you can.
Two side rooms are nearby:
- Adrenaline Syringe: Boosts your movement speed for a short time.
- Restroom: Holds Health Pills.
Grab the items, save, and go through the doors to the south.
Tower of Hanoi Puzzle
This puzzle works like the Tower of Hanoi. Make these moves in order:
- Move Eyeball 1 to the third slot.
- Move Eyeball 2 to the second slot.
- Move Eyeball 1 to the second slot.
- Move Eyeball 3 to the third slot.
- Move Eyeball 1 to the first slot.
- Move Eyeball 2 to the third slot.
- Move Eyeball 1 to the third slot.
The way ahead opens once the puzzle is solved. Go through the door, watch the short cutscene, and get ready for a boss fight.
Boss Fight: The Gnaw
Beating the Gnaw opens the room that was locked before. Inside are a Keycard and your first ranged weapon, the Revolver.
You may want to shoot everything, but save ammo when you can. The Shank still handles weak enemies, and ammo is hard to find.
Save in this room, then use the Keycard on the door you came in through to reach the Insane Side.
The Insane Side
When you enter the Insane Side, a red seal appears on the door. You can’t leave until every enemy in the area is dead.
Several Chest Maws spawn here. Clear them with the Shank, and search the side rooms for Revolver Ammo before you go.
Once the area is clear, go back to the normal world. You can return to the room you just left to save and heal.
Head south and open the gate with the Keycard. The door to the east is boarded up, so skip it for now and go west.
Kill the guard on your left right away, then check the small cell across the room for Revolver Ammo. Move on and kill the three guards further ahead.
The Waiting Room
You reach a room that looks like a waiting room. Kill the Worms there, then take the postcard from the reception desk. Since you play as William, the postcard is really a message you are writing to yourself from paradise.
Jump over the reception desk and take the Revolver Ammo from one of the desks. Go through the door and kill the two guards. The revolver is a good choice here if you need it.
Skip the boarded-up door again and keep heading west.
You run into some bugs on the way. Kill them if you like, then take the path to the right. Keep going through the outdoor section into a room full of machines and Worms.
Clear the room, then jump over the table to get the Sledgehammer. It is slow but strong, and more importantly, it breaks the boarded-up passages you have seen around the facility.
Smash the boards blocking the exit, then take the door on your left. Inside is a disturbing room with another note.
After reading it, leave through the east door. Break the boards on the room to your left and take the Revolver Ammo by the far wall. There is another note here too.
Collecting Supplies
Go back to the waiting room and head north. Two boarded-up rooms you couldn’t enter before are here: one next to the boss room and one further north.
The first room has a Health Pack. Unlike Health Pills, it restores all your health, so keep it for emergencies if you can.
The second room has:
- Health Pills
- Revolver Ammo
- Shotgun Ammo
You don’t have a shotgun yet, but take the ammo now so it is ready later. Save while you are in this area.
When you are ready, go back to the waiting room and take the south door. Pick up the Health Pills as you go through the next room. In the room after that, kill the Chest Maw and read the newspaper.
Take the door on the right and go down the stairs. Save, then go through the next door to hear a message from the person who seems to be holding you captive.
Bright Dawn Boiler Room
The boiler room has a Flashlight. You need it in dark areas, but you can’t hold it while using two-handed weapons like the Sledgehammer.
Keep going until you meet an Apparition.
Avoiding the Apparitions
Apparitions are hard to deal with, so avoid them instead of fighting. Use the looping tunnels to draw them away from the paths you need. If one catches you, you are sent back to the door by the save point. Use that chance to heal before trying again.
- Once past the first Apparition, keep going through the tunnels.
- Turn right at once to avoid the next one, then go left to get around another.
- At the fork, take the right path and look for a door on your left. Get through it fast so you are not caught.
- At the next fork, go right. Jump the first pipe, then jump the pipe on your right to enter another looping passage.
- An Apparition waits at the end of this stretch. Lead it around the loop, then run through the path it was blocking and head for the door at the end of the tunnel.
Chapter 1: Welcome Back (Continued)
Reaching the Generator Room
The right-hand path leads to a door that needs a Dagger. You only have the Shank, so you can’t open it yet. Turn back and take the other path to the generator room.
This room holds the boarded-up passage from an earlier note. There is also a strange growth that your current gear can’t remove.
Go through the passage and get ready for more enemies. Kill the Chest Maws and Hoppers on the way, then take the door back to the outside world.
Chapter 2: It’s Spreading
Exploring Pelf
Pick up the postcard in front of you.
Both large doors on the path are locked, so go into the shack on the left. Take the Revolver Ammo next to the cash register and save. Read the red note and the torn paper about the Wendigo Witch.
Go outside and follow the path to the dock. The enemy music plays, but the Aerial Hunter is flying above you, not walking on the ground.
Turn left and go up the stairs to the second floor of the nearby building. Kill the Chest Maws and take the Revolver Ammo in the southwest corner.
Two of the other doors are locked. Go through the large double doors to the south, kill the Chest Maws, and watch the cutscene. Then go into the house in the middle of the area.
Getting the Shotgun
Worms wait inside the house. Kill them and take the Shotgun Ammo by the fireplace.
Go upstairs and kill the Chest Maw. Take the Shotgun Ammo under the bed, then take the Shotgun off the wall. It is strong at close range, so it works well on groups and tougher enemies.
Leave the house and go into the building straight ahead. Break the boards on the entrance and get ready to fight the Chest Maws and Worms inside.
Take the Adrenaline Syringe from the table at the north end of the room, then go through the south door. Kill the Chest Maw on the way and enter the next house.
Spider Relic Puzzle
Read the note from your dead wife. There is also a locked, glowing box with an item inside.
To open it, turn all four dials so they point up. Some dials move others, so use this order:
- Turn the top-left dial until it points up.
- Turn the top-right dial until it points up.
- Turn the bottom-left dial until it points up.
- Turn the bottom-right dial until it points up.
When all four point up, the box opens. Take the Spider Relic.
Unlocking the Eastern Door
Go back to where you met the Aerial Hunter. Two Hoppers are waiting, so kill them first. Save, then go to the east door and open it with the Spider Relic.
Head on to the house and kill the enemies inside, including a new one, the Spitter. Go to the third floor and take the Health Pills in the room at the far end.
You pass an exit before you reach that room. Follow the blood trail to the left from there. The path to the right goes back to the Spider Relic door.
Searching the Hotel
Enter the next building. Kill the two Spitters and the Chest Maw on the first floor, and take the Key to Room 302 from the other side of the desk.
- First floor: The unlocked room has a Health Pack.
- Second floor: Room 201 has Revolver Ammo.
- Third floor: Kill the Spitters and the Chest Maw, take the Shotgun Ammo, and open Room 302 with the key.
Look over the scene in Room 302 and read the note. Its number code is different on every playthrough.
The Code-Locked House
Go back to the main area and find the house with a combination lock. Enter the code from the Room 302 note to open it, then kill the Worms and the Chest Maw inside.
Search the house for these items:
- Second floor: Health Pills next to the sink.
- Third-floor bathroom: Revolver Ammo behind the drawers.
- Children’s room: Skeleton Key in the crib.
Read the note in the children’s room before you leave. A Hopper spawns downstairs, so kill it on your way out.
The Graveyard
Go back through the Spider Relic door and take the door across from the hotel. Kill the Chest Maws and the new enemy in the next room, then head outside. Read the note on the gate as you go south.
Save, go down the first set of stairs, and take the Shovel.
You can dig up graves with it, but this may spawn more enemies. When you are ready, go down to the lowest level and dig up the middle grave, the one marked for you. It holds a doll that takes you to the other side.
Fight past the Chest Maws up to the top level of the graveyard and leave through the door.
Preparing for the Boss Fight
The next room has several Chest Maws and Spitters. Save ammo by drawing enemies to you one at a time and using melee weapons when you can.
Before you leave, take the ammo here:
- Northeast corner: Shotgun Ammo
- Southeast corner: Revolver Ammo
Go through the door and save. The next room has Shotgun Ammo and Revolver Ammo.
Look at the tapestry on the altar, then interact with it again to start the boss fight.
Chapter 3: Too Late for Escape
Returning to the Prison
This chapter starts in the normal world. Before leaving the church, take the postcard behind the altar and the Shotgun Ammo behind the northern graves. Then go out through the gate.
You now have the Ceremonial Dagger, which does about twice the Shank’s damage. Use it on weak enemies to save ammo.
Your goal is to get back to the prison and the door that needed the Dagger. On the way, you face Chest Maws, Hoppers, Spitters, and several alternate-world sections where you must kill every enemy to move on. Use melee weapons on weak enemies, switch to the Shotgun when needed, and don’t let groups surround you.
Item to collect: In the alternate-world room right before the prison door, look behind your starting spot for an Adrenaline Syringe.
Bright Dawn Boiler Room
Go back to the boiler room and work through the tunnels to the locked door. Kill the Chest Maws guarding it.
Use the combination from the postcard you took in the church. Move the Ceremonial Dagger to match the numbers to open the door. This uses up the Dagger, so you are back to the Shank.
Keep going through the tunnels and avoid the Apparitions. The next part is a single, fairly wide path, so move fast to avoid getting caught.
Floating Sacs
The next room has floating sacs. Shoot them, but stay alert, as more may spawn nearby.
Before moving on, search the northern room for:
- Revolver Ammo
- Health Pills
Go into the next area, kill the Chest Maws and Spitters, and take the postcard in front of the exit.
Bright Dawn Treatment Center
You are back in a familiar place, and you hear another message from your captor. Kill the Worms on the stairs, then save in the next room. Take the Shotgun Ammo before heading north.
The northern room has Chest Maws, Revolver Ammo, and Health Pills.
Go back to the previous room and into the western area. Several guards charge at you. Deal with the group using firearms, then go north and kill the Chest Maws and the Wailer in the next room.
The Four-Digit Code
The northeast door needs a code. Read the note next to it, then go into the western room. It is an office with four bodies, each marked with a number.
Read the note in the middle of the room and look at the bloody circle on the floor. Its arrows form a compass that points at the four bodies. Write down their numbers in this order:
- North
- East
- West
- South
Go back downstairs and enter the four-digit code on the keypad of the eastern door. Kill the Chest Maws inside and take the Assault Rifle and its ammo.
The Assault Rifle does little damage per bullet but fires fast. It uses ammo quickly, so save it for dangerous fights.
Prison Cells and the Bones
Go through the north door into the prison cells and read the note on the floor.
Whisperers patrol this area, but you can avoid them if you keep your distance. Follow the blood trail upstairs to a body and a pile of bones. Take the bones, because you need them later.
Head back to the Assault Rifle room. It is a good idea to save before you go through the eastern door.
The Reanimator
A Reanimator is in the next area. Don’t fight it yet. Move around it instead.
Check the bathroom right on your right for Worms, Revolver Ammo, and Shotgun Ammo.
In the room with the large creature, a guard with an Assault Rifle hides behind a desk. Shoot him with your own gun.
Go through the north door with the spinning sigils. Follow the path and read the note. Then read the other notes on the desk by the door and in the area around it. They give hints about a fight coming up. Remember this spot, because you will come back here.
Finding the Ancient Relic Piece
Leave the sigil area through the east door. Avoid the bugs in the next room, then kill the two guards ahead, one of whom has a gun.
Break the boarded-up door to get Assault Rifle Ammo and a postcard.
Take the south door and fight through the enemies and guards. You can sneak up behind one of the guards and take him out before he sees you.
Crouch under the broken door to reach a save point and another postcard.
Go outside and kill the Aerial Hunter. Keep going until you find the grave of a skeleton with bones missing. Add the bones you found earlier to it. This sends you to the alternate world, where you fight Hoppers, Spitters, and Chest Maws.
Kill them all to reveal a bat-shaped piece of the Ancient Relic. Take it and go back through the north door.
Preparing for the Boss Fight
[MISSING: The source has no text in this section.]
Chapter 4: The Colossus
This chapter takes place in Point Mine.
Exploring the Bridge and Shack
You start outside on a bridge in falling snow. Look around until you find a door covered in growth. You can’t open it yet, so go south into the cave. Read the note by the elevator and try to use it. As you might expect, it doesn’t work.
Before you leave the area, take the Revolver Ammo behind the large rock to the west. The nearby shack has a save point, a propane tank, and a bookshelf with a book missing. Read the note next to the bookshelf.
There is a puzzle at the western doorway. Turn the pieces until they make one unbroken path from the left side to the right side.
The House and Broken Elevator
Inside the house is another Gorgamesh. You don’t have to kill it, so stay clear of its attacks and move past it.
Before you leave, take these items:
- Adrenaline Hypo: Behind the bar on the first floor
- Shotgun Ammo: Behind the stairs on the first floor
- Health Pills: On the second floor
Leave through the second-floor exit. Handle the enemies past the door, then look around the corner for Shotgun Ammo before taking the south door.
A Reanimator waits in the next area. Avoid it and take the Shotgun Ammo on the left. Go right, round the corner, and climb the ladder.
Kill the enemies here and across the walkway, then take the elevator up. Skip the doorway across from the elevator for now.
Finding the Screamer and Red Book
Go into the house at the top of the elevator. The screaming you hear comes from a new enemy, the Screamer.
In the room where the Screamer was, take:
- Health Pack
- Assault Rifle
- Fumigator
Before you go, check behind the stack of crates in the previous room for Revolver Ammo.
Now go back down to the room near the foot of the elevator. As you walk in, a green cloud is fading away. The fumigator caused it.
A Gorgamesh and several Chest Maws attack soon after. Get under the rafters so the Gorgamesh can’t follow you, then kill the Chest Maws. You can also kill the Gorgamesh if you want the area safer.
What you came for is the Red Book on the bed in the far-left corner. Take it and leave right away.
Getting the Flamethrower
Jump down to the ground, stay away from the room with the Reanimator, and go back to the shack with the bookshelf and save point.
Put the Red Book on the empty shelf to reveal the Flamethrower, and take it before you go.
The Flamethrower is the answer to Reanimators, which normal weapons struggle to kill. It also burns away the growth on some doors. It runs on propane tanks, which refill its fuel.
Burning Through the Growth
Leave the cave and go outside. Use the Flamethrower on your first Reanimator.
To kill one without wasting fuel, set it alight with a short burst. Wait until the fire stops hurting it, then light it again. Repeat until it dies. Each Reanimator should only take a little fuel.
You can also wear it down with normal weapons until it falls, then burn it to finish it off.
With the Reanimator dead, burn the growth off the east door and go through.
The Mine Cart and Aerial Hunter
This area has several Reanimators and Screamers, so don’t let them surround you. Look between the rocks for Shotgun Ammo, then hop on the mine cart to reach the next area.
Go into the building and kill the enemies. Before you leave, check the second floor for Health Pills and ammo.
The door leads outside to two Reanimators and an Aerial Hunter. Keep moving as you fight so they can’t overwhelm you. When the area is clear, find the postcard in the northern building.
The Radio and Alternate World
Go into the northern building, deal with any enemies, and go upstairs to the radio.
Switch it on and turn the dial until you hear an emergency broadcast. Then change to the second channel and find the next broadcast, which is the doctor’s. Hearing it takes you to another world.
Returning Through the Building
Go down the ramp and kill the enemies on the way. Take the southwest door, kill the couple of worms there, and then deal with the Screamers downstairs. When it is clear, leave the building.
The Docks and the Boat Key
Follow the snowy path to the docks and kill the Reanimators on the way.
At the docks, go into the building and take the Acid Neutralizer. There is a save point here too.
The boat is locked. Go back to the building with the acid-filled sink, use the Acid Neutralizer on it, and take the key inside.
Return to the boat and unlock it with the key. Look at what is left of Mr. Rice, then take the Battery to travel to the other plane.
Fight along the path in the alternate world. It is mostly Chest Maws, so clear them and keep going until you are back in the earlier area.
Restoring the Main Elevator
Go back to the main elevator, the one that was missing its battery. Use the save point first.
Put the Battery in the elevator and ride it down. At the bottom, go through the door.
Boss Fight: Colossus
Move on until you meet the Colossus. Beat it and take the Scorpion Relic it leaves behind. This ends the Point Mine section.
Chapter 5: Final Passage
This chapter covers the lighthouse and the Bright Dawn Treatment Center.
The Lighthouse and Scorpion Relic
You start with the Scorpion Relic equipped. It works much like a boomerang and does little damage, but it has a special ability that helps later.
Go through the door ahead and keep going. Open the lighthouse with the Scorpion Relic and use the elevator inside.
The door ahead has a pressure puzzle. Flip the right switches to bring the pressure gauge into the green zone without pushing it into the red. Each switch adds a different amount, so test them until you find a combination that keeps the gauge in the safe range.
After the puzzle, go through the long tunnel and take the postcard on the way. Climb the stairs and go through the door.
Bright Dawn Treatment Center
Returning to Familiar Ground
You are back at the Bright Dawn Treatment Center. Take the door on your right and use the save point.
Before moving on, you can go back to the Bright Dawn Boiler Room for another weapon. If you don’t want it, skip the next section.
Optional Weapon: Nail Gun
To get the Nail Gun, return to the Bright Dawn Boiler Room. Its entrance is next to the southern save point on your map. Get past the Whisperers and Apparitions to the growth-covered room you saw near the end of Chapter 1.
The Scorpion Relic protects you from Whisperers. If you face one with the relic equipped, you raise it and push the Whisperer back, which lets you get around it. Use this to pass them without getting trapped.
In the growth-covered room, search for:
- Nail Gun
- Nails
- Health Pills
The Nail Gun does about the same damage as the Shotgun, but it has better range and needs reloading less often. Most importantly, it uses one hand, so you can keep your flashlight out.
The Chain-Link Area
Go back to the Treatment Center and head to the area you couldn’t reach before you had the Scorpion Relic. Unlock the door, and refill your propane if you need to before going outside. Once outside, check the southern wall for a postcard.
Screamers fill the chain-link area ahead. Search the paths around it for supplies before moving on:
- Revolver Ammo: At the end of the western path
- Adrenaline Syringe: Behind the ducts in the top-left corner
- Health Pills and Shotgun Ammo: Inside the northeastern chain-link area
Once you have them, follow the blood trail to the northern door on the eastern wall.
The Doctor’s Plan and the Key
When you enter the next room, the Doctor tells you more about his plans. Search under the body in the room to find a key, then take it and go through the east door.
Optional Final Weapon: Buzzsaw
In the next room, take the far door to a bathroom. If you picked up the Nail Gun earlier, the game’s last weapon, the Buzzsaw, is here.
The Buzzsaw is like a faster Shank. Each hit does about the same damage, but it hits much more often. It can overheat and needs both hands, which makes it awkward in some situations. Tap the attack button quickly instead of holding it down to keep hitting while keeping the heat low.
The bathroom also has a save point, so save and heal if you need to.
Before you leave, check the room just before the bathroom. It has Screamers, Chest Maws, and a letter from the dead man in the church. Search the other small rooms for a Health Pack, then leave the area.
The Priest’s Combination Lock
Go back outside and open the other door on the blood trail.
After a short speech from the Doctor, Hoppers attack. Kill them and take the note in the room. If you looked at the combination lock in the priest’s office earlier, you will know what this note is for. A couple of other notes are nearby, but they matter less.
Enter the last word of the important note you found in the kitchen as the combination. When the door opens, go in.
Examine the altar-like table to enter the Plane of Anguish. Kill the Chest Maws if you like, then jump down the hole.
Descending Through the Plane of Anguish
Read the postcard in the next area. Crouch and move ahead, then fight through the rooms full of enemies. Keep dropping down holes to go deeper.
You reach a room packed with enemies. Clear it to open the sealed door, then drop down the long pit past it.
Next is a platforming section with hanging platforms to jump across. Falling has no real penalty, so don’t worry about it. Keep going and jump into the next pit.
Clear another room of enemies to open the next sealed door. Two more platforming sections follow, then another long pit.
At the bottom is a sealed room full of Chest Maws and Wailers. Kill them and move on.
Final Supplies and Save Point
The next large room has supplies to take before you move on:
- Shotgun Ammo
- Revolver Ammo
- Nails
Use the save point and look at the postcard on the altar. When you are ready, go back the way you came and leave the room through the same entrance.
Boss Fight: Malatesta
On your way back, Malatesta appears. Get ready for the last fight and defeat him.
Ending
After the fight, you end up in a quiet room. Walk to the mirror on the right to start the game’s final, ambiguous cutscene. The credits roll once it ends, and the game is over.